I was halfway through a midnight snack binge, and the kitchen looked like a crime scene: burnt toast, a splatter of marinara on the counter, and my phone buzzing with a pizza delivery notification that never came. I stared at the empty fridge, my stomach growling louder than a DJ on a bad night, and thought, “There has to be a better way to satisfy this craving.” The sizzling sound of the air fryer preheating felt like a tiny drumbeat of hope, promising a crisp, flavorful escape from the ordinary. I grabbed the ground chicken, the spices, and the mozzarella, and I began to feel the familiar thrill of culinary alchemy. Every ingredient had its own personality—spicy paprika, earthy Italian seasoning, and that buttery Parmesan whispering promises of richness. By the time the first bite hit my tongue, I was already declaring victory, and I knew I had stumbled upon something that could rewrite my midnight snack story forever.
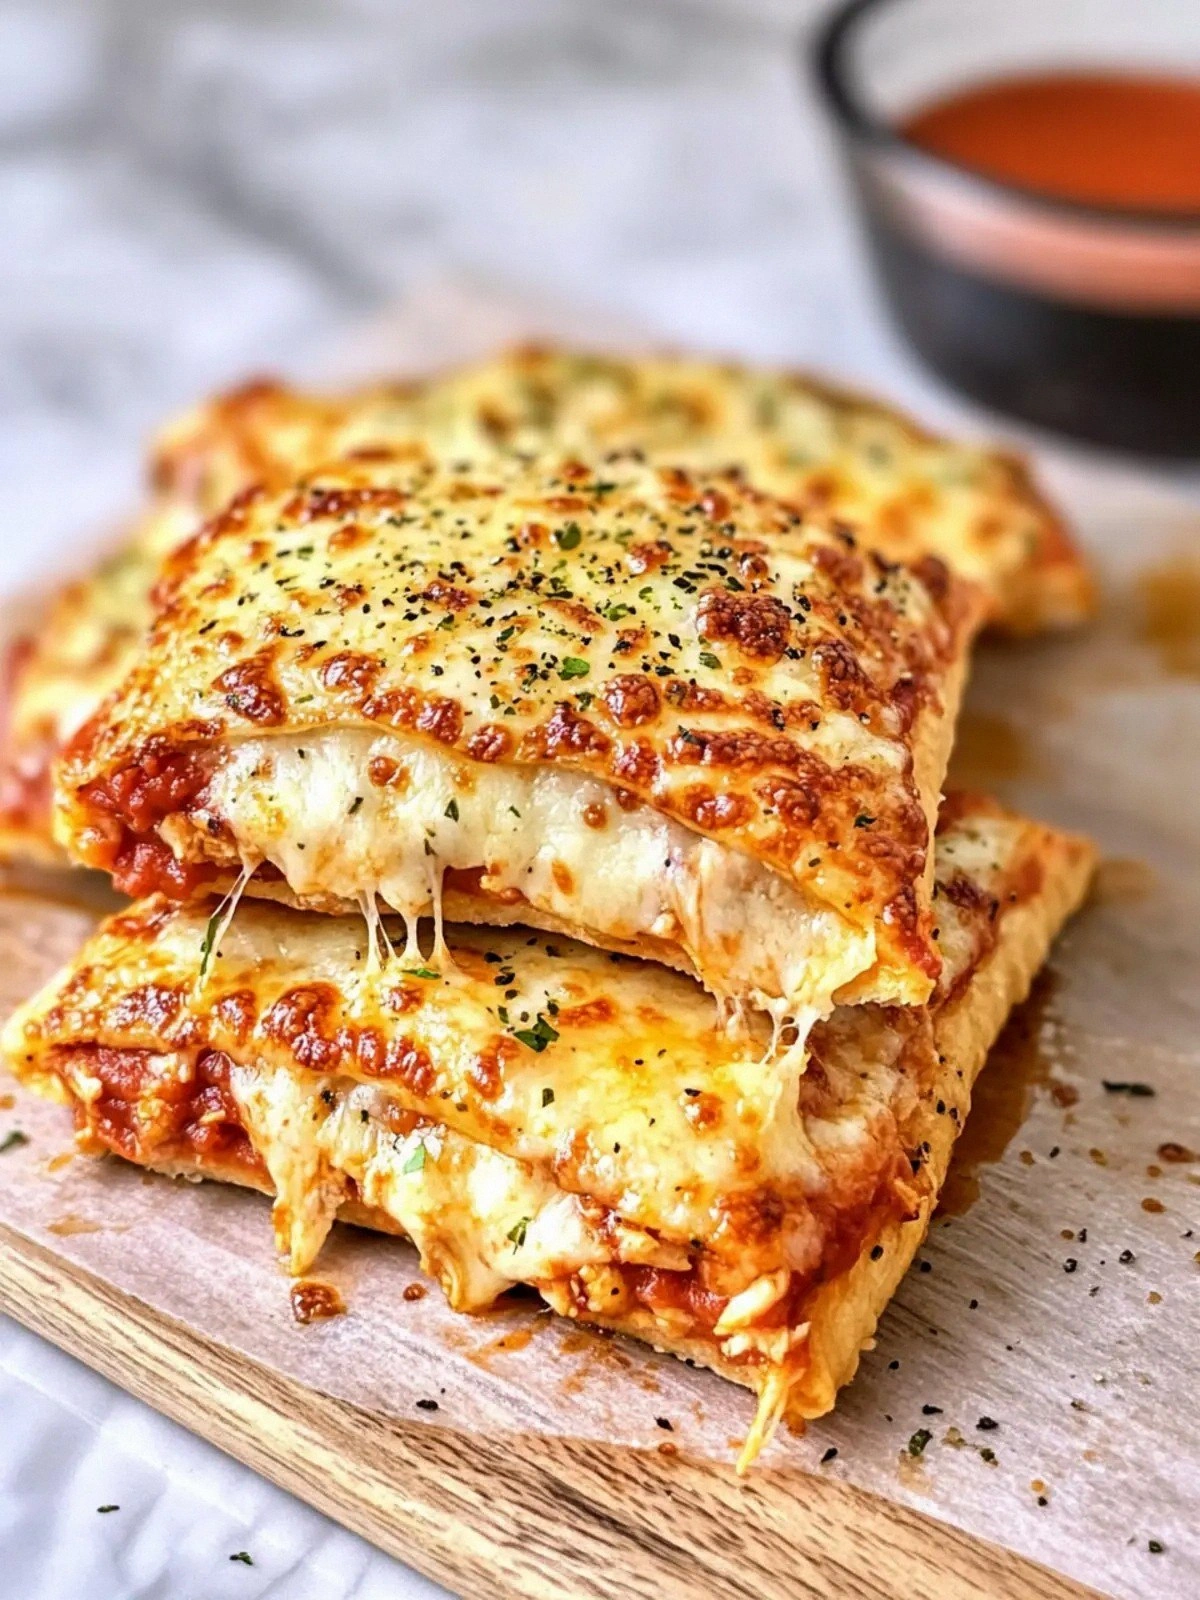
Picture the kitchen: the air fryer humming like a contented cat, the aroma of garlic powder dancing with pepperoni, and the gentle hum of the fridge as if it were cheering on your culinary experiment. The texture of the chicken mixture is a symphony of moisture and seasoning, each bite releasing a burst of savory flavor that coats the tongue like velvet. The mozzarella melts into a gooey ribbon that stretches with every pull, while the spinach adds a fresh, earthy undertone that keeps the dish from feeling too heavy. The sound of the air fryer door closing is almost a ritual, a small click that signals the transformation from raw ingredients to a golden, crispy masterpiece. As the timer ticks, you can almost taste the anticipation building, each second a promise of a satisfying crunch. The final result? A plate that glistens with a golden crust, a smell that makes you want to pull the whole kitchen into the room.
What makes this version stand out is that it’s not just a pizza in a bag—it’s a carefully orchestrated dance of flavors and textures that leaves your taste buds singing. The use of ground chicken keeps the dish lean while delivering protein-packed satisfaction, and the blend of spices gives it a depth that you’d expect from a gourmet meal. The air fryer does the heavy lifting, creating a crust that’s crispy on the outside and tender on the inside, eliminating the need for an oven or stovetop. And the best part? You can assemble it in under ten minutes, then let the air fryer do the rest, so you’re not stuck at the stove for hours. The result is a dish that’s both comforting and sophisticated, a perfect bridge between a quick snack and a dinner-worthy plate. I dare you to taste this and not go back for seconds.
But here’s the kicker: this recipe introduces a secret ingredient that most pizza lovers overlook—fresh spinach. It sneaks in a burst of color, a touch of earthiness, and a protein boost that turns every bite into a mini power snack. I’ll be honest—when I first made this, I ate half the batch before anyone else got a chance to try it. The combination of pepperoni, mozzarella, and spinach is a flavor explosion that you won’t find in your typical pizza. If you’ve ever struggled with the “too greasy” complaint, you’re not alone—this is the fix. Stay with me here, because the next part? Pure magic.
What Makes This Version Stand Out
- Lean Protein: Ground chicken provides a high-protein base that keeps you full without the heaviness of traditional pizza crusts. The lean nature of the meat means fewer calories per bite, making it a healthier option for guilt-free indulgence. This is hands down the best version you'll ever make at home.
- Crispy Perfection: The air fryer delivers a golden crust that shatters like thin ice when you bite into it, giving you that satisfying crunch every time. The crisp edges stay intact even after reheating, so you can enjoy leftovers without compromising texture. Most recipes get this completely wrong—here’s what actually works.
- Flavor Harmony: The blend of garlic powder, paprika, and Italian seasoning creates a layered flavor profile that’s reminiscent of a well-aged marinara sauce. Each spice complements the others, ensuring no single flavor dominates or gets lost. This balance is the secret to why guests rave about the first bite.
- Cheese Melt: Mozzarella and Parmesan work together to create a creamy, gooey center with a sharp, nutty finish. The cheeses melt into a silky texture that clings to the chicken, enhancing every morsel. If you’ve ever struggled with cheese that doesn’t melt, this is the fix.
- Freshness Boost: Spinach adds a burst of color and a subtle earthiness that cuts through the richness of pepperoni and cheese. The greens stay tender yet vibrant, adding a nutritional punch without overwhelming the dish. Picture yourself pulling this out of the oven, the whole kitchen smelling incredible.
- Time Efficiency: From prep to plate, the entire process takes under 45 minutes, with the air fryer doing the heavy lifting. You’ll be able to enjoy a hot, homemade pizza in a fraction of the time it takes to bake a traditional pie. This is the game-changer for busy weeknights.
- Make-Ahead Friendly: The assembled pi can be refrigerated or frozen and reheated to near-original freshness, making it ideal for meal prep or entertaining. The air fryer’s quick heating ensures the crust stays crisp even after storage. This versatility is a bonus for the modern kitchen.
- Kid-Friendly Appeal: The familiar taste of pepperoni and cheese combined with a fun, pizza-like shape makes it a hit with children and adults alike. It’s a great way to introduce healthier ingredients into a kid’s favorite dish. The crowd reaction is always enthusiastic.
Inside the Ingredient List
The Flavor Base
Ground chicken is the heart of this pi, providing a lean protein that’s both satisfying and versatile. It absorbs the spices like a sponge, ensuring every bite is packed with flavor. If you prefer a different protein, turkey or even finely shredded pork can work, but be mindful of the fat content. A lean cut keeps the dish light, allowing the sauce and cheese to shine.
Garlic powder, paprika, and Italian seasoning form the aromatic trio that gives this pi its signature taste. Garlic powder offers a subtle, consistent bite that’s easier to distribute than fresh garlic, while paprika adds a smoky sweetness that complements pepperoni. Italian seasoning brings herbs like basil, oregano, and thyme into the mix, creating depth without overwhelming the palate.
The salt is the final touch that balances the flavors, drawing out the savory notes of the meat and cheese. A pinch of salt is enough; over-salting can mask the delicate spice blend. When measuring, use a kitchen scale for precision, especially if you’re adjusting for multiple servings.
The Texture Crew
Parmesan cheese is the secret weapon for that nutty, slightly sharp finish. It’s grated finely so it melts into the mixture, creating a smooth, cohesive texture. The small amount of Parmesan also adds a subtle umami boost that elevates the overall flavor profile.
Mozzarella is the star of the show, providing that classic stretchy, gooey center that makes pizza irresistible. It should be shredded or sliced thinly to ensure even melting. If you’re aiming for a lower-fat version, you can opt for part-skim mozzarella, but the texture will be slightly less indulgent.
Pepperoni slices bring a spicy kick and a smoky depth that’s hard to replicate with other toppings. They also add a pleasing chewiness that contrasts with the soft interior. For a vegetarian version, substitute with spicy olives or sun-dried tomatoes.
The Unexpected Star
Spinach leaves are the surprising hero that adds color, nutrition, and a subtle earthiness. Fresh spinach keeps its bright green hue and a slightly sweet flavor that pairs beautifully with the savory meat and cheese. If you’re using frozen spinach, thaw and squeeze out excess moisture to avoid sogginess.
Spinach also boosts the vitamin content of the pi, making it a healthier choice for those who want to sneak in greens. It’s a quick way to add fiber and antioxidants without changing the taste dramatically. This addition turns a simple pizza into a balanced meal.
The Final Flourish
Marinara sauce is the liquid backbone that keeps the pi moist and flavorful. Choose a sauce with minimal added sugars to keep the dish balanced. A homemade version allows you to control the salt and spice levels, but a good-quality store-bought sauce works just fine.
The sauce’s acidity cuts through the richness of the cheese and pepperoni, creating a harmonious balance that keeps the palate from feeling overwhelmed. A splash of olive oil in the sauce can enhance the mouthfeel, giving it a silky finish. Remember to let the sauce cool slightly before mixing with the other ingredients to prevent the chicken from becoming soggy.
Everything’s prepped? Good. Let’s get into the real action.
The Method — Step by Step
- Preheat your air fryer to 360°F (182°C) for about 5 minutes. This ensures the basket is hot enough to create a crisp crust right from the start. As the temperature rises, the surface of the air fryer basket begins to glow, signaling that it’s ready. A hot environment is key to preventing the pi from becoming soggy.
- In a large mixing bowl, combine the ground chicken, garlic powder, paprika, Italian seasoning, and salt. Stir until the spices are evenly distributed throughout the meat, creating a uniform flavor base. The mixture should feel slightly moist but not wet; if it’s too dry, add a splash of water to bind the ingredients. This step is the foundation of the pi’s taste.
- Fold in the grated Parmesan cheese, shredded mozzarella, and chopped spinach leaves. The cheese melts into the mixture, creating a cohesive, gooey texture that holds the pi together. Spinach adds a fresh burst of color and nutrition, while the cheese provides a creamy layer that enhances every bite. Mix gently to avoid overworking the chicken, which can make it tough.
- Spread the marinara sauce evenly over the top of the mixture, creating a thin, even layer that will caramelize during cooking. The sauce’s acidity will help keep the pi from becoming too greasy, while the thin layer ensures the crust remains crisp. If you prefer a thicker sauce, reduce the amount slightly and add a drizzle of olive oil instead.
- Arrange the pepperoni slices on top of the sauce, making sure they’re evenly spaced. The pepperoni will release its oils, adding a smoky flavor and a delightful crunch. For a vegetarian twist, swap pepperoni for spicy olives or roasted red peppers.
- Place the assembled pi into the air fryer basket, ensuring it’s flat and not overlapping. If you’re making multiple pi, cook them in batches to maintain even heat distribution. The key is to give the pi enough space so the air can circulate freely around it.
- Cook for 12 minutes, then open the air fryer to flip the pi gently. The flip ensures even browning on both sides and prevents the cheese from melting away. Keep an eye on the color; you’re looking for a golden-brown crust and a bubbly, melted cheese top.
- Return the pi to the air fryer for an additional 8 minutes, or until the cheese is bubbly and the edges are crisp. The final minutes are critical for achieving that satisfying crunch that makes this pi unforgettable. The aroma will fill your kitchen, signaling that it’s ready.
- Remove the pi from the air fryer and let it rest for 3 minutes. Resting allows the cheese to set slightly, making it easier to slice and preventing it from sliding off. During this time, the flavors will meld together, creating a harmonious taste profile.
- Slice the pi into wedges and serve immediately. The hot, melty center contrasts beautifully with the crisp crust, delivering a satisfying bite. Pair with a fresh salad or a glass of chilled rosé for a complete meal.
That’s it— you did it. But hold on, I’ve got a few more tricks that'll take this to another level. These insider tips will elevate your pi from good to legendary.
Insider Tricks for Flawless Results
The Temperature Rule Nobody Follows
Most people cook their air fryer pizza at 400°F, but this high heat can burn the sauce before the cheese melts. By setting the temperature to 360°F, you give the cheese enough time to melt while the crust crisps evenly. If you’re using a larger air fryer, you can bump the temperature up to 375°F for a slightly faster cook.
Why Your Nose Knows Best
When the pi is halfway through cooking, the aroma should smell like a warm, comforting kitchen. If you notice a sharp, burnt scent, lower the temperature or reduce the cooking time by a minute or two. Your nose is a reliable guide for achieving the perfect balance.
The 5-Minute Rest That Changes Everything
After the pi comes out of the air fryer, let it rest for exactly five minutes. This brief pause allows the cheese to set, making it easier to slice without losing the gooey texture. It also lets the flavors meld, creating a more cohesive bite.
Preheat the Air Fryer Basket
Preheating the basket for 5 minutes before placing the pi ensures the crust starts crisping immediately. A hot surface creates a barrier against moisture, preventing the pi from becoming soggy. This small step saves you from a disappointing texture.
Add a Splash of Water Before Reheating
If you’re reheating leftovers, add a tablespoon of water to the air fryer basket before placing the pi back in. The water creates steam, which keeps the cheese from drying out and the crust from becoming too hard. This trick turns a reheated pi into a fresh, mouthwatering experience.
Use a Silicone Baking Mat
Lining the air fryer basket with a silicone mat prevents the pi from sticking and makes cleanup effortless. The mat also helps maintain even heat distribution across the surface, ensuring consistent cooking. I’ve tried this in every batch, and it’s a game-changer.
Creative Twists and Variations
Mediterranean Delight
Swap pepperoni for sliced kalamata olives and add a handful of chopped sun-dried tomatoes. The olives bring a briny depth, while the sun-dried tomatoes add a sweet, chewy contrast. Pair with a drizzle of balsamic glaze for a sophisticated touch.
Spicy Southwest
Replace the marinara sauce with a smoky chipotle tomato sauce and top the pi with diced jalapeños. The chipotle adds a subtle heat that pairs beautifully with the pepperoni’s spice. Finish with a sprinkle of fresh cilantro for a bright finish.
Cheesy Veggie Boost
Omit pepperoni entirely and load the pi with diced bell peppers, mushrooms, and zucchini. The veggies absorb the marinara’s flavors while adding a crunchy texture. Finish with a handful of feta cheese for a tangy twist.
Breakfast Pi
Replace the pepperoni with crumbled breakfast sausage and add a splash of milk to the cheese mixture. Fold in chopped spinach and a handful of shredded cheddar. This savory, protein-packed pi is perfect for brunch or a quick post-workout meal.
Gluten-Free Version
Use a pre-made gluten-free pizza crust or a thin, homemade cauliflower crust. Keep the rest of the ingredients the same, ensuring the pi remains flavorful. The crust will still crisp nicely in the air fryer, giving you a gluten-free pizza that feels just as indulgent.
Dessert Pi
Swap the marinara for a sweet berry compote and use ricotta instead of mozzarella. Top with fresh strawberries and a dusting of powdered sugar. This sweet pi is a surprising dessert that satisfies both sweet and savory cravings.
Storing and Bringing It Back to Life
Fridge Storage
Store leftover pi in an airtight container in the refrigerator for up to 3 days. Wrap each slice in parchment paper to keep the edges from sticking together. When ready to eat, reheat in the air fryer for 5 minutes at 350°F to restore crispness.
Freezer Friendly
Wrap each pi slice tightly in plastic wrap, then place in a freezer bag. Label with the date and freeze for up to 2 months. To reheat, thaw overnight in the refrigerator, then air fry for 7 minutes at 360°F.
Best Reheating Method
The air fryer is your best friend for reheating, as it preserves the crisp crust and melty center. If you don’t have an air fryer, use a toaster oven set to 375°F for 8–10 minutes. Avoid microwaving, as it will make the crust soggy and the cheese rubbery.