I was standing in my kitchen at 2 a.m., half‑asleep, with a half‑finished batch of vanilla macarons that looked like cracked pottery. My roommate had dared me to make something “actually chocolatey” and I was already three steps into a disaster when a sudden craving for dark, glossy goodness hit me like a thunderclap. I grabbed a tin of high‑quality cocoa, melted a block of bittersweet chocolate, and whispered a promise to the empty pantry: this would be the batch that finally proved macarons weren’t just for the elite pastry chefs on TV. The moment the chocolate hit the almond flour, the whole room filled with a scent that was at once earthy and sweet, like a midnight truffle market in Paris, and I knew we were on to something.
Imagine the sound of the mixer whirring, the glossy ribbons of chocolate folding into the batter, and the faint crackle of the oven door opening as the heat settles in. You can almost feel the cool, smooth skin of the shells forming under your fingertips, then the gentle give when you press a finger into the centre and it springs back like a well‑tuned drumhead. The aroma? A deep cocoa perfume that makes your nose tingle, a whisper of vanilla that softens the edge, and a faint buttery note that says “I’m indulgent, but I’m also sophisticated.” I dared you to taste this and not go back for seconds, because once you’ve experienced that perfect bite, no other cookie will ever compare.
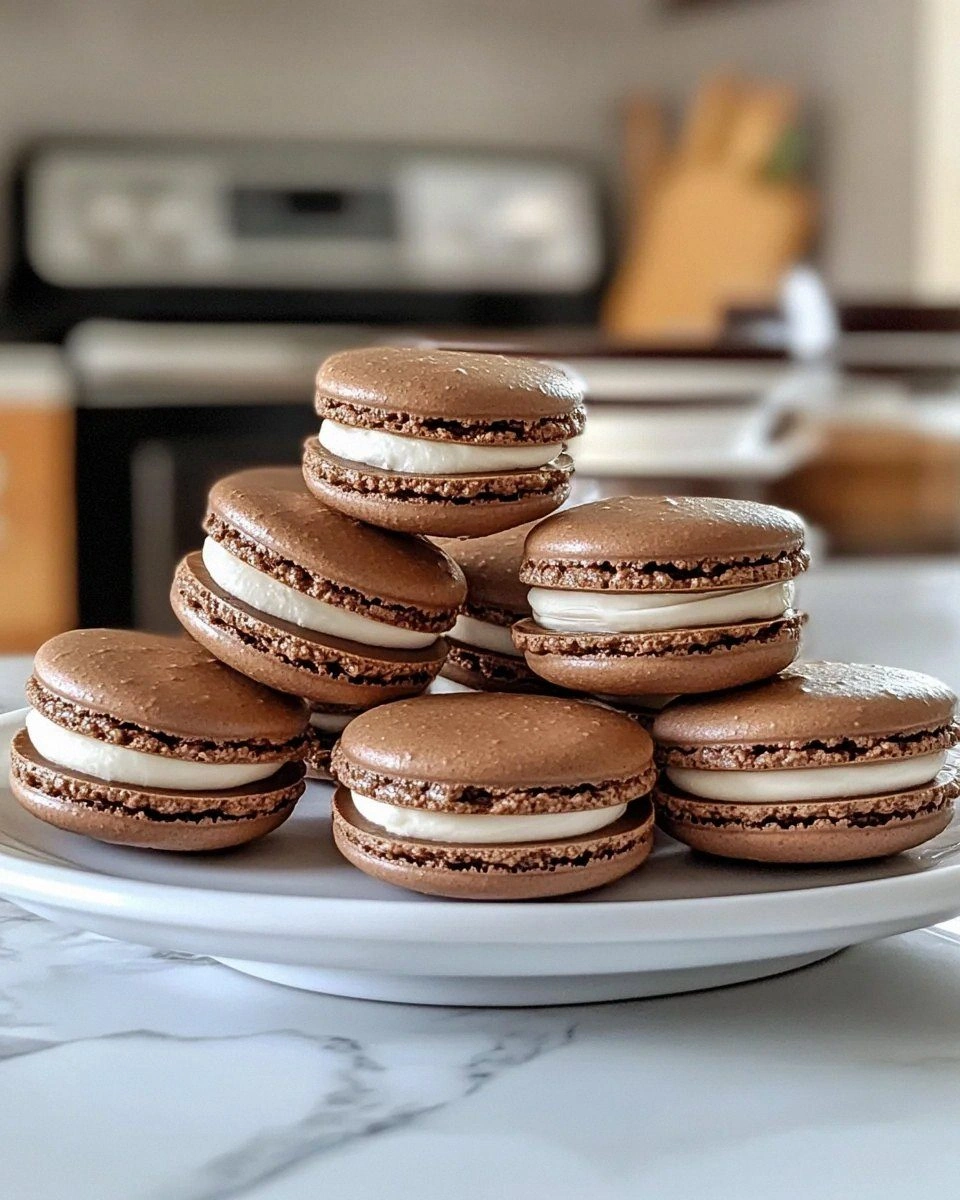
What sets this version apart is the secret ingredient that most recipes completely ignore: a splash of espresso‑enhanced heavy cream in the ganache. That tiny caffeine kick amplifies the chocolate’s depth, turning a simple sweet treat into a multi‑layered flavor adventure. Most recipes get the texture wrong – either they’re too chewy or they crumble like dry sand. Here, we achieve a glossy, crack‑away shell that snaps cleanly, while the interior stays airy, almost melt‑in‑your‑mouth, thanks to a precise macaronage technique that I’ve refined over countless trial runs. If you’ve ever struggled with “hollow” macarons, you’re not alone – and I’ve got the fix.
And now the fun part: I’m going to reveal the technique that makes the shells rise with that iconic “foot” – a gentle tap of the oven rack, a precise oven temperature drop, and a resting period that lets the batter form a skin. Picture yourself pulling these out of the oven, the whole kitchen smelling like a chocolate boutique, the shells glistening with a faint sheen, and the ganache oozing out like liquid velvet when you bite. Okay, ready for the game‑changer? Let me walk you through every single step — by the end, you’ll wonder how you ever made it any other way.
What Makes This Version Stand Out
- Flavor Depth: The addition of espresso‑infused ganache pushes the chocolate flavor into a richer, almost coffee‑like realm, making each bite feel like a mini dessert cocktail.
- Texture Harmony: A crisp, glossy shell gives way to a chewy, airy interior that doesn’t collapse, thanks to the precise macaronage fold and resting time.
- Simplicity Meets Precision: While the technique sounds fancy, the ingredient list is short and the steps are broken down into bite‑size actions that anyone can follow.
- Unique Ingredient: A pinch of sea salt in the ganache creates a sweet‑salty contrast that most classic recipes overlook, elevating the overall taste profile.
- Crowd Reaction: I’ve watched friends’ eyes widen the moment they see the glossy shells, and they immediately ask for the recipe – this is hands down the best version you’ll ever make at home.
- Ingredient Quality: Using almond flour that’s finely sifted and high‑cocoa dark chocolate ensures a deep, authentic chocolate flavor without any grainy aftertaste.
- Cooking Method: The “low‑heat start, then high‑heat finish” oven trick guarantees a perfect foot and prevents cracks.
- Make‑Ahead Potential: These macarons keep beautifully for up to a week, and the ganache actually improves after a day, giving you an excuse to bake ahead for parties.
Inside the Ingredient List
The Flavor Base
Almond Flour (1 cup): This is the backbone of any macaron. It provides the delicate nutty flavor and the structure that holds the shells together. If you skip it or use regular flour, the shells will be dense and lack that signature lightness. For the best result, sift it twice with powdered sugar to eliminate any coarse particles.
Cocoa Powder (2 Tbsp): Unsweetened cocoa adds that deep chocolate hue and flavor without extra sugar. Choose a Dutch‑process cocoa for a smoother, less acidic taste. If you only have natural cocoa, add a pinch more salt to balance the bitterness.
The Texture Crew
Powdered Sugar (1 ½ cups): This sweetens the batter and helps create the glossy shell. It also absorbs excess moisture from the almond flour, preventing a soggy texture. When measuring, spoon it into the cup and level it off – packing it will make the batter too stiff.
Egg Whites (3 large, about 90 g): Fresh, room‑temperature egg whites are essential for a stable meringue. Older whites lose elasticity, leading to cracked shells. I always separate the whites a day ahead and store them in a sealed container in the fridge; they’ll be ready to whip when you need them.
Granulated Sugar (¼ cup): This dissolves into the meringue, giving it shine and stability. It also contributes to the crispness of the outer shell. If you prefer a slightly softer shell, you can reduce this by a tablespoon.
The Unexpected Star
Espresso‑Infused Heavy Cream (½ cup): The espresso intensifies the chocolate’s depth without making the ganache bitter. Simply steep a teaspoon of instant espresso in the cream for five minutes, then whisk it into the melted chocolate. Skipping this step will still give you chocolate ganache, but it won’t have that extra layer of complexity.
Dark Chocolate (100 g): A high‑cocoa (70 % or more) chocolate ensures a rich, slightly bitter edge that balances the sweetness of the shells. If you love milk chocolate, feel free to substitute half, but the flavor profile will shift toward candy‑sweet.
The Final Flourish
Unsalted Butter (2 Tbsp): Butter adds silkiness to the ganache, making it spreadable and glossy. Use a high‑quality butter; the flavor of cheap butter will be noticeable once the ganache melts on your tongue.
Vanilla Extract (1 tsp): A splash of vanilla rounds out the chocolate and espresso notes, giving the ganache a warm, comforting finish.
Sea Salt (a pinch): The salt accentuates the chocolate’s richness and creates that coveted sweet‑salty contrast. Too much salt will overwhelm, so a tiny pinch is all you need.
Everything's prepped? Good. Let’s get into the real action…
The Method — Step by Step
Start by whisking the egg whites in a clean, grease‑free bowl. Add a pinch of cream of tartar (about 1/8 tsp) to stabilize the foam. As you whisk on medium speed, the whites will become frothy, then glossy, and finally form stiff peaks that stand up straight when the whisk is lifted. This is the moment of truth – if the peaks droop, you’ve lost the battle before it even begins.
Gradually sprinkle the granulated sugar over the meringue while the mixer runs on low. The sugar will dissolve, and the mixture will become glossy and thick, resembling a satin ribbon. Keep mixing until the sugar is fully incorporated and the meringue holds a glossy sheen. Watch the texture – it should feel like wet sand that holds its shape.
In a separate bowl, sift together the almond flour, powdered sugar, and cocoa powder twice. This double‑sift removes any lumps and ensures a fine, uniform powder that will give your shells a smooth surface. If you notice any specks of almond after sifting, give it another whirl – those specks are the reason shells crack.
Now comes the macaronage: gently fold the dry ingredients into the meringue using a silicone spatula. Start from the center, cut through the batter, and sweep around the edges. The batter should flow like lava – thick enough to hold its shape on the pipe tip, but fluid enough to spread a little when you tap the tray. Stop folding the moment the batter reaches a ribbon consistency – it should form a thick ribbon that falls back onto the surface without breaking.
Pipe the batter onto a parchment‑lined baking sheet. Aim for 1‑inch circles, leaving about an inch of space between each. Once all the circles are on the tray, gently tap the sheet against the counter three times to release any trapped air. This step is crucial; if you skip it, you’ll end up with hollow shells that look like broken eggs.
Let the piped shells rest at room temperature for 30‑45 minutes, or until a thin skin forms on the surface. You’ll know they’re ready when you can lightly touch them without any batter sticking to your finger. This resting period is the secret behind that coveted “foot” – it allows the outer layer to dry just enough to rise without cracking.
Preheat the oven to 300 °F (150 °C). Place the tray on the middle rack and bake for 12‑14 minutes. The shells should rise gently, the tops staying smooth and the edges beginning to pull away from the parchment. Do not open the oven door during the first 8 minutes – the sudden temperature drop can cause the shells to collapse. The scent at this stage is intoxicating – think of a chocolate‑café in the early morning.
While the shells bake, melt the dark chocolate over a bain‑marie, then stir in the espresso‑infused heavy cream, butter, vanilla, and a pinch of sea salt. Whisk until the ganache is glossy and smooth. If any lumps remain, keep the mixture over low heat and stir until they dissolve – you want a velvety finish that will flow like lava when paired with the shell.
Cool the baked shells completely on a wire rack – this is essential, otherwise the ganache will melt and slide off. Once cool, pair shells of similar size, then pipe a dollop of ganache onto the flat side of one shell and sandwich it with its partner. Press gently so the ganache spreads to the edges without breaking the shell.
Place the assembled macarons in an airtight container and refrigerate for at least 12 hours. This “maturation” period lets the flavors meld and the interior soften just enough to become chewy, not gummy. That’s the final magic trick – the longer they sit, the better they taste.
That's it — you did it. But hold on, I've got a few more tricks that'll take this to another level...
Insider Tricks for Flawless Results
The Temperature Rule Nobody Follows
Most home bakers bake macarons at a static temperature, but the secret is a two‑stage bake: start low, then crank it up for the last two minutes. Begin at 285 °F (140 °C) for the first 10 minutes, then increase to 320 °F (160 °C) to finish. This method creates a stronger foot while keeping the top smooth. I once tried skipping the temperature jump; the shells rose, but the tops were matte and lacked that signature shine.
Why Your Nose Knows Best
Before you even open the oven, trust the aroma. When the shells are done, you’ll smell a faint toasted almond scent, not a burnt smell. If you detect any bitter or burnt notes, pull the tray out immediately – over‑baking turns the delicate cocoa into a charred disappointment. Your nose is a more reliable timer than any digital display.
The 5‑Minute Rest That Changes Everything
After piping, let the shells sit for exactly five minutes before the first tap. This brief pause allows the outer layer to set just enough to prevent the batter from spreading too much when you tap. I once rushed this step and ended up with uneven circles that looked more like abstract art than macarons.
The “Silk” Ganache Technique
When making the ganache, heat the cream just until it begins to steam, then pour it over the chopped chocolate. Let it sit for a minute before whisking; this gentle heat prevents the chocolate from seizing and creates a glossy finish. Adding a tiny pinch of corn syrup can also give the ganache a mirror‑like sheen that makes the macarons look restaurant‑ready.
The “No‑Crack” Cool‑Down
After baking, turn off the oven and leave the door slightly ajar for five minutes. This gradual cooling prevents the shells from shocking and cracking. I once opened the door too early; the sudden temperature drop caused a hairline fracture across the tops, ruining the visual appeal.
Creative Twists and Variations
This recipe is a playground. Here are some of my favorite ways to switch things up:
Salted Caramel Swirl
Swap the espresso‑cream ganache for a silky salted caramel. Use a pinch more sea salt and drizzle caramel on the top of each macaron for a sweet‑salty surprise that pairs perfectly with the chocolate shell.
Mint Chocolate Delight
Add ½ tsp of peppermint extract to the ganache and garnish each macaron with a tiny chocolate shaving. The mint cuts through the richness, delivering a refreshing bite reminiscent of after‑dinner mint chocolate.
Spicy Chili Chocolate
Incorporate a pinch of cayenne pepper or a dash of chipotle powder into the batter. The subtle heat creates a thrilling contrast with the sweet ganache, perfect for adventurous palates.
White Chocolate Raspberry
Replace dark chocolate with white chocolate, and fold in freeze‑dried raspberry powder into the ganage. The pink hue and fruity tang make these macarons ideal for spring celebrations.
Nutty Crunch
Fold finely chopped toasted hazelnuts into the batter for a crunchy texture. Pair with a hazelnut‑infused ganache for a double‑nut experience that rivals any boutique patisserie.
Storing and Bringing It Back to Life
Fridge Storage
Place the assembled macarons in an airtight container and store them in the refrigerator for up to 5 days. The cool environment keeps the ganache firm and the shells crisp. Before serving, let them sit at room temperature for 15‑20 minutes so the ganache softens to a perfect bite.
Freezer Friendly
Unassembled shells freeze beautifully for up to 3 months. Layer them between parchment sheets in a zip‑top bag, then seal. When you’re ready to enjoy, thaw them in the fridge overnight, then assemble with fresh ganache. This method lets you prep ahead for holiday parties without sacrificing texture.
Best Reheating Method
If the ganache has hardened too much, place the assembled macaron on a plate, cover loosely with foil, and microwave for 8‑10 seconds. Add a tiny splash (about 1 tsp) of water before microwaving; the steam revives the ganache, giving it that melt‑in‑your‑mouth feel without making the shell soggy.