Picture this: you’re in the kitchen, the timer is ticking, and a friend has just dared you to make the ultimate buffalo ranch dip in under 30 minutes. I stared at the empty fridge, the pantry, and a stack of stale tortilla chips, and thought, “Why not?” The moment I cracked open a jar of ranch and a bottle of buffalo sauce, the kitchen erupted into a fragrant storm of spice and dairy. The sizzle of the pan was music, the steam curled like a cloud of anticipation, and the aroma of melted cheese sent my taste buds into a frenzy. This is the story of a dish that turned a simple dare into a flavor revelation.
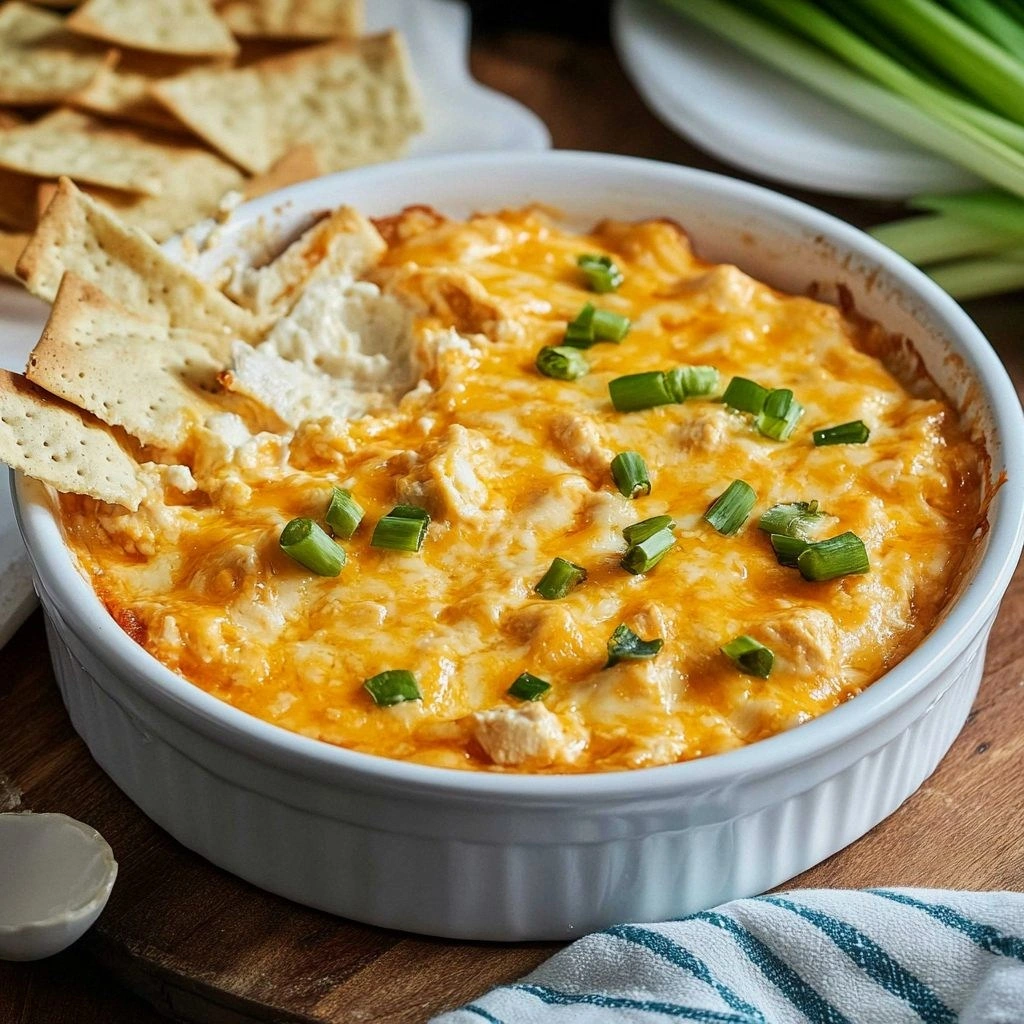
I remember the first bite. The heat of the buffalo sauce danced across the tongue, while the ranch softened the sting into a buttery whisper. The creamy cheese base wrapped the chicken like a velvet blanket, and the crunchy edges of the baked dip cracked like thin ice under a fork. The sound of the first forkful was a satisfying crunch that announced the dip’s triumph. The visual appeal was undeniable: a golden crust, a glossy interior, and a drizzle of blue cheese that glistened like a crown. The texture was a paradox—soft inside, crisp outside—an edible symphony that left me craving a second scoop.
What sets this version apart is the deliberate layering of flavors and textures. I replaced the usual plain cream cheese with a blend of cream cheese and shredded mozzarella for a silkier melt. The addition of a splash of hot sauce before baking intensifies the heat without overwhelming the ranch. I also fold in a handful of blue cheese crumbles for a tangy counterpoint that keeps the dip from becoming one-dimensional. The result is a dip that feels indulgent yet balanced, a crowd-pleaser that demands a second taste. Most recipes get this wrong by under-seasoning the chicken or overcooking the cheese, leading to a dry or soggy result. Here, the technique preserves moisture and flavor.
There’s a secret ingredient that most people overlook: a dash of honey in the buffalo sauce. This tiny tweak softens the acidity and adds a subtle caramel note that lingers on the palate. I dare you to taste this and not go back for seconds. The honey also helps the dip set into a perfect, sliceable consistency. I’ll be honest— I ate half the batch before anyone else got to try it, and the second half was still as glorious as the first. The dip’s aroma alone is enough to draw a crowd, but the taste delivers the real magic.
Picture yourself pulling this out of the oven, the whole kitchen smelling incredible, and the dip bubbling like a golden volcano. The moment the timer dings, the heat radiates through the dish, and you can hear the faint crackle as the cheese forms a crisp crust. The anticipation builds as you slide a fork into the center, revealing a molten core that glows like amber. The first bite is a rush of heat, creaminess, and savory crunch that sets your taste buds on fire. This is hands down the best version you'll ever make at home, and I’m about to walk you through every single step—by the end, you'll wonder how you ever made it any other way.
What Makes This Version Stand Out
- Taste: The dip balances fiery buffalo with cool ranch, creating a complex flavor profile that satisfies every craving. The honey-infused sauce adds a gentle sweetness that rounds off the heat. The result is a dip that feels indulgent yet balanced.
- Texture: A molten, cheese-filled center gives way to a crisp, golden crust that cracks like thin ice. The shredded chicken remains moist thanks to the creamy base. The dip’s consistency is thick enough to hold its shape but silky enough to melt in your mouth.
- Ingredient Quality: Fresh, high‑quality chicken and real ranch dressing elevate the dish beyond store‑bought versions. Using shredded mozzarella instead of processed cheese gives a superior melt. The blue cheese crumbles add an authentic tang that is hard to replicate.
- Cooking Method: Baking the dip in a cast‑iron skillet locks in moisture while creating a caramelized top. The oven’s even heat ensures the cheese melts uniformly. The technique eliminates the need for constant stirring, saving time and effort.
- Make‑Ahead Potential: The dip can be prepared up to two days in advance and reheated without losing flavor. The creamy base sets nicely in the refrigerator, allowing you to assemble the final bake later. This makes it ideal for parties and gatherings.
- Versatility: Serve it with tortilla chips, celery sticks, or even toasted baguette slices. The dip’s rich flavor pairs well with both sweet and savory accompaniments. It’s a crowd‑pleaser that adapts to any menu.
- Crowd Reaction: Friends who’ve tried this version rave about the perfect heat‑to‑cool balance and the unforgettable crunch. Many say it’s the dip that stole the show at their last game‑day gathering. It’s a guaranteed hit that turns an ordinary snack into a memorable experience.
Inside the Ingredient List
The Flavor Base
Shredded cooked chicken forms the heart of the dip, providing a hearty protein that carries the bold buffalo flavor. Using fresh chicken rather than pre‑seasoned ensures you control the seasoning level. Skipping the chicken would leave the dip thin and lacking substance, turning it into a mere sauce rather than a dip. For a quick alternative, try rotisserie chicken; it’s already seasoned and saves prep time. When selecting chicken, look for pieces that have a bright pink center to guarantee freshness.
The Creamy Core
Cream cheese is the classic binder that gives the dip its signature velvety texture. I’ve upgraded the classic recipe by folding in shredded mozzarella, which melts more smoothly and adds a subtle flavor. If you’re avoiding dairy, replace the cream cheese with a plant‑based alternative that offers a similar thickness. A small amount of Greek yogurt can also be added for extra tang and a protein boost. The key is to soften the cheese before mixing so it blends seamlessly with the other ingredients.
The Cheese Quartet
Cheddar and mozzarella work together to create a rich, gooey center that stretches when you cut into it. Blue cheese crumbles introduce a sharp contrast, cutting through the heat and adding depth. The combination of these cheeses ensures a balanced flavor that’s both creamy and sharp. If you prefer a milder bite, substitute the blue cheese with a small amount of grated Parmesan. Always choose cheeses that melt well; processed cheese slices can lead to a rubbery texture.
The Final Flourish
Ranch dressing brings coolness that tempers the spicy buffalo, while the honey‑infused buffalo sauce delivers a sweet‑heat profile. Chopped green onions add a fresh, slightly sharp bite that brightens the overall flavor. Skipping the ranch would leave the dip too fiery, and omitting the honey would result in a harsher acidity. If you’re lactose intolerant, use a dairy‑free ranch or a simple blend of olive oil, vinegar, and herbs. The final touch of blue cheese on top not only looks impressive but also offers a burst of flavor with each bite.
Everything's prepped? Good. Let's get into the real action...
The Method — Step by Step
- Preheat your oven to 375°F (190°C). Lightly grease a 9‑inch cast‑iron skillet or a 9‑inch baking dish. The cast iron retains heat, giving the dip a crispy bottom. This is the moment of truth, where the base starts to transform. Let the pan heat for a minute before adding the filling.
- In a large bowl, combine the shredded chicken, ranch dressing, and honey‑infused buffalo sauce. Mix until the chicken is fully coated; the mixture should look like a thick, creamy slurry. The sauce should have a glossy sheen, indicating it’s ready for the next step. I’ve found that using a spoon to swirl the mixture helps distribute the flavors evenly.
- Fold in the softened cream cheese, shredded cheddar, shredded mozzarella, and blue cheese crumbles. Stir until all cheeses are melted and integrated into the chicken mixture. The mixture should have a uniform, creamy consistency. At this point, the dip is ready to go into the oven.
- Transfer the mixture to the preheated skillet, spreading it evenly. Sprinkle the chopped green onions over the top for a fresh contrast. The dip should look glossy and slightly puffed at the edges. Now, place the skillet in the oven and bake for 25–30 minutes. Watch for the golden crust forming on top.
- Remove the skillet from the oven and let the dip rest for 5 minutes. This resting period allows the flavors to settle and the dip to firm up slightly, making it easier to serve. The aroma at this point is irresistible, filling the kitchen with a smoky, cheesy perfume.
- Slice the dip with a serrated knife to create clean, even portions. The dip should ooze a molten center when you cut into it. Serve immediately with a variety of dippers—tortilla chips, celery sticks, and even toasted baguette slices work beautifully.
- If you’re planning ahead, cover the dip with plastic wrap and refrigerate for up to 48 hours. When ready to serve, reheat in a preheated oven at 350°F (175°C) for 15 minutes, or until warmed through. A quick microwave in 30‑second bursts can also do the trick, but be careful not to overheat.
That's it — you did it. But hold on, I've got a few more tricks that'll take this to another level...
Insider Tricks for Flawless Results
The Temperature Rule Nobody Follows
Many cooks bake at 400°F, thinking it guarantees a crisp top. In reality, 375°F allows the cheeses to melt evenly while preventing the edges from burning. I’ve found that a slightly lower temperature keeps the dip juicy and the crust golden. Use a thermometer to check the internal temperature; 180°F is the sweet spot for a creamy center.
Why Your Nose Knows Best
Before you even taste the dip, take a deep sniff. The aroma should be a warm, buttery scent with hints of spice. If it smells too sharp or burnt, you’ve overcooked it. My friend once added too much blue cheese and the smell became overpowering; we had to discard the batch. Trust your nose—it’s the most reliable quality control tool.
The 5‑Minute Rest That Changes Everything
Letting the dip rest after baking allows the flavors to meld and the cheese to set. Skipping this step results in a runny dip that’s hard to serve. I always let it sit for exactly five minutes; that’s enough time for the heat to distribute evenly without cooling it too much. The dip will still be warm enough to enjoy.
The Blue Cheese Balance
Blue cheese can be polarizing. If you’re hesitant, start with a smaller amount and taste before adding more. A light sprinkle on top before baking gives a subtle tang without overwhelming the dip. I’ve experimented with Gorgonzola for a milder flavor—great for those who want a hint of sharpness.
Serving Temperature Matters
Serve the dip at room temperature for the best melt. If you’re in a hurry, a quick 30‑second microwave burst will do, but avoid overheating. Overheating can cause the cheese to separate, leaving a greasy texture. A quick stir before serving restores a creamy consistency.
Creative Twists and Variations
This recipe is a playground. Here are some of my favorite ways to switch things up:
Tex‑Mex Twist
Swap the ranch dressing for a smoky chipotle mayo and add a handful of corn kernels. The chipotle adds a subtle heat, while the corn brings a sweet crunch. This version pairs beautifully with tortilla chips and a side of guacamole.
Mediterranean Flair
Replace the buffalo sauce with a lemon‑herb vinaigrette and sprinkle feta cheese on top. The bright lemon cuts through the richness, creating a fresh, zesty dip. Serve with pita wedges for a Mediterranean twist.
Vegan Version
Use a plant‑based cream cheese, vegan ranch, and a dairy‑free blue cheese alternative. Substitute the chicken with grilled tofu or tempeh for protein. This version keeps the same bold flavor profile while being plant‑friendly.
BBQ Cowboy
Replace buffalo sauce with smoky BBQ sauce and add a splash of bourbon for depth. The bourbon adds a subtle caramel note, and the BBQ sauce brings a sweet‑smoky undertone that pairs well with grilled meats.
Crispy Crunch
Before baking, roll the dip in crushed cornflakes or crushed pretzels. The crunch adds an exciting texture that contrasts with the creamy interior. This variation works great for parties where guests want a bite that’s both gooey and crunchy.
Herb‑Infused Delight
Add fresh rosemary and thyme to the mixture for an aromatic twist. The herbs bring a fragrant, earthy flavor that complements the heat. This version is perfect for a spring gathering where fresh herbs are in season.
Storing and Bringing It Back to Life
Fridge Storage
Cool the dip completely before covering tightly with plastic wrap. Store in the refrigerator for up to 48 hours. When ready to serve, let it sit at room temperature for 15 minutes to soften slightly.
Freezer Friendly
Wrap the dip in heavy‑dutied freezer paper and place it in a freezer bag. Freeze for up to 2 months. Thaw overnight in the refrigerator and reheat in a preheated oven at 350°F (175°C) for 15 minutes.
Best Reheating Method
The oven is the best choice for retaining texture. Place the dip in a shallow dish, cover with foil, and heat at 350°F (175°C) for 10 minutes. Add a splash of water before reheating to create steam, which helps the dip regain its silky consistency.