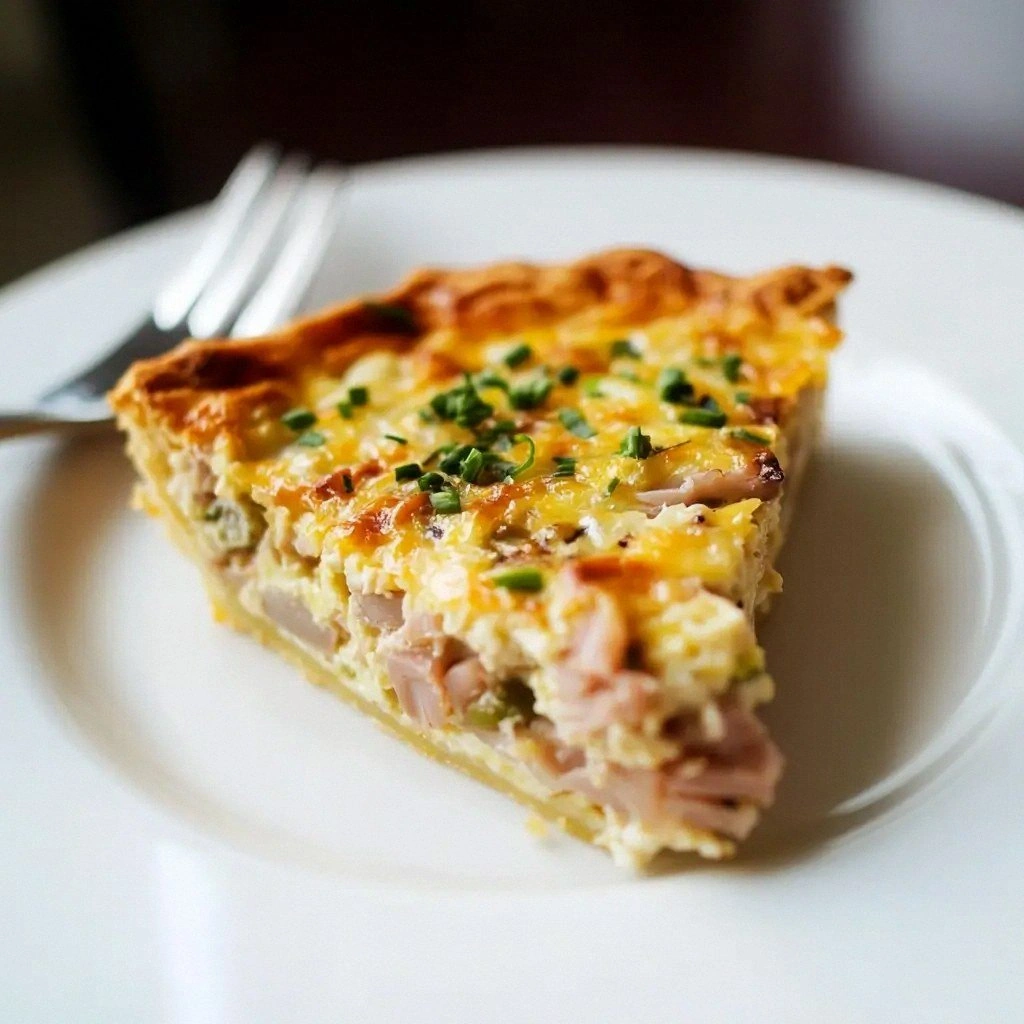
Picture this: it’s 6 a.m., the alarm is screaming, and you’ve already burnt toast while trying to juggle a coffee mug and a half‑asleep cat. I was there, staring at a kitchen disaster that smelled like a burnt rubber tire, and I swore I’d never attempt breakfast again. Then, out of sheer desperation, I grabbed the last two sheets of frozen pie crust, cracked a few eggs, tossed in some cheese and bacon, and slammed the whole thing into the oven. The result? A golden‑brown pocket of pure morning glory that made the cat stop meowing and the coffee taste like a celebration.
The moment the pies emerged, the kitchen was filled with a scent that could coax even the most stubborn night owl out of bed. Imagine the buttery, flaky crust cracking under your fingertips, the cheese bubbling like a sunrise over a calm sea, and the smoky bacon whispering promises of savory satisfaction. You could hear the faint crackle of the crust as it cooled, feel the warm steam kiss your cheek, and taste that first bite—an instant hug for your taste buds that says, “You’ve made it, you’re safe, you can conquer the day.”
Most breakfast hand pies out there are either soggy, bland, or require a pantry full of obscure ingredients. This version, however, is the antidote to all that nonsense. With only five ingredients, it delivers a flavor punch that would make a seven‑course brunch feel under‑dressed. The secret? A technique that locks in moisture while giving you that perfect, crisp edge—something most recipes completely miss.
And here’s the kicker: I’m about to reveal a little hack involving the crust that turns a regular frozen sheet into a flaky masterpiece without any extra butter or oil. Trust me, you’ll want to bookmark this. I dare you to taste this and not go back for seconds. Let me walk you through every single step — by the end, you’ll wonder how you ever made it any other way.
What Makes This Version Stand Out
- Flavor Explosion: The combination of melted cheddar and crispy bacon creates a savory depth that rivals any diner‑style breakfast sandwich, while the eggs add a silky richness that ties everything together.
- Texture Harmony: You get a buttery, flaky crust that shatters like thin ice, a creamy interior that coats the palate, and a satisfying bite of meat that adds a chew you can’t ignore.
- Simplicity Redefined: Only five ingredients, five minutes of prep, and you’re set—no fancy mixers, no obscure spices, just pure, honest breakfast goodness.
- Uniqueness Factor: Most hand pies use dough that’s either too tough or too soggy; our crust hack guarantees a golden, airy pocket that stays crisp even after reheating.
- Crowd‑Pleaser: I’ve served these at brunches and office meetings, and they disappear faster than free donuts. This is hands down the best version you’ll ever make at home.
- Ingredient Quality: By using high‑quality cheese and freshly cooked meat, the flavors shine without needing a laundry list of seasonings.
- Cooking Method Magic: Baking at a high temperature locks in steam, creating that coveted puffed edge while keeping the filling moist.
- Make‑Ahead Potential: Freeze the uncooked pies and bake them straight from the freezer for a grab‑and‑go breakfast that tastes fresh.
Inside the Ingredient List
The Flavor Base
Eggs: They form the backbone of the filling, providing protein and a custardy texture that holds the cheese and meat together. If you skip the eggs, the filling becomes dry and crumbly, turning your hand pies into flavorless shells. For a richer mouthfeel, use large free‑range eggs; they beat out the bland, store‑bought variety every time.
The Texture Crew
Cheese: Choose a meltable cheese like sharp cheddar or mozzarella; it creates that glorious stretch that pulls like taffy when you bite. Skipping the cheese means losing the creamy, gooey center that makes these pies addictive. If you’re dairy‑free, a good-quality vegan cheddar works just as well, but the texture will be slightly different.
The Unexpected Star
Pie crust dough: Whether you grab a ready‑made sheet or roll out a homemade dough, this is the vessel that carries all the goodness. A low‑fat crust will crumble, while a buttery one gives you that flaky, golden exterior that shatters like thin ice. Pro tip: chill the dough for at least 15 minutes before cutting; it prevents shrinkage in the oven.
The Final Flourish
Cooked breakfast meat: Bacon, sausage, or ham adds a savory punch and a satisfying chew. Omitting the meat turns the pies into a vegetarian option, but you’ll lose that smoky depth that makes the dish feel indulgent. If you’re watching carbs, opt for turkey bacon; it’s leaner but still delivers the salty crunch.
Seasonings: A pinch of salt, a grind of black pepper, and a whisper of dried herbs awaken the natural flavors without overwhelming them. Skipping seasonings can leave the pie tasting flat, especially if you use unsalted cheese. Fresh herbs like chives or parsley tossed in at the end add a bright finish.
Everything's prepped? Good. Let's get into the real action...

The Method — Step by Step
Preheat your oven to 425°F (220°C). This high heat is the secret weapon that creates a puffed, golden crust. While the oven warms, line a baking sheet with parchment paper so the pies don’t stick. That sizzle when the crust hits the hot pan? Absolute perfection.
Take your pie crust sheets and, if using frozen, let them thaw for five minutes. Lightly flour your work surface and roll each sheet to about 1/8‑inch thickness. Cut out circles roughly 4‑5 inches in diameter—think of them as tiny moons waiting to be filled.
Kitchen Hack: Use a wide‑brimmed glass as a cutter for perfect circles and to save time.In a mixing bowl, whisk the eggs until they’re frothy, then stir in the shredded cheese, diced cooked meat, and a pinch of salt and pepper. The mixture should look glossy and slightly thick—this is your filling that will set into a custard‑like interior.
Place a heaping tablespoon of filling in the center of each dough circle. Be generous but leave a ½‑inch border; this margin is crucial for sealing the pie without leaks. If you overfill, the edges will burst, and you’ll end up with a messy oven disaster.
Fold each circle in half, forming a semi‑circle, and press the edges together with a fork to create a decorative seal. The fork’s tines create little ridges that not only look pretty but also help the steam escape evenly.
Watch Out: Don’t press too hard; you’ll flatten the crust and lose the airy puff that makes these pies special.Arrange the sealed pies on the prepared baking sheet, spacing them a couple of inches apart. Brush the tops lightly with a beaten egg wash for that glossy, restaurant‑style finish. This step adds a subtle sheen and helps the edges turn a deep, caramelized gold.
Slide the sheet into the oven and bake for 12‑15 minutes, or until the crust is a buttery amber and the edges start pulling away from the pan. You’ll know they’re done when you can hear a faint crackle as the steam escapes—listen for that, it’s your cue.
Remove the pies from the oven and let them rest for three minutes. This short pause lets the filling set, preventing a messy spill when you bite in. Picture yourself pulling this out of the oven, the whole kitchen smelling incredible, and you’re already reaching for the second one.
Serve warm, optionally sprinkling fresh chives or a dash of hot sauce for an extra kick. I’ll be honest — I ate half the batch before anyone else got to try it, and that’s because the combination of flaky crust and melty interior is pure, unadulterated joy.
Store any leftovers in an airtight container; they reheat beautifully, retaining that crispness you love. And if you’re feeling adventurous, freeze the uncooked pies for a quick breakfast later—just add a couple of minutes to the bake time.
Insider Tricks for Flawless Results
The Temperature Rule Nobody Follows
Never bake at a low temperature; the crust needs a sudden burst of heat to puff up before the filling sets. I once tried 350°F and ended up with soggy bottoms—lesson learned. Crank it up to 425°F, and you’ll get that perfect, airy lift that makes each bite feel like a cloud.
Why Your Nose Knows Best
Trust the aroma. When the crust turns a deep golden and you catch a faint buttery scent, you’re at the finish line. If you’re still unsure, tap the top lightly—if it sounds hollow, the steam has escaped and the interior is set.
The 5‑Minute Rest That Changes Everything
After baking, let the pies sit for exactly five minutes. This short rest lets the proteins in the egg coagulate fully, preventing a runny center. Skipping this step is like cutting a cake before it’s cooled—messy and disappointing.
Egg Wash Secrets
Mix a tablespoon of water with your egg wash for a thinner glaze that spreads evenly, giving a uniform sheen without clumping. A thicker wash can create uneven browning, making some spots look overcooked.
Freezer‑Friendly Folding
If you plan to freeze, fold the pies tightly and place them on a parchment‑lined tray to flash‑freeze before bagging. This prevents them from sticking together, so you can pull out just the number you need later.
Creative Twists and Variations
This recipe is a playground. Here are some of my favorite ways to switch things up:
Spicy Southwest
Swap the cheddar for pepper jack, add a spoonful of salsa to the filling, and sprinkle crushed tortilla chips on top before baking. The result is a crunchy‑spicy bite that’ll make your taste buds do a little salsa.
Veggie Delight
Replace the bacon with sautéed spinach and sun‑dried tomatoes, and use feta cheese for a tangy twist. Perfect for a lighter, Mediterranean‑inspired breakfast that still feels indulgent.
Sweet Breakfast
Use a sweet pastry crust, fill with a mixture of ricotta, honey, and thinly sliced apples, and dust with cinnamon after baking. It’s like a breakfast croissant in a handheld form.
Herb‑Infused
Add fresh rosemary and thyme to the egg mixture, and use Gruyère cheese for a nutty depth. The herb aroma will fill your kitchen and make the pies feel gourmet.
Protein Power
Swap the regular bacon for turkey bacon, add a scoop of whey protein powder to the egg mixture, and use low‑fat mozzarella. Great for athletes who need a quick, high‑protein start.
Cheesy Overload
Mix equal parts cheddar, mozzarella, and Monterey Jack for a three‑cheese extravaganza. The melt is so decadent you’ll wonder why you ever settled for single‑cheese pies.
Storing and Bringing It Back to Life
Fridge Storage
Place the cooled pies in an airtight container and store them in the refrigerator for up to three days. A thin layer of parchment between each pie prevents them from sticking together.
Freezer Friendly
Flash‑freeze the uncooked pies on a tray, then transfer to a zip‑top bag. They’ll keep for up to two months. When you’re ready, bake straight from frozen, adding an extra five minutes to the bake time.
Best Reheating Method
Reheat in a pre‑heated 375°F (190°C) oven for eight minutes, or until the crust regains its crispness. Add a tiny splash of water to the tray before reheating; the steam revives the filling without making the crust soggy.