Love this? Pin it for later! 📌
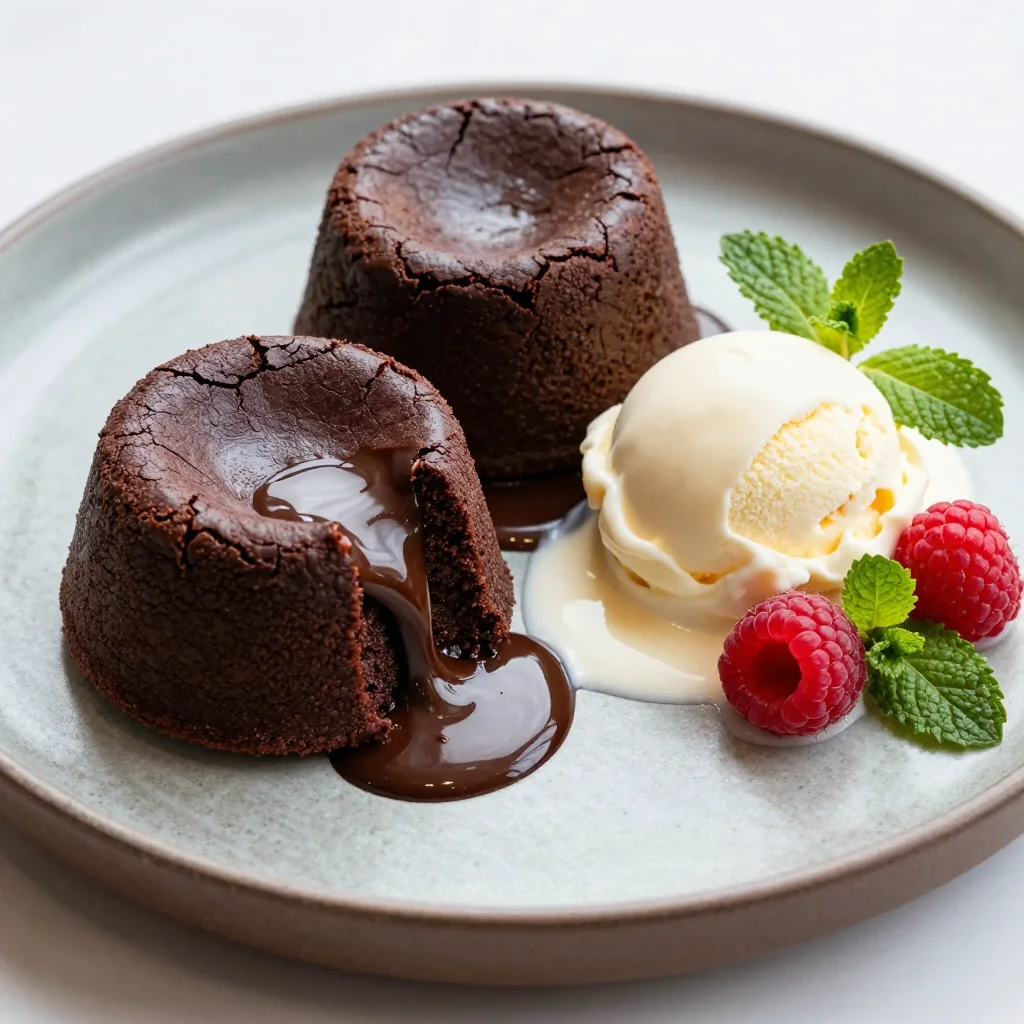
There’s something almost cinematic about the moment you slide your spoon into a warm chocolate lava cake and watch that glossy river of molten chocolate spill onto the plate. My husband and I discovered this together on a rainy Tuesday in March, the kind of evening when take-out menus feel too predictable and reservations feel like work. We wanted dessert that said “I love you” without the $50 wine markup. Twenty minutes later we were standing at the oven in our socks, two ramekins trembling between our mitts, and the first bite—bittersweet, buttery, impossibly velvety—turned an ordinary weeknight into date-night magic. We’ve since served these at engagement parties, New Year’s Eve countdowns, and that impromptu backyard picnic when the power went out and the candlelight made everything taste better. The recipe has followed us through three apartments, two cats, and one tiny human who now requests “the volcano cakes” every Friday. The best part? No one guesses the secret: they’re faster to make than a batch of boxed brownies.
Why This Recipe Works
- 20-Minute Miracle: From pantry to plate faster than streaming an episode—perfect for surprise date nights.
- Bakery-Level Fudge: A precise 70 % / 30 % ratio of bittersweet to milk chocolate guarantees that iconic molten center.
- One-Bowl Batter: No mixer, no fuss—just a whisk and a microwave-safe bowl keep dishes (and stress) minimal.
- Fail-Safe Timing: A 2-minute window between under-baked and over-baked keeps even first-timers confident.
- Make-Ahead Magic: Mix, fill ramekins, and refrigerate up to 24 hours—bake straight from cold for instant romance.
- Endless Twists: Espresso, orange zest, or a whisper of chipotle turn the same base into a new love letter every time.
Ingredients You'll Need
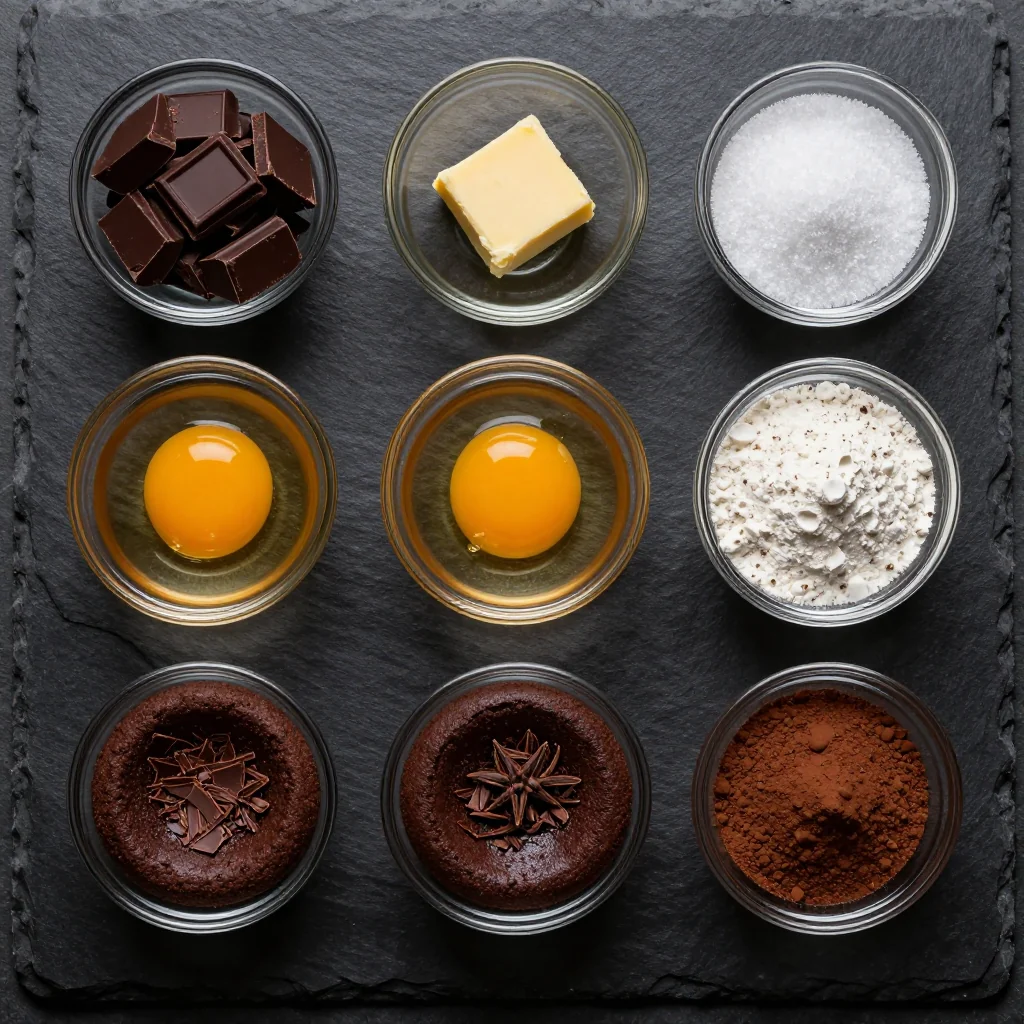
Great chocolate lava cake lives or dies by the chocolate you choose. I reach for a 70 % bittersweet bar—something sold in the baking aisle but good enough to nibble on the drive home. The higher cocoa percentage gives that sophisticated edge, while a modest scoop of milk chocolate chips (or a chopped bar) rounds out sweetness so the cakes don’t read as bitter. If you only have semi-sweet on hand, drop the granulated sugar by a tablespoon and you’ll still be in silky territory.
Unsalted butter keeps the flavor clean; salted butter muddies the chocolate. Cut it into small cubes so it melts evenly with the chocolate—no seized chocolate, no grainy puddles. For the eggs, large is the standard in recipe testing; extra-large will make the cakes rise a bit higher but risk a spongy rim. Cold eggs straight from the fridge are fine; just whisk them thoroughly so the yolks and whites emulsify before they hit the warm chocolate.
A whisper of espresso powder is my covert weapon. It doesn’t scream coffee; it just deepens cocoa notes the way vanilla heightens sweetness. If you don’t have it, swap ½ tsp of very strong cooled espresso or simply skip—your cakes will still be swoon-worthy. All-purpose flour is measured by the spoon-and-level method: fluff the flour, spoon it into the cup, sweep the excess. Too much flour equals cakey edges and a stubborn center that refuses to flow.
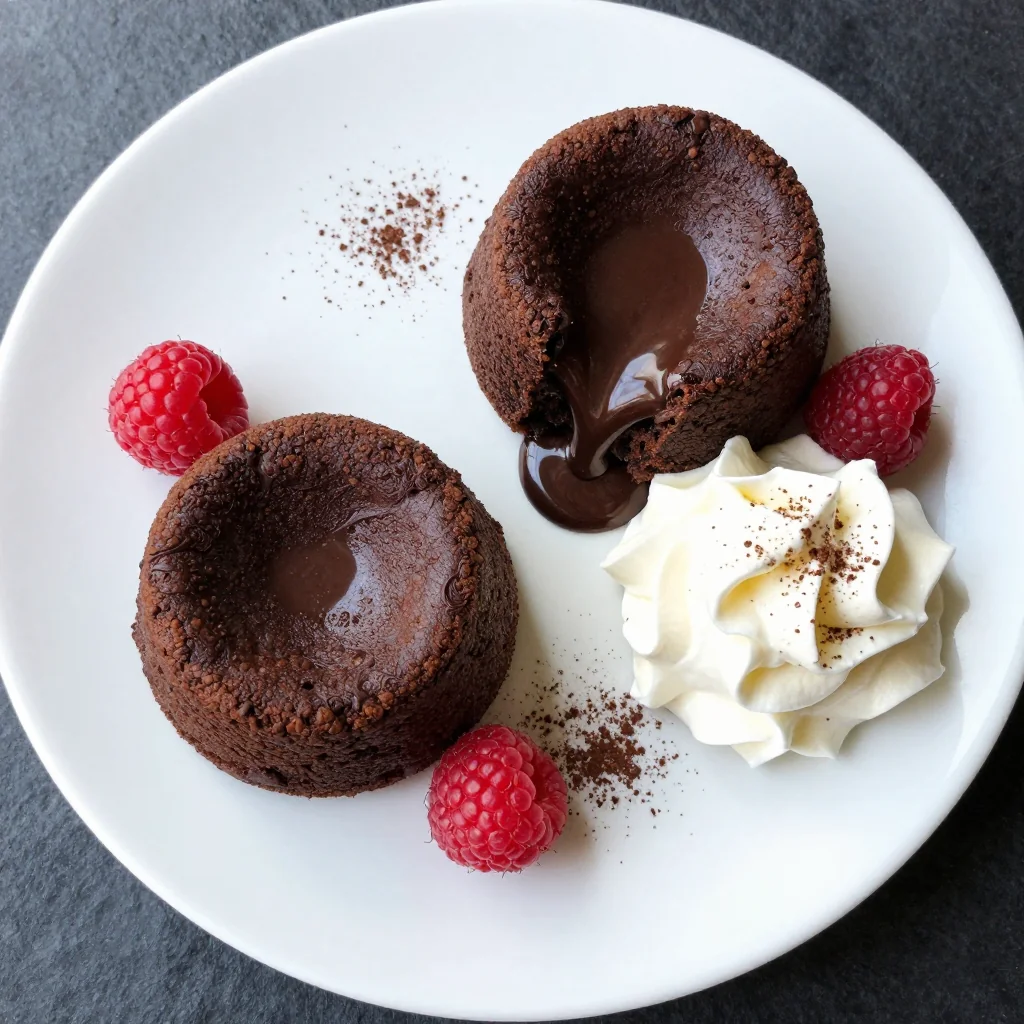
Ramekins should hold 4 oz (½ cup) of liquid. Ceramic heats gently and gives that classic bistro look, but grease them obsessively: butter every ridge, dust with cocoa powder (not flour—it shows streaks), and tap out the excess. No ramekins? A standard muffin tin works; reduce bake time to 9 minutes and pop them out like jumbo muffins. Finally, a dusting of powdered sugar and a handful of fresh raspberries dress the plate for pennies, turning humble ingredients into restaurant glamour.
How to Make Rich Chocolate Lava Cakes Ready in 20 Minutes for Date Night
Prep Ramekins Like a Pro
Preheat oven to 425 °F (218 °C). Using softened (not melted) butter, swipe every inner surface of four 4-oz ramekins. Dust with 1 tsp cocoa powder per ramekin, turning to coat; invert and tap sharply to remove excess. This double-layer insurance guarantees a clean release and those Insta-worthy edges.
Melt Chocolate & Butter
In a medium microwave-safe bowl combine 3 oz (85 g) chopped bittersweet chocolate and 2 oz (55 g) milk chocolate with 6 Tbsp (85 g) unsalted butter, diced. Microwave on 50 % power in 30-second bursts, stirring after each, until just melted with a few streaks remaining. Let residual heat finish the job; overheated chocolate seizes into gritty paste.
Whisk in Eggs & Sugar
Let the chocolate mixture cool 2 minutes—lukewarm, not hot. Whisk in 2 large eggs one at a time until fully incorporated. Add 2 Tbsp granulated sugar and ⅛ tsp espresso powder; whisk 30 seconds until glossy. The sugar dissolves in the residual warmth, so you won’t taste grains.
Fold in Flour & Salt
Sprinkle 2 Tbsp all-purpose flour and a pinch of fine sea salt over the surface. Switch to a silicone spatula and fold—don’t stir—until no dry streaks remain. Over-mixing activates gluten and robs you of that brownie-like rim.
Divide & Smooth
Divide batter evenly among ramekins, filling each about ¾ full (roughly ¼ cup). Tap each ramekin gently on a towel-lined counter to pop air bubbles; smooth tops with the back of a spoon for even baking.
Bake to Liquid Gold
Slide ramekins onto the center rack. Bake 10–12 minutes: look for set edges, matte tops, and a tiny jiggle in the center when you gently shake the ramekin. If the center puffs up like a muffin, you’ve crossed into cake territory—still delicious, but no lava flow.
Release & Plate
Immediately (they keep cooking from residual heat) run a thin paring knife around the inside edge. Invert each ramekin onto a dessert plate wearing an oven mitt; hold plate and ramekin together and give one confident shake. Lift slowly—if any resistance, run the knife again. Serve hot with ice cream melting into the molten core.
Expert Tips
Check Oven Calibration
An inexpensive oven thermometer prevents under- or over-baking. True 425 °F yields that textbook lava center.
Cold Start Option
Assemble up to 24 hrs ahead, cover each ramekin with plastic, refrigerate. Add 2 extra minutes to bake time straight from cold.
Brown-Butter Boost
Brown the butter first, cool 5 min, then proceed. Nutty aroma amplifies chocolate complexity without extra ingredients.
Floral Finish
Stir ¼ tsp rose water or orange-blossom water into the batter for a romantic perfume that blooms under heat.
Spice It Up
Add ⅛ tsp chipotle powder for smoky heat that hits after the chocolate fades—an unforgettable surprise.
Photo Timing
Have your camera ready; lava waits for no one. Shoot within 90 seconds for the money-shot ooze.
Variations to Try
- Peanut-Butter Core: Freeze 4 tsp peanut-butter mixed with 1 tsp powdered sugar into tiny disks. Press one into each ramekin before topping with remaining batter.
- White-Chocolate Raspberry: Replace bittersweet with white chocolate; swirl 1 tsp raspberry jam into each center before baking.
- Dairy-Free Delight: Swap butter for refined coconut oil and use 60 % dairy-free dark chocolate. Texture remains lush.
- Mocha Molten: Dissolve 1 tsp instant espresso in ½ tsp hot water; whisk into batter for a latte-like lava.
- Mint-Chip: Add ¼ tsp peppermint extract and fold in 2 Tbsp mini chocolate chips for cool contrast.
Storage Tips
Unbaked batter keeps refrigerated up to 24 hours (see Pro Tip card). Once baked, lava cakes are at their prime within 5 minutes; the center continues to set as it stands. If you must reheat, microwave a plated cake on 50 % power for 15 seconds—no more—or you’ll lose the molten core. Baked cakes do not freeze well; the structure collapses upon thawing. For parties, I prefer to mix the batter, portion into ramekins, cover with plastic wrap, and bake to order; guests receive theater and warmth every time.
Frequently Asked Questions
Rich Chocolate Lava Cakes Ready in 20 Minutes for Date Night
Ingredients
Instructions
- Prep Ramekins: Preheat oven to 425 °F. Butter and dust 4 ramekins with cocoa; tap out excess.
- Melt Chocolate: Combine chocolates and butter in a bowl; microwave at 50 % power in 30-second bursts until smooth.
- Whisk Eggs: Cool chocolate 2 min, then whisk in eggs one at a time, sugar, and espresso powder until glossy.
- Add Dry: Fold in flour and salt until just combined.
- Fill & Bake: Divide batter among ramekins; bake 10–12 min until edges are set but centers jiggle.
- Release: Immediately invert onto plates; dust with powdered sugar and serve hot.
Recipe Notes
Bake times vary by ramekin material and oven quirks; start checking at 9 min. Serve within 1 minute for maximum lava flow.