I remember the night my kitchen turned into a chaotic arena of sizzling pans and the scent of burnt sugar. I had promised my friends a dessert that would make their taste buds dance, but my attempt at a classic baked pear recipe ended up with a soggy, overcooked mess that could only be described as an edible disappointment. That disaster was the spark that lit a fire in my culinary curiosity, and I set out to create a version that would never again fail, no matter how many times I’d tried before. I dared myself to craft something that would have everyone begging for seconds, even the skeptics who had once told me pears were too delicate for baking.
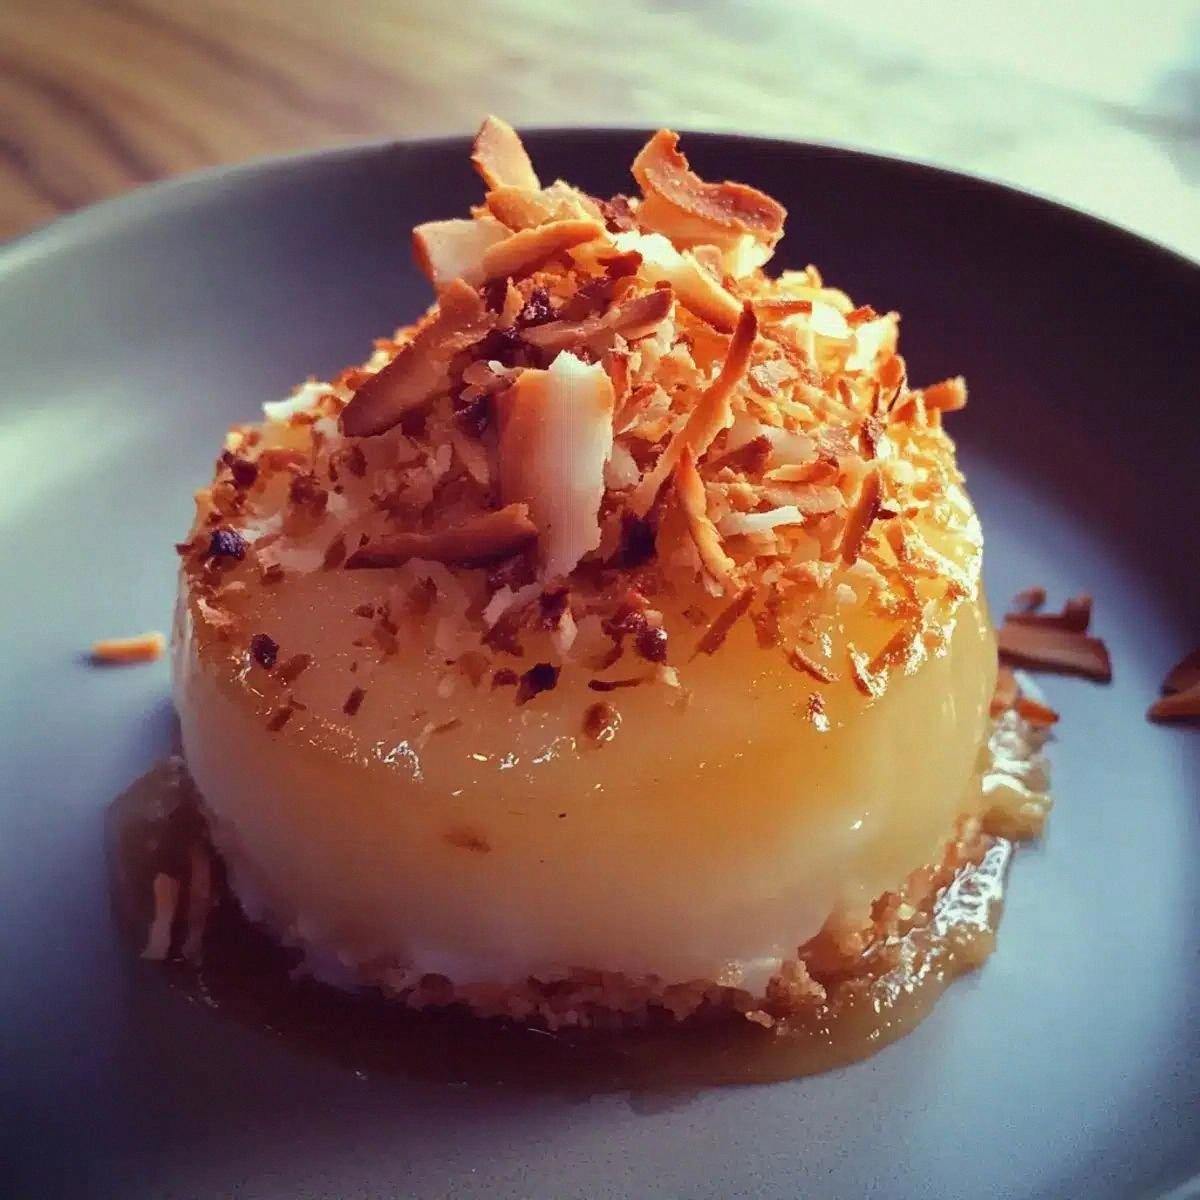
Picture this: the kitchen lights dim, a single pan on the stove, and the gentle hum of anticipation in the background. You slice a pear, and the fresh, crisp aroma instantly lifts the room, a scent that feels like a promise of sweetness and comfort. The pear’s skin glistens like a polished gem, the flesh inside a translucent, almost translucent jade that hints at the juicy treasure within. The sound of the butter melting in the pan is a soft, buttery sigh that signals the beginning of something extraordinary. And when the first golden crust forms, it crackles softly, a subtle symphony of caramelized sugar and toasted coconut that draws you in. This is not just a dessert; it’s an edible invitation to indulge in a moment of pure bliss.
What sets this recipe apart from every other pear bake you’ve ever tried? First, it’s the balance of textures: the pears stay tender yet firm, the coconut coating offers a chewy, nutty crunch, and the butter creates a silky, glossy glaze that ties everything together. Second, the flavor profile is a harmonious blend of citrus, honey, and warm spices that elevate the natural sweetness of the pears without overwhelming them. Third, the simplicity of the method means you can pull this out of the oven in under 45 minutes, making it a perfect last-minute treat for dinner parties or a comforting Sunday dessert. Fourth, the use of unsweetened shredded coconut keeps the dish light and tropical, while the ground almonds add a subtle nutty depth that is both satisfying and healthful. Finally, the recipe is designed to be crowd-pleasing; even the most discerning palate will be left asking for more.
Now, I’m about to walk you through every single step of this culinary adventure. By the end, you’ll wonder how you ever made baked pears any other way. I dare you to taste this and not go back for seconds—though, honestly, I’ll be the first to admit I ate half the batch before anyone else even had a chance to try it. Let’s dive in.
What Makes This Version Stand Out
- Taste: The combination of fresh lemon juice and honey creates a bright, slightly tart glaze that perfectly balances the pears’ natural sweetness. The subtle hint of cinnamon or nutmeg adds depth without overpowering.
- Texture: The shredded coconut forms a delicate, airy coating that crisps to a golden finish while maintaining a chewy interior, creating a delightful contrast with the juicy pears.
- Simplicity: With just eight ingredients and a straightforward method, this recipe is easy enough for beginners yet sophisticated enough to impress.
- Uniqueness: The use of ground almonds as a binder adds a nutty undertone and helps the coconut coating adhere beautifully to the pears.
- Crowd Reaction: Friends and family rave about how the pears stay perfectly tender, and the coconut topping adds a fun, beachy vibe that’s perfect for gatherings.
- Ingredient Quality: Choosing ripe pears with a slight blush and high-quality, unsweetened coconut ensures the best flavor and texture.
- Cooking Method: Baking at a moderate temperature allows the pears to steam gently while the coating caramelizes, resulting in a glossy, caramelized finish.
- Make‑Ahead Potential: The dish can be assembled a day ahead; just keep it refrigerated, and it will still taste fresh and delicious when reheated.
Alright, let's break down exactly what goes into this masterpiece…
Inside the Ingredient List
The Flavor Base
The 4 ripe pears are the heart of the dish. When you cut into them, the natural juices mingle with the lemon juice, creating a bright, tangy foundation that cuts through the richness of the butter and honey. If you skip the pears, you lose the juicy, sweet center that makes this dessert so irresistible. When selecting pears, look for ones that have a slight blush and a firm but yielding texture; they’ll hold their shape during baking.
The lemon juice is a game‑changer. It not only brightens the overall flavor but also prevents the pears from oxidizing and turning brown. A tablespoon is enough to coat the surface of the pears, giving them a subtle citrus zing that pairs beautifully with honey. If you’re out of lemon, a splash of lime or even a dash of orange juice can work, but the flavor profile will shift slightly.
The Sweetener
Honey or maple syrup is the sweetener of choice because it adds depth and a natural caramel note that complements the pears. Two tablespoons are just enough to coat the pears and the coconut mixture without making the dish overly sweet. If you prefer a vegan version, maple syrup is a perfect substitute. Be careful not to use a high‑fructose corn syrup, as it can make the coating sticky and less desirable.
The Texture Crew
Unsweetened shredded coconut provides that signature tropical crunch. A cup is enough to coat the pears, and the coconut’s natural oils help create a glossy finish. If you can’t find shredded coconut, finely chopped dried coconut is a suitable alternative, though it may not caramelize as nicely. The coconut should be toasted slightly before mixing to bring out its nutty aroma.
Ground almonds act as a binder, helping the coconut stick to the pears while adding a subtle nutty flavor. Half a cup of almonds is perfect for this recipe. If you’re allergic to nuts, try ground sunflower seeds or pumpkin seeds for a similar effect, but the taste will change slightly. The almonds also add protein and healthy fats, giving the dessert a more substantial bite.
Butter is essential for creating that silky, glossy glaze that gives the pears a caramelized finish. Four tablespoons of butter melt into the honey, lemon, and coconut, forming a rich sauce that coats each pear slice. If you’re looking for a dairy‑free version, try coconut oil or a dairy‑free butter substitute; the flavor will be slightly different but still delicious.
The Final Flourish
Chopped pecans or walnuts add a crunchy, buttery contrast to the chewy coconut. A quarter cup is enough to sprinkle over the top before baking, giving each bite a delightful crunch. If you prefer a lighter version, you can omit the nuts entirely or use a handful of toasted slivered almonds instead.
To taste cinnamon or nutmeg brings warmth and depth to the dish. A pinch of either spice is enough to elevate the overall flavor profile. If you love a stronger spice kick, feel free to add a half teaspoon of cinnamon. The spices should be added to the coconut mixture to ensure they’re evenly distributed.
Everything's prepped? Good. Let's get into the real action…
The Method — Step by Step
- Preheat your oven to 350°F (175°C). This moderate temperature allows the pears to steam gently while the coconut coating caramelizes beautifully. If you’re in a rush, you can preheat while you prep the ingredients.
- Wash the pears, core them, and slice them into ¼‑inch thick rounds. Use a sharp knife to ensure even slices; uneven thickness will lead to uneven baking. Arrange the slices on a parchment‑lined baking sheet.
- In a small bowl, whisk together the lemon juice and honey (or maple syrup). The mixture should be smooth and slightly viscous, ready to coat the pears. If you’re using maple syrup, let it sit for a minute to thicken slightly.
- Brush each pear slice with the lemon‑honey mixture, ensuring every side gets a generous coating. The glaze should cling to the pears, creating a glossy sheen that promises sweetness.
- Melt the butter in a small saucepan over low heat until it’s fully liquid and slightly golden. Once melted, pour it over the glazed pears, letting the butter mingle with the honey and lemon for a rich, silky sauce.
- In a separate bowl, combine the shredded coconut, ground almonds, chopped nuts, and a pinch of cinnamon or nutmeg. Stir until the mixture is well blended and the nuts are evenly distributed.
- Sprinkle the coconut mixture over the pears, pressing gently to help it adhere. The coconut should form a thin, even layer on top of each slice, creating a crunchy, caramelized crust as it bakes.
- Place the baking sheet in the preheated oven and bake for 25–30 minutes. The pears should be tender yet firm, and the coconut coating should be golden brown and slightly crisp. Watch closely to ensure the coating doesn’t burn.
- Remove the pears from the oven and let them cool for a few minutes. The glaze will thicken slightly, giving the dish a glossy finish that looks as good as it tastes. Serve warm or at room temperature.
That's it — you did it. But hold on, I've got a few more tricks that'll take this to another level…
Insider Tricks for Flawless Results
The Temperature Rule Nobody Follows
Many bakers think a higher temperature is always better for caramelization, but that’s a myth. Baking at 350°F allows the pears to steam gently inside, keeping them juicy, while the coconut coating caramelizes slowly for a perfect golden crust. If you push the heat too high, the coating can burn before the pears are fully cooked.
Why Your Nose Knows Best
The aroma of toasted coconut is a subtle indicator that the coating is reaching its peak. When you smell that nutty, sweet scent, it’s time to pull the pears out of the oven. Trusting your nose can prevent over‑baking and keep the texture just right.
The 5-Minute Rest That Changes Everything
Letting the baked pears rest for five minutes after removal from the oven allows the glaze to set and the flavors to meld. This short rest also ensures that the coconut coating doesn’t crumble when you plate the dish. It’s a simple step that dramatically improves the final presentation.
Use a Parchment‑Lined Sheet
A parchment paper sheet not only prevents sticking but also creates a clean surface that makes cleanup a breeze. It also helps the pears bake evenly by providing a consistent heat distribution. If you’re baking in a cast‑iron skillet, line it with parchment for the same benefit.
Keep the Pears Whole
Slicing pears too thin can lead to over‑cooking and a mushy texture. Aim for ¼‑inch thick slices to maintain structure while allowing the glaze to penetrate. The thickness also creates a satisfying bite that’s both juicy and firm.
Don’t Skip the Nuts
A friend once tried this recipe without nuts, thinking it would be lighter. The result was a less textured dessert that didn’t have the same satisfying crunch. Adding pecans or walnuts gives a delightful contrast and adds a buttery flavor that balances the sweetness.
Creative Twists and Variations
This recipe is a playground. Here are some of my favorite ways to switch things up:
Maple‑Glazed Pears
Swap honey for pure maple syrup and add a splash of bourbon for an adult twist. The maple adds a deep, caramel flavor that pairs wonderfully with the pears, while the bourbon gives a subtle warmth.
Spiced Coconut Pears
Increase the cinnamon to a full teaspoon and add a pinch of ground ginger. This variation gives the dessert a warm, comforting spice profile that’s perfect for cooler evenings.
Almond‑Infused Pears
Use almond butter instead of butter and add a tablespoon of almond extract. The almond butter creates a richer, creamier glaze, and the extract deepens the nutty flavor.
Chocolate‑Covered Pears
After baking, drizzle melted dark chocolate over the pears and let it set. The chocolate adds a luxurious, bittersweet contrast that elevates the dish to dessert‑parlor level.
Berry‑Pear Fusion
Add fresh blueberries or raspberries to the baking sheet before the pears. The berries burst during baking, releasing juices that mingle with the pears for a fruity, vibrant flavor.
Vegan Coconut Pears
Replace butter with coconut oil and honey with agave nectar. This version is dairy‑free and still delivers that glossy, caramelized finish, making it suitable for vegan diners.
Storing and Bringing It Back to Life
Fridge Storage
Store the baked pears in an airtight container in the refrigerator for up to 3 days. The coating may soften slightly, but the flavor remains intact. To maintain crispness, place a paper towel in the container to absorb excess moisture.
Freezer Friendly
Wrap each pear slice individually in plastic wrap and place them in a freezer bag. They can be frozen for up to 2 weeks. When you’re ready to serve, thaw them at room temperature for 20 minutes before reheating.
Best Reheating Method
Reheat frozen pears in a preheated oven at 300°F (150°C) for 10–12 minutes or until warmed through. Add a tiny splash of water before reheating to create steam, which keeps the pears moist and prevents them from drying out.