Love this? Pin it for later! 📌
Why This Recipe Works
- Make-Ahead Magic: Prep everything the night before and simply bake in the morning for a stress-free breakfast
- Nutritional Powerhouse: Each serving provides 8g of fiber and 12g of protein to keep you satisfied until lunch
- Customizable Base: Easily adapt with seasonal fruits, nuts, or spices to match your preferences
- Freezer-Friendly: Bake once, enjoy all week – portions freeze beautifully for up to 3 months
- Texture Perfection: Achieves the ideal balance between creamy interior and slightly crispy edges
- Family-Approved: Even picky eaters love this naturally sweetened version that tastes like dessert for breakfast
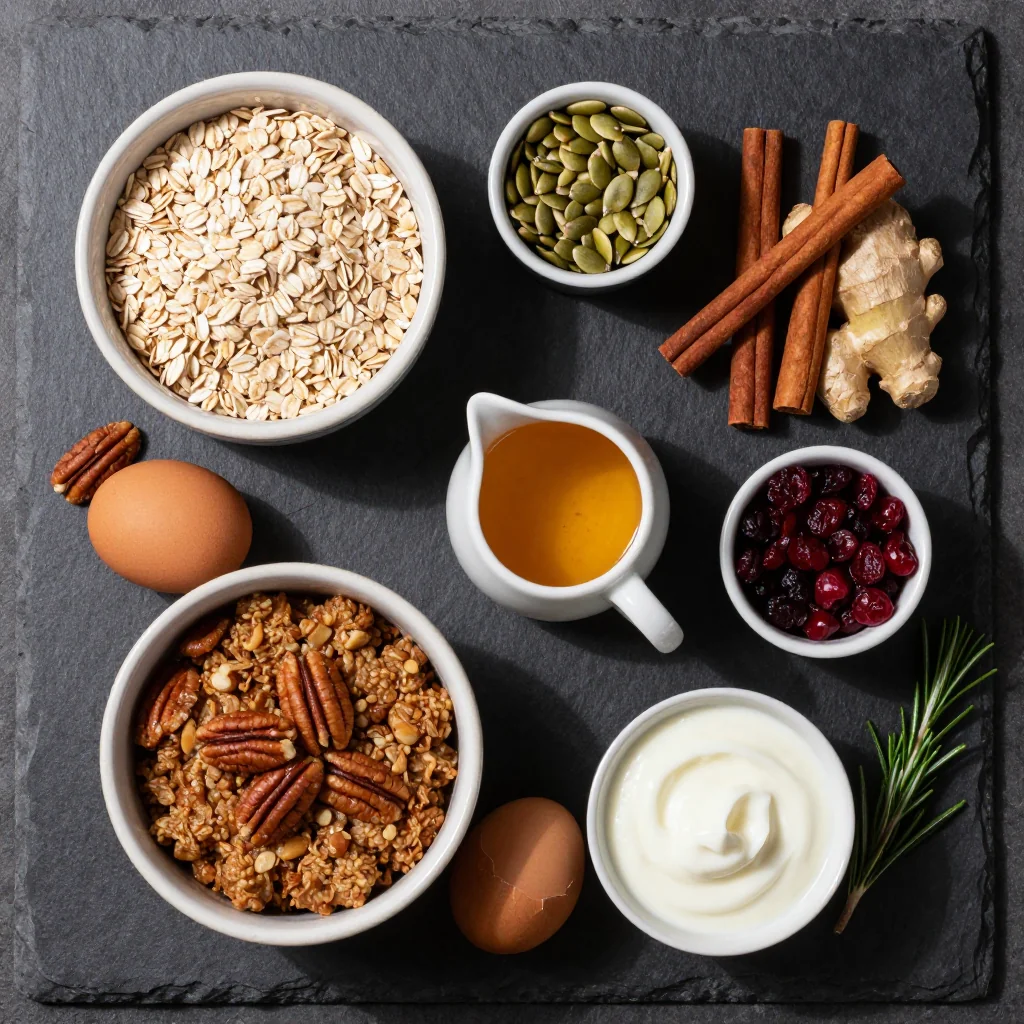
Ingredients You'll Need
How to Make Healthy Baked Oatmeal for Winter Mornings
Prep Your Pan and Preheat
Start by preheating your oven to 375°F (190°C). While the oven heats, generously grease a 9-inch square baking dish with coconut oil or butter. For easy cleanup and guaranteed release, line the dish with parchment paper, leaving an overhang on two sides to create handles for easy removal later. This step is crucial for achieving those coveted crispy edges while preventing sticking.
Mix the Dry Ingredients
In a large mixing bowl, whisk together 2 cups old-fashioned rolled oats, 2 teaspoons cinnamon, ½ teaspoon nutmeg, ½ teaspoon ginger, 1 teaspoon baking powder, and ¼ teaspoon salt. Taking time to evenly distribute the leavening agent and spices ensures every bite has consistent flavor and proper rise. The baking powder might seem unusual in oatmeal, but it's essential for creating that perfect texture that sets this apart from regular stovetop oats.
Combine the Wet Ingredients
In a separate medium bowl, whisk together 2 cups unsweetened almond milk, 2 large eggs, ½ cup maple syrup, 2 tablespoons melted coconut oil, 1 teaspoon vanilla extract, and 2 tablespoons chia seeds until completely combined. The chia seeds need about 5 minutes to begin absorbing liquid, so let this mixture rest while you prepare the apples. This resting period prevents the chia from creating clumps in the final dish.
Prepare the Apples
Dice 2 medium apples (about 2 cups diced) into ¼-inch pieces. I like to keep the skin on for extra fiber and nutrition, but you can peel them if preferred. Toss the diced apples with 1 tablespoon lemon juice to prevent browning and enhance their natural flavor. If your apples are particularly tart, you can sprinkle them with 1 teaspoon of the maple syrup to balance their flavor.
Combine Wet and Dry
Pour the wet ingredient mixture into the bowl with the dry ingredients. Using a rubber spatula, fold everything together just until combined. Avoid overmixing, which can make the final texture dense and tough. The batter will seem quite liquidy at this stage – this is perfect! The oats will absorb much of this liquid during baking, creating that ideal creamy-yet-set consistency.
Fold in Apples and Nuts
Gently fold in the diced apples and ½ cup chopped walnuts or pecans, reserving a few pieces of each for topping if desired. Distributing these add-ins evenly throughout ensures every serving has the perfect balance of fruit, nuts, and oat base. The apples will release some moisture during baking, contributing to the pudding-like texture.
Transfer to Baking Dish
Pour the mixture into your prepared baking dish, spreading it into an even layer. Give the dish a gentle tap on the counter to release any air bubbles and ensure the mixture settles evenly. If you reserved any apples or nuts for topping, scatter them across the surface now. For an extra-decadent touch, you can sprinkle an additional tablespoon of maple syrup across the top – this will create a beautiful caramelized crust.
Bake to Perfection
Bake for 35-40 minutes, until the edges are golden brown and the center is set but still slightly jiggly. The oatmeal will continue to firm up as it cools, so avoid overbaking. A toothpick inserted near the center should come out mostly clean with just a few moist crumbs. If the top is browning too quickly, tent loosely with foil during the last 10 minutes of baking.
Cool and Serve
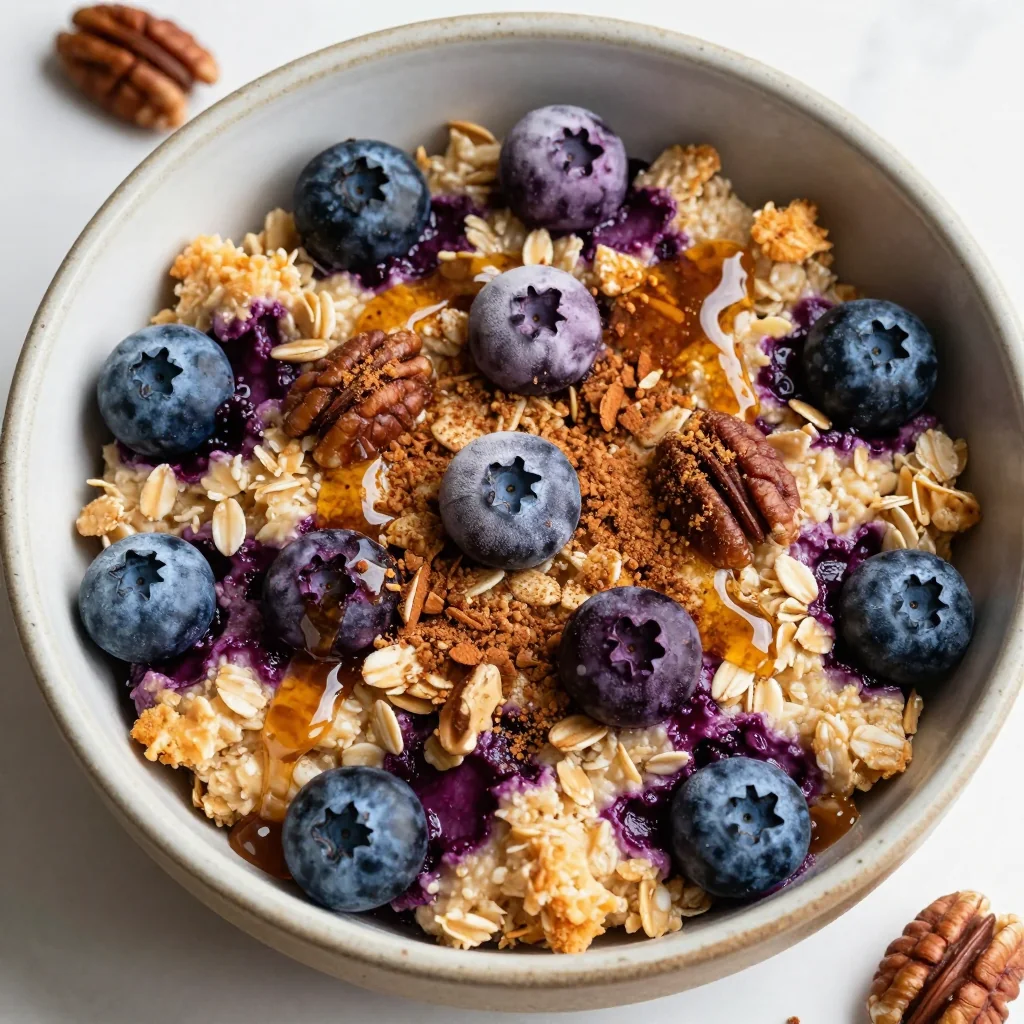
Let the oatmeal cool for 10-15 minutes before serving – this resting period allows it to set properly and makes cutting cleaner portions easier. Serve warm with your favorite toppings: a splash of milk, fresh berries, sliced bananas, chopped nuts, or an extra drizzle of maple syrup. The texture is best when it's still warm but not piping hot.
Expert Tips
Temperature Matters
Bring your eggs and milk to room temperature before mixing. Cold ingredients can cause the coconut oil to solidify, creating unwanted clumps in the final texture.
Overnight Option
Assemble everything the night before, cover tightly, and refrigerate. In the morning, let it sit at room temperature while the oven preheats, then bake as directed (may need 5 extra minutes).
Don't Skip the Fat
The coconut oil might seem optional, but it creates a richer texture and helps prevent the oatmeal from sticking to the pan. For oil-free, substitute with unsweetened applesauce.
Stir Once, Not Twice
Spice It Right
Whole spices, freshly ground, make a world of difference. Try grinding your own cinnamon sticks and nutmeg for an incredibly aromatic final product.
Double Batch Benefits
This recipe doubles beautifully in a 9x13-inch pan. Bake for an additional 10-15 minutes. Perfect for meal prep or feeding a crowd during the holidays.
Variations to Try
Berry Bliss
Replace apples with 1½ cups mixed frozen berries. Add orange zest and substitute almond extract for vanilla. The frozen berries create beautiful color swirls throughout.
Pumpkin Spice
Replace apples with 1 cup pumpkin purée, increase maple syrup to ¾ cup, and add 1 teaspoon pumpkin pie spice. Top with pepitas for extra crunch and nutrition.
Chocolate Banana
Replace apples with 2 mashed ripe bananas, reduce maple syrup to ¼ cup, and fold in ½ cup dark chocolate chips. The bananas add natural sweetness and moisture.
Savory Herb
Omit sweeteners and spices, replace with fresh herbs like rosemary and thyme. Add shredded cheese and sun-dried tomatoes for a unique brunch option that pairs perfectly with eggs.
Storage Tips
Refrigerator Storage
Once completely cooled, cut the baked oatmeal into individual portions and store in an airtight container in the refrigerator for up to 5 days. Place parchment paper between layers if stacking to prevent sticking. The flavors actually improve after the first day as the spices meld together.
Reheating Instructions:
- Microwave: Place a portion on a microwave-safe plate and heat for 45-60 seconds
- Oven: Warm in a 350°F oven for 10-12 minutes, covered with foil to prevent drying
- Toaster Oven: Perfect for reheating single portions – 5-6 minutes at 350°F
Freezer Storage
This baked oatmeal freezes exceptionally well, making it perfect for meal prep. Once completely cooled, portion into individual servings and wrap tightly in plastic wrap, then place in a freezer-safe bag or container. Freeze for up to 3 months. Thaw overnight in the refrigerator or use the defrost setting on your microwave. The texture remains remarkably good after freezing.
Meal Prep Tip:
Double the recipe and freeze half in individual portions. Having a healthy breakfast ready in under 2 minutes makes busy mornings so much easier!
Frequently Asked Questions
Absolutely! Simply use certified gluten-free rolled oats. Oats are naturally gluten-free, but they're often processed in facilities that handle wheat, so cross-contamination can be an issue for those with celiac disease. Look for brands that specifically state "certified gluten-free" on the package.
Overbaking is usually the culprit. Every oven is different, so start checking at the 30-minute mark. The center should still have a slight jiggle when you remove it from the oven – it will continue to set as it cools. Also, make sure you're using the correct size pan; too large a pan can cause the mixture to spread too thin and dry out.
I don't recommend substituting steel-cut oats directly in this recipe as they require significantly more liquid and longer cooking time. If you prefer steel-cut oats, try my separate recipe specifically developed for that variety. This recipe is optimized for rolled oats, which create the best texture.
Replace the maple syrup with an equal amount of mashed ripe banana or unsweetened applesauce, and add 1-2 tablespoons of your preferred sugar-free sweetener like stevia or monk fruit. Keep in mind that the texture will be slightly different, and you may need to reduce the liquid by 2-3 tablespoons to compensate for the extra moisture from the fruit.
While you can use quick oats, I don't recommend it as they tend to create a mushier, less satisfying texture. Rolled oats maintain their structure better during baking, giving you those distinct oat flakes in every bite. If quick oats are all you have, reduce the liquid by ¼ cup and check for doneness 5-10 minutes earlier.
Double the recipe and bake in a 9x13-inch pan for about 45-50 minutes. Set up a toppings bar with fresh berries, sliced bananas, chopped nuts, shredded coconut, maple syrup, and milk. This way everyone can customize their portion, and you can enjoy time with your guests rather than being stuck in the kitchen.
Healthy Baked Oatmeal for Winter Mornings
Ingredients
Instructions
- Prep the dish: Preheat oven to 375°F (190°C). Grease a 9-inch square baking dish with coconut oil or line with parchment paper.
- Mix dry ingredients: In a large bowl, whisk together oats, cinnamon, nutmeg, ginger, baking powder, and salt.
- Combine wet ingredients: In a separate bowl, whisk together almond milk, eggs, maple syrup, melted coconut oil, vanilla, and chia seeds.
- Prepare apples: Toss diced apples with lemon juice to prevent browning.
- Combine mixtures: Pour wet ingredients into dry ingredients and fold together just until combined.
- Add mix-ins: Gently fold in apples and nuts, reserving some for topping if desired.
- Bake: Pour into prepared dish and bake for 35-40 minutes until edges are golden and center is set but still slightly jiggly.
- Cool and serve: Let cool 10-15 minutes before serving warm with your favorite toppings.
Recipe Notes
For best results, use room temperature ingredients to prevent coconut oil from solidifying. Store cooled portions in an airtight container in the refrigerator for up to 5 days or freeze for up to 3 months.