I remember the night it all started. I was trying to impress a friend who claimed she could cook anything, and I wanted to show her that even a simple chicken thigh could be turned into a culinary masterpiece. I opened the fridge, pulled out a few boneless skinless thighs, and stared at the pantry like a detective searching for clues. The smell of garlic, miso, and soy sauce already promised something extraordinary, but I had no idea just how bold this dish would become.
Picture this: the kitchen is humming, the stove is ready, and the air is thick with the scent of toasted sesame oil mingling with the earthy sweetness of miso. The sound of the skillet sizzling is a drumbeat that signals the start of a flavor orchestra. Each bite is a burst of umami, a whisper of heat from the garlic, and a silky coating that clings to the chicken like velvet. If you’re feeling adventurous, you’ll notice the subtle citrus zing that comes from a splash of mirin—an ingredient that’s often overlooked but essential to this recipe’s magic.
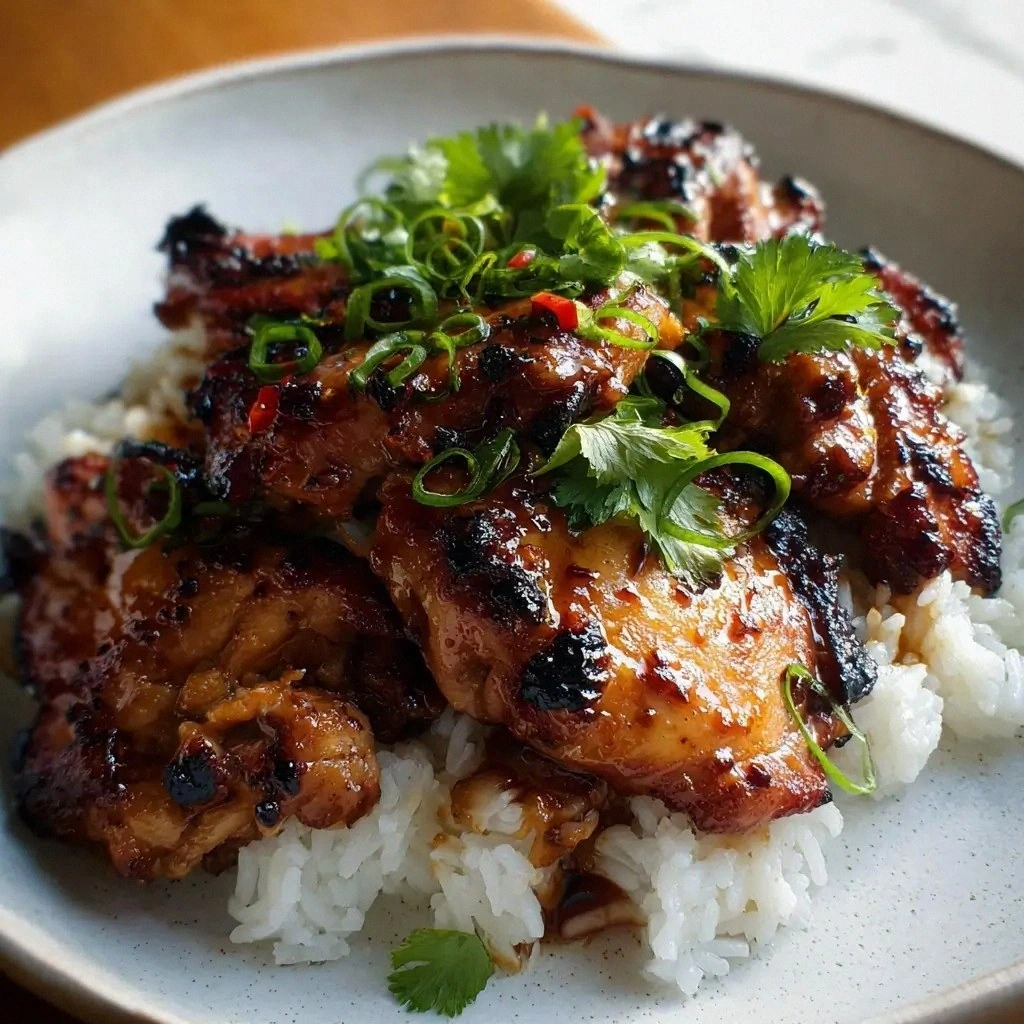
What sets this version apart? It’s the precise balance of sweet, salty, and umami that creates a sauce so rich it feels like a hug. The chicken’s skin crisps to a golden caramelized crust that breaks like thin ice when you bite. The miso base is layered with a hint of ginger, giving depth without overpowering. The finishing touch of toasted sesame seeds adds a nutty crunch that elevates the dish from simple to unforgettable. I dare you to taste this and not go back for seconds.
By the end of this post, you’ll know why this is hands down the best version you’ll ever make at home. I’ll walk you through every single step, from the moment you first chop the garlic to the last sprinkle of scallions. The techniques I’ll reveal are simple yet transformative—no fancy gadgets required. Get ready for a recipe that’s as satisfying to cook as it is to devour.
What Makes This Version Stand Out
- Taste: The miso and garlic create a layered umami profile that’s deeper than a standard soy sauce glaze. The subtle sweetness from mirin balances the saltiness, leaving a lingering finish that keeps you reaching for more.
- Texture: The chicken skin crisps to a golden caramelized finish while the interior stays juicy and tender. The sauce coats the meat in a silky glaze that melts in your mouth.
- Simplicity: With only a handful of pantry staples, you can craft a restaurant‑level dish in under 45 minutes. No complicated prep or obscure ingredients.
- Uniqueness: The combination of miso, garlic, and sesame oil is rare in everyday chicken recipes. It offers a flavor profile that feels both exotic and comforting.
- Crowd Reaction: Friends who’ve tried it say it’s the “goat cheese of chicken thighs”—unexpectedly bold, yet universally appealing.
- Ingredient Quality: Using a high‑quality miso paste and fresh garlic elevates the dish. The difference is noticeable even if you’re working with store‑bought items.
- Cooking Method: A two‑stage process—first searing for crispness, then braising in a flavorful glaze—ensures even cooking and maximum flavor absorption.
- Make‑Ahead Potential: The sauce can be prepared a day in advance, letting the flavors meld and intensify. This makes it perfect for busy weeknights.
Alright, let's break down exactly what goes into this masterpiece…
Inside the Ingredient List
The Flavor Base
Miso paste is the heart of this sauce. It’s a fermented soybean product that delivers a deep, savory umami punch. The saltiness of the miso is counterbalanced by the sweet undertones of mirin and a splash of sake, creating a balanced glaze that doesn’t overwhelm the chicken. If you skip the miso, the dish loses its signature depth; the sauce becomes a generic soy glaze that lacks complexity.
The Texture Crew
The chicken thighs themselves are the texture foundation. Skin-on thighs give that coveted crispy exterior while the meat stays juicy inside. A small amount of sesame oil added to the pan during searing helps the skin crisp up to a golden caramelized finish that shatters like thin ice when bitten. If you prefer skinless thighs, the dish will still be delicious, but you’ll miss the satisfying crunch that elevates the mouthfeel.
The Unexpected Star
Fresh garlic is the secret weapon that adds a punchy heat and aromatic brightness. Minced finely, the garlic releases its oils, which blend seamlessly into the miso glaze. If you use pre‑minced garlic, the flavor can be a bit muted; the fresh cloves give that bright, sharp note that wakes up the palate.
The Final Flourish
A sprinkle of toasted sesame seeds and chopped scallions finish the dish with nutty crunch and fresh green brightness. The sesame seeds add a subtle nutty aroma, while the scallions bring a clean, herbaceous contrast that cuts through the richness of the glaze. If you’re allergic to sesame, you can omit the seeds and still enjoy a beautifully balanced dish.
Everything's prepped? Good. Let's get into the real action…
The Method — Step by Step
- Start by patting the chicken thighs dry with paper towels. Removing excess moisture is key to getting that perfect crispy skin. Season each side generously with salt and pepper. This simple step ensures the seasoning stays on the surface during searing.
- Heat a cast‑iron skillet over medium‑high heat until shimmering. Add a tablespoon of sesame oil, swirling to coat the bottom. The oil should ripple but not smoke—if it does, lower the heat. This oil choice gives the skin a subtle nutty aroma.
- Place the thighs skin‑side down in the pan. Let them cook undisturbed for 5–7 minutes, until the skin is deep golden brown and releases easily from the pan. If the skin sticks, give it a minute longer; patience pays off with a crisp finish.
- Flip the thighs over and add minced garlic, ginger, and a splash of mirin. Stir quickly to coat the meat and let the aromatics bloom for 30 seconds. The garlic should start to turn a light golden hue—watch this part closely, as it’s the moment of truth.
- Pour in 2 tablespoons of miso paste, 1 tablespoon of soy sauce, and 1 tablespoon of sake. Whisk until the miso is fully dissolved, forming a glossy glaze. The sauce should thicken slightly as it simmers, coating the thighs evenly.
- Reduce the heat to medium‑low, cover the skillet, and let the thighs braise for 12–15 minutes. The sauce should bubble gently, and the chicken should reach an internal temperature of 165°F (74°C). This low‑heat braising locks in moisture.
- Remove the lid, increase the heat to medium, and let the glaze reduce until it’s thick and caramelized, about 5 minutes. The glaze should cling to the thighs, forming a glossy finish that coats every surface.
- Sprinkle toasted sesame seeds and chopped scallions over the top. Serve immediately with steamed rice or a crisp salad. The contrast of textures—crunchy skin, silky glaze, fresh greens—creates a memorable dining experience.
That's it — you did it. But hold on, I've got a few more tricks that'll take this to another level…
Insider Tricks for Flawless Results
The Temperature Rule Nobody Follows
Most people cook chicken thighs over high heat, which can dry them out. I’ve discovered that starting at medium‑high for the initial sear and dropping to medium‑low for braising preserves juiciness. This two‑stage method also ensures the skin crisps without burning the glaze.
Why Your Nose Knows Best
The first aroma that hits your nose when the skillet starts to sizzle is a cue that the skin is ready. A light golden hue and a subtle nutty scent mean the sear is perfect. Trust your nose; it’s the most reliable sensor for cooking.
The 5‑Minute Rest That Changes Everything
After braising, let the thighs rest for five minutes before slicing. This allows the juices to redistribute, ensuring each bite stays moist. Skipping the rest can leave the meat feeling dry and less flavorful.
The Perfect Garlic Crush
Using a garlic press instead of mincing gives a smoother texture and a more even distribution of flavor. The press releases more oil, intensifying the garlic’s bite without any gritty bits.
The Secret to Crispy Skin
Patting the skin dry and seasoning it before searing locks in moisture and promotes a crisp texture. If you find the skin still soggy, add a pinch of baking soda to the seasoning mix; it helps draw out moisture.
The Quick Sesame Toast
Toast the sesame seeds in a dry skillet over medium heat until they’re golden and fragrant. This step brings out their nutty flavor and prevents them from becoming soggy when sprinkled on top.
Creative Twists and Variations
This recipe is a playground. Here are some of my favorite ways to switch things up:
Spicy Sriracha Kick
Add a tablespoon of sriracha to the glaze for a fiery edge. The heat pairs beautifully with the miso’s richness, creating a balanced flavor that’s both bold and comforting.
Citrus Twist
Replace the mirin with a splash of fresh orange juice and zest. The citrus adds brightness and cuts through the savory depth, making the dish lighter and more refreshing.
Herb‑Infused Variation
Stir in a handful of chopped fresh basil or cilantro before serving. The herbs bring a fresh, aromatic layer that elevates the dish into a more complex flavor profile.
Gluten‑Free Adaptation
Use a gluten‑free soy sauce and ensure your miso paste is certified gluten‑free. This keeps the dish safe for those with gluten sensitivities while preserving its signature umami.
Vegetarian Swap
Replace the chicken thighs with thick-cut tofu or seared tempeh. The tofu will absorb the glaze, offering a plant‑based option that still delivers that caramelized crust.
Breakfast Edition
Serve the glazed thighs with a side of fluffy scrambled eggs and toast. The savory glaze adds a unique twist to a classic breakfast, making it feel like a brunch treat.
Storing and Bringing It Back to Life
Fridge Storage
Cool the thighs completely before placing them in an airtight container. Store in the refrigerator for up to three days. The glaze will thicken slightly, so a quick stir will restore its glossy consistency.
Freezer Friendly
Wrap each thigh individually in parchment paper and place them in a freezer bag. They can be stored for up to two months. Thaw overnight in the refrigerator before reheating.
Best Reheating Method
Reheat in a skillet over medium heat, adding a splash of water or broth to create steam. This prevents the glaze from drying out and keeps the thighs moist and flavorful.