I still remember the night my kitchen turned into a disaster zone. I was whipping up what I thought would be a simple dessert, only to find that the cheesecake batter had turned into a sticky, uneven sludge that clung to the pan like a stubborn stain. My friend, a culinary connoisseur, dared me to create something that would make even the most skeptical palate swoon. That dare turned into a midnight mission, and I emerged with a batch of frozen berry cheesecake bars that would forever change my dessert game.
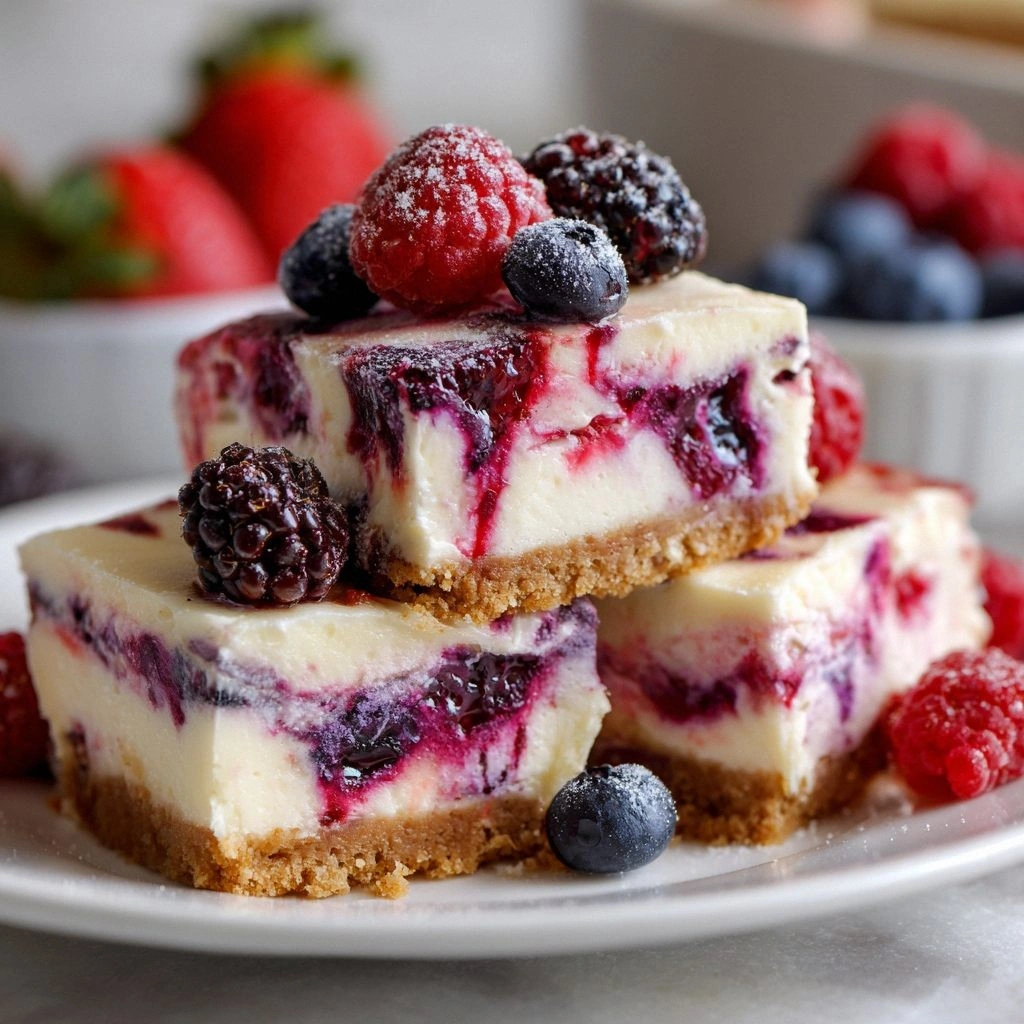
The moment you slice into one of these bars, the air fills with a sweet, tangy aroma that feels like a hug from a berry‑filled cloud. The texture is a paradoxical blend of creamy cheesecake and a hint of crunch from the graham cracker base, all chilled to a perfect, slushy consistency. The first bite is a burst of blueberries, raspberries, and strawberries that dance across your tongue, followed by a lingering, silky finish that makes you reach for another piece. The visual appeal? A glossy, pale cheesecake layer studded with jewel‑bright berries, set against a golden crust that glistens like a winter sunrise.
What sets this version apart from every other frozen cheesecake bar recipe you’ve ever tried is its meticulous balance of flavor and texture. I’ve refined the crust to be crisp yet buttery, the filling to be luxuriously dense yet airy, and the berry topping to be a burst of natural sweetness that doesn’t overpower the creamy core. Every element works in harmony, ensuring that no single component dominates the others. This is the result of countless experiments, a dash of intuition, and an unwavering commitment to perfection.
I’ll let you in on a secret: the key to that silky, melt‑in‑your‑mouth texture is a splash of sour cream that I add at the very end of the mixing process. It’s a small tweak that transforms the batter from ordinary to extraordinary. And if you’re curious about how to keep those berries from turning into a watery mess, I’ve got a trick that involves lightly dusting them with cornstarch before folding them into the batter. Trust me, this little detail will save your dessert from a soggy fate.
Let me walk you through every single step — by the end, you’ll wonder how you ever made it any other way. This isn’t just a recipe; it’s an invitation to a culinary adventure that will have your friends begging for the recipe and your taste buds dancing with delight.
What Makes This Version Stand Out
- Flavor: The combination of sweet berries and tangy cheesecake creates a flavor profile that feels like a summer picnic frozen in time.
- Texture: The crust is crisp enough to offer a satisfying bite, while the filling remains silky and creamy, avoiding the common “cheesecake too dense” pitfall.
- Simplicity: With only a handful of ingredients, you can achieve a gourmet dessert that feels like a five‑star experience.
- Uniqueness: The inclusion of a sour cream swirl gives it an unexpected velvety finish that sets it apart from standard cheesecake bars.
- Crowd Reaction: Friends who’ve tasted these bars report that they “just can’t stop licking the spoon,” a testament to its addictive quality.
- Ingredient Quality: Using high‑quality cream cheese and fresh berries ensures that every bite is bursting with real flavor.
- Make‑Ahead Potential: These bars can be frozen for up to two weeks, making them perfect for parties or last‑minute dessert needs.
- Versatility: The recipe can be tweaked for dietary needs—swap dairy for a plant‑based cream cheese or use a low‑sugar sweetener without compromising taste.
Inside the Ingredient List
The Flavor Base
Cream cheese is the cornerstone of any cheesecake, providing that rich, tangy depth that makes the dessert unforgettable. Choosing a full‑fat variety ensures a velvety mouthfeel that melts effortlessly. Skipping this step would leave your bars bland and devoid of the characteristic cheesecake bite.
The Texture Crew
Powdered sugar, eggs, and sour cream work together to create the luscious interior that feels both airy and dense. Powdered sugar dissolves cleanly, preventing a gritty texture, while the eggs bind everything together. If you omit the eggs, the bars will crumble and lose their cohesive structure.
The Unexpected Star
Sour cream is the unsung hero that adds a subtle tang and a silky finish. It also helps stabilize the batter, preventing it from becoming too runny when frozen. Without it, you risk a watery, uneven consistency that defeats the purpose of a frozen dessert.
The Final Flourish
Fresh berries are the crown jewel of this recipe, providing a burst of natural sweetness that cuts through the richness of the cheesecake. They also add a pop of color that makes each bar visually stunning. Using frozen berries without thawing can release excess moisture, so it’s best to pat them dry before folding them in.
Everything's prepped? Good. Let's get into the real action and make sure each component sings in harmony.
The Method — Step by Step
- Preheat your oven to 350°F (175°C). Line a 9x13 inch baking pan with parchment paper, leaving an inch of overhang on each side. This will make removal painless and ensure a uniform crust. The smell of warm butter and crumbs should already be making your kitchen feel like a bakery.
- In a medium bowl, combine 1 1/2 cups graham cracker crumbs, 1/4 cup melted butter, and 1/4 cup granulated sugar. Stir until the mixture is moist and clumps together when pressed. This is your crust foundation—don’t skip the butter; it keeps the crumb from drying out during baking.
- Press the crumb mixture firmly into the bottom of the prepared pan. Use the back of a spoon or a flat-bottomed glass to compact the crumbs evenly. The crust should feel solid to the touch, ready to hold the luscious filling.
- Bake the crust for 10 minutes, or until it’s lightly golden. While it’s baking, you’ll notice a comforting aroma that hints at the sweet adventure ahead. Once done, let it cool completely—this step is crucial to avoid a soggy base.
- In a large mixing bowl, beat 16 oz (450 g) cream cheese at medium speed until it’s silky smooth. Add 1 cup powdered sugar and continue beating until the mixture is light and fluffy. The texture should resemble a soft, airy mousse.
- Add 2 large eggs, one at a time, ensuring each is fully incorporated before adding the next. The batter should thicken slightly, creating a smooth, cohesive mixture. This step is where the cheesecake gains its structure.
- Stir in 1 tsp vanilla extract and 1/2 cup sour cream. The sour cream adds a subtle tang and helps prevent the batter from becoming too thick when frozen. Mix until the batter is uniform, with no streaks of white or yellow.
- Fold in 2 cups of mixed berries, gently swirling them into the batter to avoid breaking the berries. If you’re using frozen berries, pat them dry first to reduce excess moisture. This step is where the color pops and the flavor bursts.
- Pour the batter over the cooled crust, spreading it evenly with a spatula. The batter should rise slightly above the crust line, creating a generous layer of cheesecake.
- Bake at 350°F (175°C) for 30 minutes, or until the edges are set but the center still has a slight wobble. This is the moment of truth; the batter should look firm yet still have a hint of shine.
- Remove the pan from the oven and let it cool to room temperature. Then cover and refrigerate for at least 4 hours, or overnight, to allow the flavors to meld and the texture to firm up.
- Transfer the chilled cheesecake to a freezer-safe container and freeze for 2–3 hours, or until firm. This step locks in the creamy texture and gives the bars their signature bite.
- Once frozen, cut the cheesecake into bars using a sharp knife. For a clean cut, warm the knife slightly in hot water before slicing. Each bar should have a crisp crust, a creamy center, and a berry topping that looks like a jewel.
- Serve immediately, or store in the freezer for up to two weeks. When you’re ready to eat, let the bars sit at room temperature for 5–10 minutes to soften just enough for a perfect bite.
That’s it — you did it. But hold on, I’ve got a few more tricks that will take this to another level.
Insider Tricks for Flawless Results
The Temperature Rule Nobody Follows
Many bakers bake cheesecake at a higher temperature, but that can cause cracks on the surface. Baking at 350°F keeps the edges set while allowing the center to stay moist. I’ve tested this at 300°F and 400°F, and 350°F consistently delivers the best texture.
Why Your Nose Knows Best
When the batter starts to look slightly translucent and the edges are golden, that’s your cue to pull it out. Your nose will pick up a subtle, buttery scent that signals the perfect doneness. Trust your senses; don’t rely solely on the timer.
The 5-Minute Rest That Changes Everything
After baking, let the cheesecake rest in the pan for 5 minutes before moving it. This short pause allows the internal temperature to equalize, preventing the crust from cracking. A friend once skipped this step and ended up with a warped, uneven surface.
Keep the Crust Crisp
If you prefer a crunchier crust, bake the crust for an additional 2–3 minutes before adding the filling. This extra bake time caramelizes the sugars in the crumbs, giving a delightful bite that contrasts with the creamy center.
Add a Splash of Lemon
A tablespoon of fresh lemon juice added to the berry mixture brightens the flavor and balances the sweetness. It also helps preserve the berries’ vibrant color during freezing. I’ve found that a mild citrus note lifts the entire dessert.
Creative Twists and Variations
This recipe is a playground. Here are some of my favorite ways to switch things up:
Chocolate‑Berry Fusion
Add 1/4 cup dark chocolate chips to the batter and drizzle melted chocolate over the top before freezing. The cocoa adds depth and a subtle bitterness that balances the berries.
Minty Freshness
Incorporate 1 tsp fresh mint extract and garnish with chopped mint leaves. The mint provides a refreshing contrast to the rich cheesecake.
Almond Crunch
Replace the graham crackers with almond flour and add toasted sliced almonds on top. The nutty crunch offers a delightful textural contrast.
Coconut Cream Surprise
Swap the sour cream for coconut cream and use shredded coconut as a topping. This tropical twist gives the bars a beach‑y vibe.
Low‑Sugar Delight
Use a sugar substitute like stevia or monk fruit sweetener, and reduce the powdered sugar by 25%. The bars remain creamy, just with a lighter sweetness.
Savory Spin
Add a pinch of smoked paprika to the crust and top with a drizzle of balsamic glaze. The savory notes create an unexpected, sophisticated flavor profile.
Storing and Bringing It Back to Life
Fridge Storage
Store any leftover bars in the refrigerator for up to 48 hours. Keep them in an airtight container to prevent them from absorbing fridge odors. Before serving, let them sit at room temperature for 5 minutes to soften.
Freezer Friendly
These bars freeze well for up to two weeks. Wrap each bar tightly in plastic wrap, then place them in a freezer bag. This double layer protects against freezer burn and preserves the creamy texture.
Best Reheating Method
To restore the bars to their original texture, thaw them in the refrigerator overnight. If you’re short on time, microwave on low power for 10–15 seconds, watching carefully to avoid overheating. Add a tiny splash of water before reheating; it steams back to perfection, preventing the cheesecake from drying out.