Love this? Pin it for later! 📌
October mornings in New England smell like woodsmoke and cinnamon. I grew up in a 192-year-old farmhouse whose only source of heat was a temperamental wood stove in the kitchen, so breakfast had to be fast, filling, and—above all—warm. My mother would wake before dawn to stoke the fire and slide a well-seasoned cast-iron waffle iron onto the griddle. By the time my siblings and I stumbled downstairs, cheeks pink from the cold, a towering stack of pumpkin waffles waited on a pie plate covered with a tea towel.
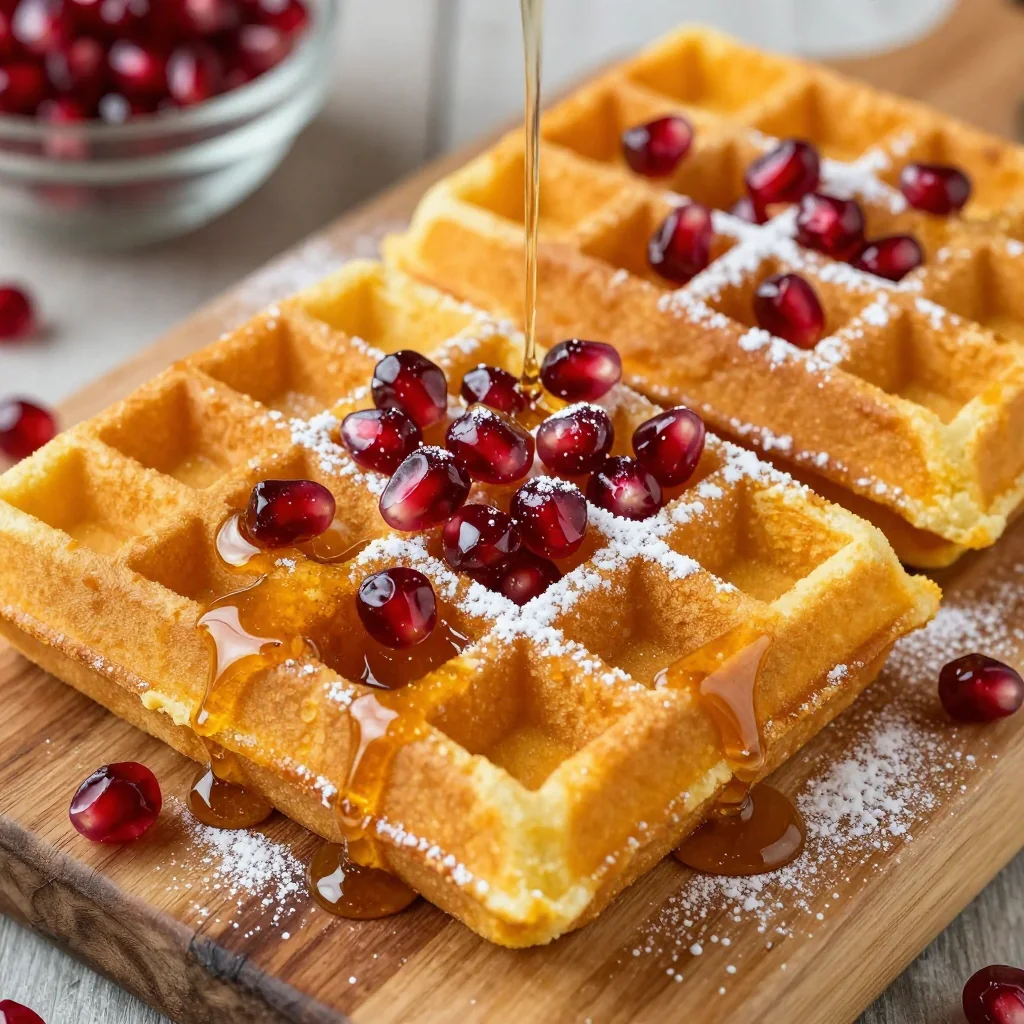
Fast-forward twenty years: I’m the one racing against sunrise, juggling a laptop, a toddler who only wears rain boots, and a dog that refuses to come inside when called. The farmhouse is gone, but the craving for those cozy, spice-laden waffles remains. After months of tweaking ratios and testing freezer methods, I finally cracked the code: a freezer-friendly pumpkin waffle that tastes (and smells) exactly like childhood—no 5 a.m. fire-tending required. You can mix the batter in one bowl, cook a double batch on Sunday afternoon, freeze the extras between sheets of parchment, and reheat them in a toaster all week long. They emerge crisp on the edges, custardy in the center, perfumed with cinnamon, nutmeg, and real pumpkin.
Whether you’re feeding a crowd on Thanksgiving morning, meal-prepping for busy school days, or simply craving the edible equivalent of a flannel blanket, these waffles deliver autumn in every pocketed square. Let’s get that griddle hot.
Why This Recipe Works
- Maximum Moisture, Zero Sogginess: A careful ratio of pumpkin purée to buttermilk keeps the interior tender without turning the waffles limp.
- Freezer-Engineered Crispness: A light brush of melted butter before freezing creates micro-layers that re-toast to a shatter-crisp shell.
- Spice Layering Technique: Adding spices at two stages—once in the dry mix, again in the wet—amplifies depth without overwhelming the pumpkin.
- One-Bowl Convenience: Melted butter doubles as the fat for the batter and the grease for the waffle iron, cutting dishes and time.
- Whole-Grain Option: Swap in white whole-wheat flour for half the all-purpose without sacrificing fluff.
- Toast-and-Go Reheat: Straight from freezer to toaster, they’re ready in under 3 minutes—no microwave rubberiness.
Ingredients You'll Need
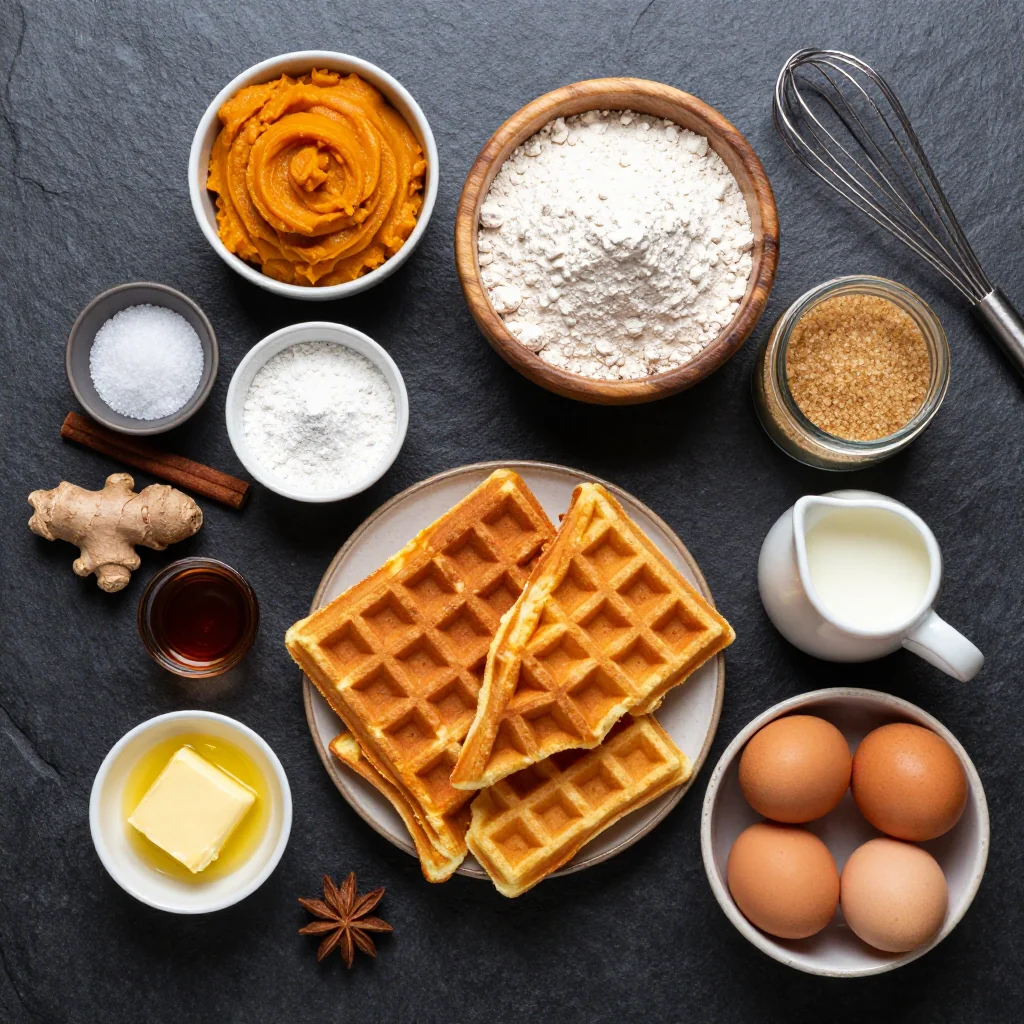
Pumpkin Purée: Use 100% pure pumpkin, not pumpkin-pie filling. Libby’s is the gold standard for moisture consistency, but any brand without additives works. If you’re swimming in garden pumpkins, homemade purée is lovely—just drain it in cheesecloth for 30 minutes so the extra water doesn’t thin the batter.
Buttermilk: The acid reacts with baking soda for lofty lift. No buttermilk on hand? Add 1 Tbsp white vinegar to a scant 1¼ cups milk and let stand 5 minutes. For dairy-free, use oat milk with the same trick.
Whole-Grain Option: Replace up to half the flour with white whole-wheat for nutty flavor and extra fiber. Avoid regular whole-wheat; the hull fragments can make waffles dense.
Spice Blend: I blend cinnamon, ginger, nutmeg, clove, and a whisper of black pepper. Pepper sounds odd, but it wakes up the pumpkin the way coffee heightens chocolate. Grate whole nutmeg fresh if you can—its oils are still fragrant, whereas pre-ground often tastes dusty.
Melted Butter: Brown the butter for deeper toffee notes. Simply cook it until the milk solids turn chestnut, then pour into a cold bowl to stop the color. Let it cool to lukewarm before whisking with eggs so they don’t scramble.
Maple Sugar (optional): It costs more than brown sugar but dissolves faster, yielding crisper edges. If you keep only brown sugar, pack it firmly and whisk aggressively to remove lumps.
How to Make Freezer-Friendly Pumpkin Waffles for Breakfast
Prep Your Station
Place your waffle iron on the counter and preheat to medium-high. (Setting 5 on a 6-setting dial works for most irons.) Melt 10 Tbsp unsalted butter; if browning, watch closely—carry-over heat will finish the color while you gather the remaining ingredients. Line two rimmed baking sheets with parchment for the cooked waffles.
Whisk the Dry Team
In a large bowl, whisk 2 cups all-purpose flour, ¼ cup maple sugar (or brown sugar), 2 tsp baking powder, 1 tsp baking soda, ¾ tsp fine sea salt, 2 tsp cinnamon, 1 tsp ginger, ½ tsp nutmeg, ¼ tsp clove, and ⅛ tsp black pepper. Aerating now reduces over-mixing later.
Combine the Wet Stars
In a medium bowl, whisk 1 cup pumpkin purée, 1¼ cups buttermilk, 2 large eggs, 2 tsp vanilla, and the lukewarm melted butter until homogenous. The mixture should resemble a thick milkshake. If your kitchen is chilly, let the bowl sit in a larger bowl of warm tap water for 3 minutes to prevent butter flecks from solidifying.
Marry Wet & Dry
Pour the wet mixture into the dry. Using a silicone spatula, fold with a figure-eight motion just until the flour disappears. Lumps are fine; over-mixing develops gluten and yields tough waffles. The batter should be thick but pourable. If it stands in peaks, splash in 1–2 Tbsp extra buttermilk.
Test Waffle = Blueprint
Lightly brush the hot iron with melted butter. Ladle in slightly less than ¾ cup batter (varies by iron). Close and cook 4 minutes—no peeking! Steam will billow aggressively at first, then subside. When the lid lifts without resistance, the waffle is ready. Peek at the color: deep mahogany edges with amber pockets mean the remaining batter will cook similarly. Adjust time or heat if needed.
Batch Cooking Strategy
Transfer finished waffles to the parchment-lined sheet in a single layer; avoid stacking while hot—steam trapped between layers softens the crust. Continue cooking, buttering the iron only every other waffle; excess grease can make the edges fry unevenly.
Flash-Cool for Freezer
Slide the baking sheet onto a wire rack and allow waffles to cool 15 minutes. Warm waffles in a sealed container create condensation = freezer ice crystals. Once cool, blot the tops gently with a paper towel to remove any surface butter that could turn rancid over long storage.
Package for the Deep Chill
Stack waffles in pairs, placing a small sheet of parchment between each pair so they separate easily. Slide into a gallon-size freezer bag; press out air, and label with the date. For shorter storage (1 week), a beeswax wrap works; for months, vacuum-seal.
Toaster Revival
No need to thaw. Pop frozen waffles directly into a wide-slot toaster on medium heat. Toast once, rotate 180°, toast again. The double cycle ensures the centers heat through while the exterior crisps. Serve with maple syrup, apple butter, or a swipe of almond butter and thin pear slices.
Expert Tips
Browning ≠ Burning
Pumpkin’s natural sugars caramelize quickly. If your iron’s thermostat runs hot, lower the dial one notch and extend cook time by 30 seconds.
Silicone vs. Metal Tools
Silicone tongs protect non-stick coating when removing waffles. Metal forks can scratch and lead to sticking in future batches.
Volume Control
Overfilling causes batter to seep out the sides and burn on the iron’s lip. Underfilling yields sad, holey waffles. Use a ¾-cup spring-loaded scoop for consistency.
Double Batch Math
A standard recipe doubles beautifully. For triple batches, whisk dry ingredients in a stockpot to contain the volume without a flour cloud.
Iron Seasoning
If waffles stick, your iron may need seasoning. Brush with oil, heat 10 minutes, cool, wipe. The polymerized layer acts like cast iron.
Flavor Make-Over
Fold ½ cup toasted chopped pecans and ¼ cup candied ginger into the batter for a holiday vibe that pairs with cranberry syrup.
Variations to Try
- Chocolate-Chip Pumpkin: Swap 2 Tbsp flour for cocoa powder and fold in ⅔ cup mini chips. Kids love the cookie-dough vibe.
- Savory-Sweet: Omit sugar, add ½ cup grated sharp cheddar and 2 Tbsp chopped chives. Serve beside fried chicken and hot honey.
- Gluten-Free: Replace flour with 1 cup oat flour + ¾ cup almond flour + ¼ cup arrowroot. Texture is slightly denser but still crisp-edged.
- Vegan: Sub almond milk + 1 Tbsp lemon juice for buttermilk, flax eggs for chicken eggs, and coconut oil for butter. Freeze the same way.
- Protein Boost: Add ¼ cup vanilla whey or plant protein plus 2 Tbsp extra milk to loosen the batter.
Storage Tips
Refrigerator: Cooked waffles keep 3 days in an airtight container. Reheat in toaster for best texture; microwaving steams them limp.
Freezer: Properly wrapped waffles maintain peak quality 3 months, though they remain safe indefinitely at 0 °F. Label bags—everything looks identical under frost.
Sheet-Pan Freeze: For grab-and-go convenience, freeze waffles in a single layer on a sheet pan for 2 hours, then transfer to bag. Pre-freezing prevents clumping so you can remove one or six at a time.
Air-Fryer Revival: 350 °F for 4 minutes, flipping halfway, restores bakery-level crispness if you don’t own a toaster.
Frequently Asked Questions
Freezer-Friendly Pumpkin Waffles for Breakfast
Ingredients
Instructions
- Preheat & Melt: Heat waffle iron to medium-high. Melt butter; cool 5 minutes.
- Mix Dry: In a large bowl, whisk flour, sugar, leavening, salt, and all spices.
- Mix Wet: In a medium bowl, whisk pumpkin, buttermilk, eggs, vanilla, and lukewarm butter.
- Combine: Pour wet into dry; fold just until no streaks of flour remain.
- Cook: Brush iron with butter. Ladle about ¾ cup batter per waffle. Cook 4 minutes.
- Cool: Transfer to wire rack. Repeat with remaining batter.
- Freeze: Cool completely, layer with parchment, seal in freezer bag up to 3 months.
- Reheat: Toast directly from frozen until hot and crisp. Serve with maple syrup.
Recipe Notes
For ultra-crisp edges, brush waffles with a whisper of melted butter before freezing. Toast twice on medium for deepest crunch.