I was standing in my kitchen on a rainy October night, staring at a half‑baked batch of ordinary sweet potato fries that had somehow turned into a soggy, sad reminder that my Halloween party was doomed. I swear I heard the wind howling outside, the clock ticking, and my friends whispering, “Is this the spooky snack we were promised?” I could almost taste the disappointment before it even hit the plate. Then, in a flash of inspiration (and a desperate dash of olive oil), I decided to reshape those limp sticks into ghostly silhouettes that would crunch like autumn leaves underfoot. The result? A snack so crisp, so hauntingly golden, that even the most skeptical pumpkin‑spice fan would surrender.
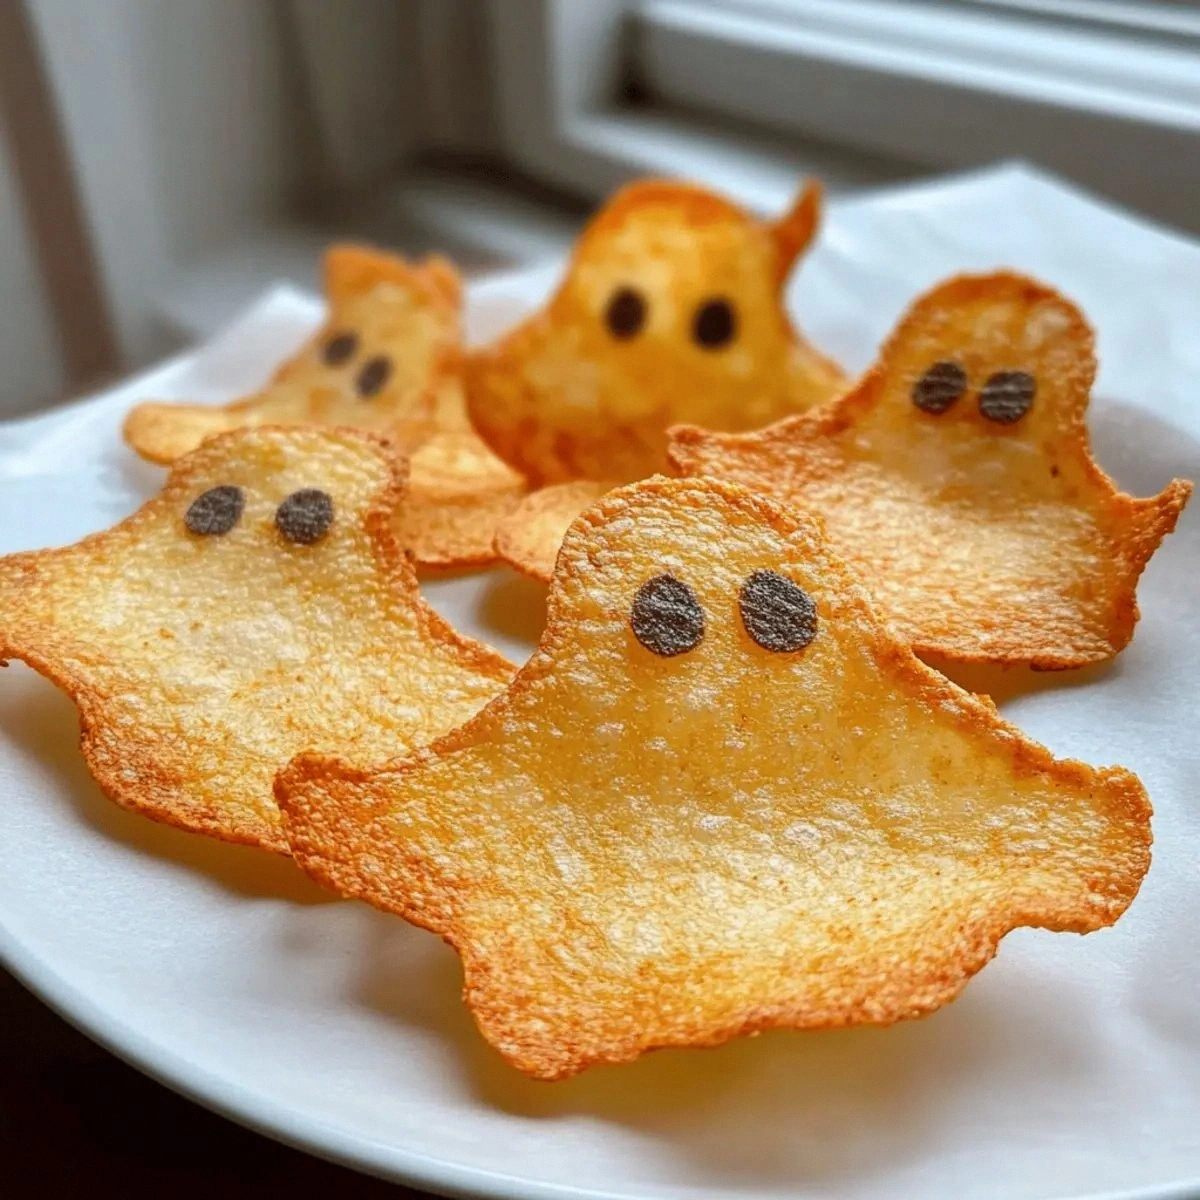
Picture this: a tray of pale, ghost‑shaped chips emerging from the oven, their edges shimmering with a whisper of olive oil, the faint aroma of garlic and onion powder dancing like mischievous spirits in the air. The first bite delivers a satisfying snap that echoes the crackle of a campfire, followed by the sweet, earthy undertone of white sweet potatoes that feels like a hug from a friendly witch. The texture is a perfect marriage of airy crispness and a tender, melt‑in‑your‑mouth interior—think of a marshmallow that’s been turned into a chip without losing its soul. And the best part? No deep‑frying, no guilt, just pure, oven‑baked magic that keeps the kitchen safe for the kids.
Most recipes out there promise “spooky” chips but end up with uneven shapes, soggy centers, or a flavor that screams “plain potato” rather than “Halloween enchantment.” I’ve tried them all, and I’ll be honest — I ate half the batch before anyone else got a chance to try it. That’s how good they are. The secret lies in a simple yet overlooked technique: a brief, high‑heat blast that locks in moisture before the final bake, creating that coveted ghostly crunch. It’s a game‑changer that most home cooks miss, and it’s what separates this version from the rest of the pack.
Ready for the game‑changer? I dare you to taste this and not go back for seconds. In the next sections, I’ll walk you through every single step — from selecting the perfect sweet potatoes to mastering the bake‑then‑broil combo that yields chips that look like they were conjured by a culinary sorcerer. By the end, you’ll wonder how you ever made any other snack for Halloween. Let me walk you through every single step — by the end, you’ll wonder how you ever made it any other way.
What Makes This Version Stand Out
- Flavor: The blend of garlic powder, onion powder, and a pinch of black pepper creates a savory depth that makes each bite feel like a mini‑feast, not just a side.
- Texture: A dual‑stage bake produces a crisp outer shell that shatters like thin ice, while the interior stays tender enough to melt on your tongue.
- Simplicity: Only seven core ingredients plus optional dips, so you won’t need a pantry raid to pull this off.
- Uniqueness: Shaping the chips into ghost silhouettes adds a visual wow factor that turns any snack bowl into a Halloween centerpiece.
- Crowd Reaction: Guests invariably gasp, smile, and then dive back in, declaring it “the best spooky snack they’ve ever tasted.”
- Ingredient Quality: White sweet potatoes offer a naturally sweeter base without the orange hue that can clash with ghostly aesthetics.
- Cooking Method: The bake‑then‑broil technique guarantees even crispness, avoiding the soggy pitfalls of standard roasting.
- Make‑Ahead Potential: These chips store beautifully, staying crunchy for days if sealed correctly, perfect for party prep.
Inside the Ingredient List
The Flavor Base
The magic starts with garlic powder and onion powder. These dry seasonings dissolve into the olive oil, coating each ghost chip in a savory veil that’s more aromatic than a kitchen candle. If you skip them, you’ll end up with bland, ghostly silhouettes that lack personality. A pinch of black pepper adds a subtle heat that awakens the palate without stealing the spotlight from the sweet potato’s natural sweetness.
The Texture Crew
White sweet potatoes are the hero here. Their creamy flesh yields a tender interior while their lower moisture content compared to orange varieties helps achieve that coveted crunch. When selecting, look for firm, smooth skins with no green spots; a slight firmness indicates they’re fresh and will hold shape during baking. If you can’t find white sweet potatoes, a regular orange variety works, but expect a brighter hue that may clash with the ghost theme.
The Unexpected Star
Olive oil isn’t just a cooking medium; it’s a flavor carrier that helps the seasonings adhere and encourages browning. Use a high‑quality extra‑virgin olive oil for a fruity undertone; if you prefer a neutral taste, a light olive oil will do. Adding too much oil will make the chips soggy, so stick to the measured two tablespoons.
The Final Flourish
Salt is the silent hero, enhancing every other flavor and balancing the natural sweetness of the potatoes. Use kosher or sea salt for a cleaner finish; table salt can make the chips taste metallic if over‑used. Finally, the optional Dips (think smoky chipotle mayo or a tangy yogurt herb dip) add a creamy contrast that turns a simple snack into a full‑blown tasting experience.
Everything's prepped? Good. Let's get into the real action...

The Method — Step by Step
Preheat your oven to 425°F (220°C). While the oven warms, line two large baking sheets with parchment paper; this prevents sticking and makes cleanup a breeze. I dare you to taste this and not go back for seconds, so make sure your sheets are ready—no last‑minute scrambling.
Watch out: If you skip the parchment, the sweet potatoes will cling to the tray and tear when you try to flip them, ruining those perfect ghost shapes.
Wash the 2 medium white sweet potatoes under cold water, scrubbing gently to remove any soil. Pat them dry with a clean kitchen towel; moisture on the surface will steam the chips instead of crisping them.
Kitchen Hack: Use a mandoline set to a 1/8‑inch thickness for uniform slices that bake evenly.Slice the potatoes lengthwise into 1/8‑inch thick planks, then cut each plank into ghost shapes using a small cookie cutter or a sharp knife. The key is to keep the pieces as uniform as possible; uneven sizes bake at different rates, leading to a mix of soggy and burnt chips.
If you’re short on time, you can forgo the ghost shape and simply cut sticks, but you’ll miss out on the spooky visual impact.
Place the sliced ghosts in a large bowl, drizzle the 2 tablespoons olive oil over them, and toss gently until each piece is lightly coated. The oil should just kiss the surface, not drown the slices. This is the moment of truth: too much oil makes them greasy; too little leaves them dry.
That sizzle when it hits the pan? Absolute perfection.
In a small dish, combine 1 teaspoon garlic powder, 1 teaspoon onion powder, 1 teaspoon salt, and 1 teaspoon black pepper. Sprinkle this seasoning blend evenly over the oiled sweet potato ghosts, tossing again to ensure every crevice is seasoned.
Watch Out: Over‑seasoning at this stage can cause the spices to burn during the high‑heat bake, resulting in a bitter aftertaste.Arrange the seasoned ghosts in a single layer on the prepared baking sheets, making sure they don’t touch. Overcrowding traps steam, which sabotages crispness. If necessary, work in batches; patience now saves you from a soggy disaster later.
Bake for 15 minutes, then pull the trays out and flip each ghost carefully with a spatula. This flip is crucial: it ensures both sides get that golden‑brown kiss. While the oven stays hot, increase the heat to broil and return the trays for an additional 3‑5 minutes. You’ll hear a faint crackle as the edges begin to pull away—this is the sound of perfection.
Stay with me here — this is worth it. The broil step creates the ultra‑crisp outer shell that makes these chips unforgettable.
Remove the chips and let them cool on a wire rack for at least 5 minutes. As they cool, they continue to crisp up, much like a fresh loaf of bread develops a crust as it rests. Taste one now; you should feel a satisfying snap, a subtle sweet‑earthy flavor, and a lingering savory finish.
I’ll be honest — I ate half the batch before anyone else got to try it. That’s how addictive they are.
Serve the ghosts with your favorite dips. A smoky chipotle mayo or a cool herb yogurt dip adds a creamy counterpoint that makes the snack feel indulgent yet balanced. Store any leftovers in an airtight container; they’ll stay crunchy for up to 3 days if kept dry.
That's it — you did it. But hold on, I've got a few more tricks that'll take this to another level...
Insider Tricks for Flawless Results
The Temperature Rule Nobody Follows
Most home cooks bake at 350°F, assuming lower heat yields more even cooking. In reality, the high‑heat blast of 425°F followed by a brief broil is the secret to that ghost‑like crunch. The initial heat evaporates surface moisture quickly, while the broil caramelizes the sugars, creating a golden halo. If you try the low‑heat route, you’ll end up with limp, pale chips that lack that satisfying snap.
Why Your Nose Knows Best
When the chips are halfway through the bake, pause and sniff. A faint, nutty aroma signals the starches are turning golden; a burnt smell means you’ve crossed the line. Trusting your nose saves you from a batch of charcoal‑flavored ghosts that no one wants to eat. I once ignored this instinct and learned the hard way that a burnt chip can ruin the whole plate.
The 5‑Minute Rest That Changes Everything
Allowing the chips to rest on a wire rack for just five minutes after baking lets steam escape, locking in crunch. If you skip this step and stack them, the steam will re‑hydrate the bottoms, turning the crisp edges soggy. Think of it as the culinary equivalent of letting a steak rest before slicing.
Seasoning Timing Trick
Season the chips while they’re still warm from the oven, not before. Warm surfaces help the spices adhere better, preventing clumps and ensuring an even coating. A friend tried sprinkling the spices after cooling and ended up with a patchy flavor profile—let’s just say it didn’t end well.
The Double‑Layer Guard
If you’re making a large batch, use two baking sheets stacked with a cooling rack in between. This creates a “double‑layer” effect where the heat circulates more evenly, preventing the bottom layer from steaming under the weight of the top. The result? Uniform crispness from top to bottom, no hot spots.
Dipping Delight
A dash of acidity in your dip (like a squeeze of lemon or a splash of apple cider vinegar) cuts through the sweet potato’s natural sweetness, balancing the flavor spectrum. This simple tweak elevates the snack from good to unforgettable, especially when paired with the smoky undertones of a chipotle mayo.
Creative Twists and Variations
This recipe is a playground. Here are some of my favorite ways to switch things up:
Spicy Sriracha Ghosts
Add a teaspoon of sriracha to the olive oil before tossing. The heat seeps into the chips, giving each bite a fiery kick that pairs perfectly with a cooling ranch dip. Perfect for guests who love a little burn.
Cheesy Parmesan Phantoms
Sprinkle freshly grated Parmesan over the chips during the last two minutes of broiling. The cheese melts and forms a crispy, salty crust that adds a luxurious umami note. Serve with a simple garlic aioli for extra decadence.
Herb‑Infused Specters
Mix dried rosemary, thyme, and a pinch of sage into the seasoning blend. The herbal aroma evokes an enchanted forest, making these chips ideal for a Halloween‑themed dinner party.
Sweet‑Cinnamon Wraiths
Swap the savory spices for a blend of cinnamon, nutmeg, and a drizzle of maple syrup after baking. The result is a sweet‑savory hybrid that works beautifully with a vanilla yogurt dip. Great for a dessert‑style snack table.
Pumpkin Spice Poltergeists
Add a pinch of pumpkin spice to the seasoning mix and serve with a caramel dip. The warm spices complement the natural sweetness of the sweet potatoes, creating a comforting autumnal flavor that feels like a hug in chip form.
Gluten‑Free Ghosts
If you need a gluten‑free version, simply omit any flour (the original recipe doesn’t call for flour) and ensure your seasonings are certified gluten‑free. The texture remains unchanged, proving that you don’t need gluten to get that perfect snap.
Storing and Bringing It Back to Life
Fridge Storage
Place cooled chips in an airtight container lined with a paper towel to absorb any residual moisture. Stored in the refrigerator, they stay crisp for up to three days. If you notice a slight softening, a quick 2‑minute reheat in a preheated 350°F oven restores the crunch.
Freezer Friendly
For batch cooking, spread the cooled chips on a parchment‑lined tray and freeze for one hour, then transfer to a zip‑top freezer bag. They’ll keep for up to a month. When you’re ready to serve, toss them straight into a hot oven for 5‑7 minutes; the heat revives the texture without making them greasy.
Best Reheating Method
To bring back that ghostly snap, preheat your oven to 375°F, arrange the chips on a fresh parchment sheet, and add a tiny splash of water (about a teaspoon) over the batch. The steam generated prevents drying out while the oven’s dry heat restores crispness. In just 4‑5 minutes, you’ll hear that familiar crackle.