Picture this: I was in the middle of a Friday night cook‑out, the grill was roaring, and I thought I had the perfect steak recipe in mind. But the steak turned out dry, the salsa was too bland, and the tortillas were a sad, soggy mess. I stared at the kitchen counter, feeling the sting of disappointment like a dropped ice cube. That moment was the spark that ignited a culinary obsession, a mission to rewrite the entire fajita quesadilla experience. I knew I could do better, and I was determined to make a dish that would make even my skeptical friends gasp.
Now, imagine the first bite: the steak is marinated in a citrusy lime glaze that sings on your tongue, the chili powder gives a gentle heat that lingers like a secret whisper, and the tortillas are crisp on the edges, soft inside, like a warm hug in every bite. The aroma of sizzling onions and bell peppers wafts through the air, mingling with the smoky scent of cumin and paprika, creating a fragrant tapestry that draws you in. The sound of the steak sizzling in the pan is a satisfying hiss that signals the transformation of raw meat into flavor-packed bliss. The texture is a playful contrast—juicy steak, crunchy veggies, and gooey cheese that melts into a silky sauce. The final touch of fresh cilantro and a splash of sour cream adds a bright, creamy finish that balances the heat.
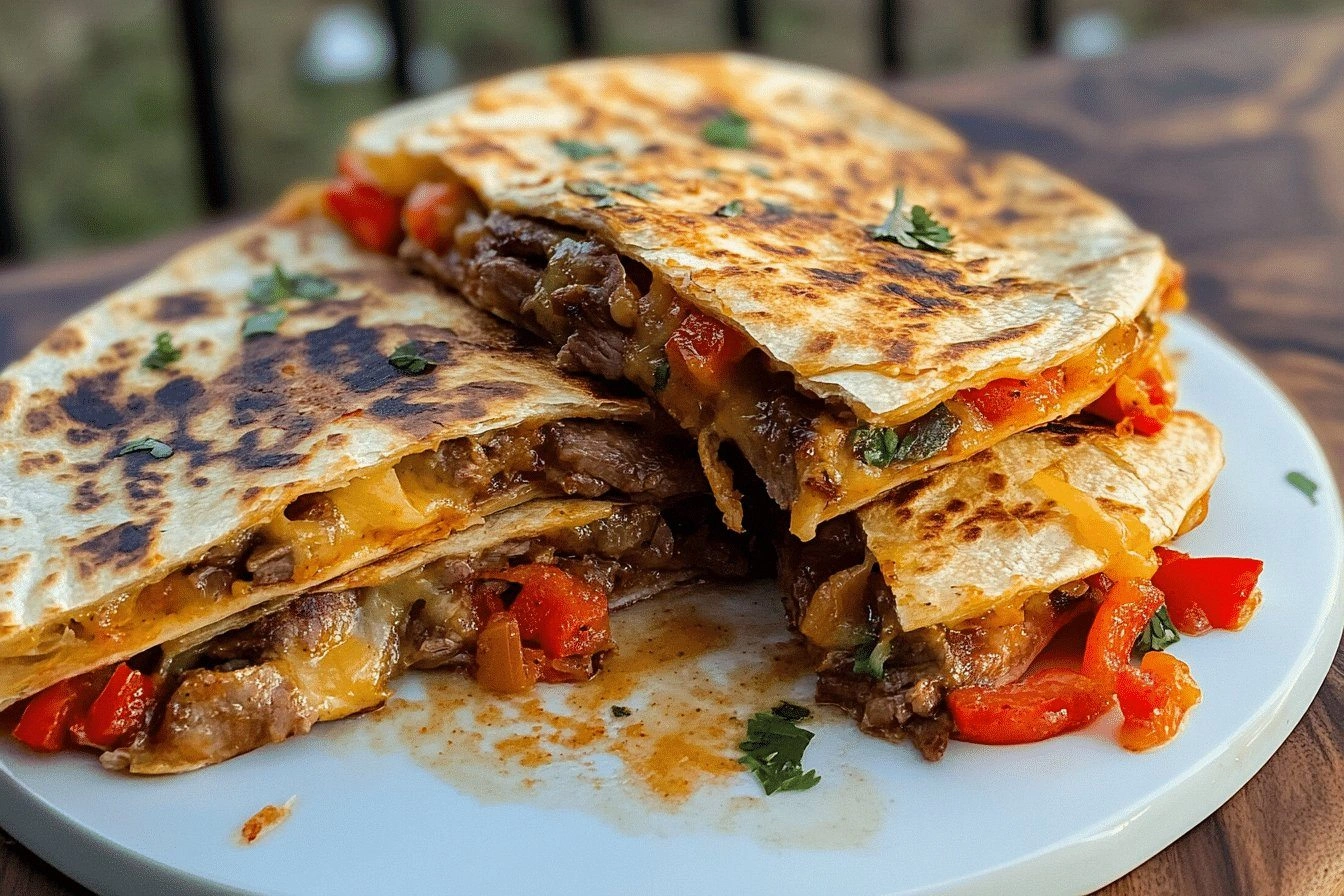
This isn’t just another recipe; it’s a culinary manifesto that redefines what a fajita quesadilla can be. The key lies in the dual marination process that infuses the steak with lime and chili, then a quick sear that locks in juices. The tortillas are lightly toasted on a griddle, giving them a subtle crunch that holds the fillings together. The cheese blend is carefully chosen to melt smoothly without overpowering the other flavors. And the assembly is a dance—layering the steak, veggies, and cheese, then folding the tortillas in a way that creates a golden, caramelized exterior. The result is a handheld masterpiece that delivers depth, balance, and a satisfying crunch in every bite.
What makes this version truly unforgettable is the unexpected addition of a splash of tequila to the steak rub, which gives a subtle smoky depth that you wouldn't expect in a street‑style dish. The tequila is evaporated during the sear, leaving behind a caramelized glaze that coats the meat like velvet. This small twist elevates the dish from ordinary to extraordinary, making each bite a revelation. I dare you to taste this and not go back for seconds. The secret is simple, but the flavor impact is huge.
If you’re ready to ditch the bland and embrace bold, this is the recipe you’ve been waiting for. Picture yourself pulling a perfectly seared steak from the pan, the sizzling sound echoing like applause, and the aroma of lime, chili, and toasted tortillas filling the kitchen. The moment you fold the quesadilla, the cheese starts to ooze, creating a golden, caramelized crust that shatters like thin ice when you bite. And now, I’m going to walk you through every single step—by the end, you’ll wonder how you ever made it any other way. Let’s dive in and turn your kitchen into a flavor laboratory.
Before we start, let me confess—I ate half the batch before anyone else got to try it. I know the temptation is real, but trust me, the leftovers are just as spectacular, especially when reheated with a splash of water. So grab your apron, and let’s turn this humble steak into a fiesta on a plate.
What Makes This Version Stand Out
- Marination Mastery: The steak undergoes a two‑step marination—first a lime‑chili rub, then a quick tequila‑infused glaze that caramelizes on the sear. This process locks in juices and adds a smoky citrus layer that sets the dish apart.
- Texture Tactics: The tortillas are toasted on a griddle until they’re just crisp enough to hold the fillings without tearing. The result is a buttery, crunchy shell that contrasts with the tender steak and crisp veggies.
- Cheese Chemistry: A blend of sharp cheddar and mild Monterey Jack melts into a silky sauce that coats the inside of the quesadilla. The cheeses are chosen for their melting properties, ensuring a gooey, cohesive filling.
- Heat Harmony: Chili powder, cumin, smoked paprika, and a hint of cayenne create a balanced heat that’s noticeable but never overwhelming. The spices mingle with the lime to produce a vibrant, layered flavor.
- Fresh Finish: A final splash of cilantro, a dollop of sour cream, and a drizzle of salsa add brightness and a creamy counterpoint to the savory core.
- Make‑Ahead Friendly: The steak can be marinated a day ahead, and the assembled quesadillas can be frozen without losing quality. This makes the dish ideal for busy weeknights or entertaining guests.
- Visual Appeal: The golden crust and vibrant green cilantro create a dish that looks as good as it tastes. It’s a crowd‑pleaser that’s perfect for photo‑ready meals.
- Versatility: Swap the steak for chicken, shrimp, or even tofu, and the flavor profile remains intact. This flexibility makes it a staple for any dietary preference.
Alright, let's break down exactly what goes into this masterpiece…
Inside the Ingredient List
The Flavor Base
The foundation of this dish is the lime‑chili steak rub. Lime juice not only tenderizes but also imparts a bright, citrusy punch that cuts through the richness of the meat. Chili powder, cumin, smoked paprika, and cayenne create a layered heat that’s both smoky and vibrant. Skipping any of these spices will diminish the complexity, leaving the steak feeling flat and one‑dimensional.
The Texture Crew
Flour tortillas are the unsung heroes that bind everything together. Toasting them on a hot griddle gives them a slight crunch that holds the fillings without tearing. If you prefer a softer crust, lightly brush them with olive oil before toasting, but be careful not to overdo it or they’ll become greasy.
The Unexpected Star
Tequila is the secret sauce that elevates this recipe. A splash of tequila in the steak rub adds a subtle smoky depth that isn’t obvious at first but becomes apparent with every bite. If you’re hesitant about using alcohol, simply replace it with a small amount of beef broth for a similar savory note.
The Final Flourish
Cilantro, sour cream, and salsa are the finishing touches that bring the dish together. Cilantro adds a fresh, herbaceous note that cuts through the richness, while sour cream provides a cool, creamy contrast to the heat. A spoonful of salsa on top gives a burst of acidity and color, completing the flavor profile. Omitting any of these will leave the dish feeling incomplete.
Everything's prepped? Good. Let's get into the real action…
The Method — Step by Step
- Start by mixing the lime juice, olive oil, chili powder, cumin, smoked paprika, garlic powder, cayenne, and a pinch of salt in a bowl. Whisk until the spices are evenly distributed and the mixture has a slick, almost syrupy consistency. This will be your steak rub. Let the steak sit in this mixture for at least 30 minutes—longer if you’re in a hurry, or overnight for maximum flavor. The citrus will break down the muscle fibers, giving the steak a buttery tenderness. This step is essential; skip it and you’ll lose the signature citrus kick.
- Heat a large cast‑iron skillet over high heat until it’s smoking hot. Add the steak in a single layer, ensuring it’s not overcrowded; if needed, cook in batches. Sear each side for 2–3 minutes until a caramelized crust forms. The steak should still be pink inside for medium‑rare; adjust time for your preferred doneness. This high‑heat sear locks in juices and creates a beautiful Maillard reaction that adds depth.
- While the steak rests, sauté the sliced onions and bell peppers in the same skillet with a drizzle of olive oil. Cook until they’re softened and slightly caramelized, about 5–7 minutes. The onions will release their natural sugars, adding a sweet counterpoint to the spicy steak. If you prefer a crunchier bite, add the peppers a minute earlier so they stay crisp. This step ensures the vegetables don’t turn mushy.
- Meanwhile, preheat a dry skillet or griddle over medium heat. Place each tortilla on the hot surface and toast for 30 seconds on each side, or until lightly browned. The tortillas should be flexible yet firm enough to fold without tearing. A quick toast adds a nutty flavor and a protective barrier that keeps the fillings from leaking. If you’re using a non‑stick pan, you can skip the oil; a little butter adds extra flavor.
- Assemble the quesadilla by spreading a generous layer of shredded cheese on half of the tortilla. Add a scoop of the seared steak, then top with sautéed onions, bell peppers, diced tomatoes, and avocado if desired. Finish with a drizzle of lime juice and a sprinkle of cilantro. Fold the tortilla over the filling, pressing gently to seal. The cheese acts as a glue, preventing the fillings from spilling out during the next step.
- Return the folded quesadilla to the skillet and press it down with a spatula. Cook for 3–4 minutes on each side until the cheese melts completely and the tortilla turns a deep golden brown. Flip only once to ensure an even crust. The heat should be medium‑high; if it’s too low, the tortilla will become soggy. This step is the moment of truth—watch the edges pull away as the crust forms.
- Once cooked, transfer the quesadilla to a cutting board and let it rest for 2 minutes. This rest period allows the cheese to set slightly, preventing a gooey mess when you cut. Slice each quesadilla into wedges using a sharp knife or pizza cutter for clean edges. Serve immediately with a dollop of sour cream, a spoonful of salsa, and an extra squeeze of lime for that bright finish.
- If you’re serving a crowd or planning ahead, you can freeze the assembled quesadillas before the final cooking step. Wrap each one tightly in foil and store in a freezer bag for up to 2 months. When ready to serve, thaw overnight and cook as directed. The texture will remain crisp, and the flavors will be just as vibrant.
That's it — you did it. But hold on, I've got a few more tricks that'll take this to another level.
Insider Tricks for Flawless Results
The Temperature Rule Nobody Follows
Many cooks set the pan too low, causing the steak to steam instead of sear. The key is a scorching hot skillet that instantly caramelizes the exterior. I keep a small drop of water in the pan; if it sizzles and evaporates instantly, the heat is right. Once the steak starts to sear, don’t touch it for a minute or two. This allows a crust to form that locks in juices and gives that coveted flavor.
Why Your Nose Knows Best
The aroma of the steak before you even taste it tells you everything about its doneness. If the smell is overwhelmingly meaty and metallic, the steak is undercooked. A subtle, nutty scent indicates a perfect Maillard reaction. Trust your nose; it’s a reliable guide to flavor and texture.
The 5-Minute Rest That Changes Everything
Letting the steak rest for five minutes after searing allows the juices to redistribute. If you slice it immediately, you’ll pull out all the liquid, leaving the meat dry. During the rest, the steak’s internal temperature continues to rise by 2–3 degrees, bringing it to the ideal medium‑rare.
The Secret to a Non-Tearing Tortilla
Tortillas can be fickle. The trick is to toast them just until they’re pliable but not fully cooked. Then, while assembling, use a light hand when folding. Over‑folding or pressing too hard can cause the tortilla to crack. Keep the folds gentle, and the tortilla will hold its shape.
The One-Ingredient Upgrade
A splash of lime juice on the finished quesadilla adds a bright, acidic pop that balances the richness. If you prefer a sweeter finish, add a drizzle of honey or a sprinkle of brown sugar before the final sear. This subtle sweet contrast is a game‑changer.
The Quick Reheat Trick
When reheating leftovers, add a tiny splash of water to the skillet before placing the quesadilla back on the heat. This creates steam that keeps the tortilla from drying out and the cheese from hardening. Flip only once, and you’ll get a crisp crust with a soft interior, just like fresh.
Now that you’ve mastered the basics, let’s explore some creative variations.
Creative Twists and Variations
This recipe is a playground. Here are some of my favorite ways to switch things up:
Chicken Fajita Quesadilla
Swap the steak for sliced chicken breast marinated in lime, garlic, and a touch of chipotle powder. The result is a leaner, yet equally flavorful version that’s great for lighter evenings.
Shrimp and Mango Fajita Quesadilla
Add shrimp sautéed with lime zest and a pinch of cayenne, then top with diced mango for a sweet, tropical twist. The shrimp’s natural sweetness pairs beautifully with the spicy kick.
Vegetarian Veggie Quesadilla
Omit the steak entirely and fill with roasted sweet potatoes, black beans, corn, and a generous layer of pepper jack cheese. This hearty option is perfect for plant‑based diners.
Mexican Street Corn Quesadilla
Replace the steak with grilled corn kernels, a dollop of mayo, lime zest, and crumbled cotija cheese. The result is a creamy, smoky corn‑filled quesadilla reminiscent of street corn.
Spicy Jalapeño Popper Quesadilla
Fill the quesadilla with cream cheese, chopped jalapeños, and shredded pepper jack. The creamy, spicy filling is a crowd‑pleaser for those who like a bit of heat.
Breakfast Burrito Quesadilla
Use scrambled eggs, bacon, and cheddar cheese to create a breakfast version. Add a drizzle of salsa and a splash of hot sauce for a morning kick.
Storing and Bringing It Back to Life
Fridge Storage
Store cooked quesadillas in an airtight container for up to 3 days. Keep the tortilla and filling separate if possible; this prevents the tortilla from becoming soggy. When ready to eat, warm in a skillet or microwave for 30 seconds, then finish on a skillet to crisp the crust.
Freezer Friendly
Wrap each quesadilla tightly in foil, then place in a freezer bag. Freeze for up to 2 months. Thaw overnight in the refrigerator before reheating. The texture remains crisp, and the flavors stay vibrant.
Best Reheating Method
The skillet method is the gold standard. Heat a non‑stick pan over medium heat, add a splash of water, then place the quesadilla. Cover for a minute, then remove the cover and allow the crust to crisp for an additional minute. This technique keeps the tortilla crunchy and the cheese perfectly melted.