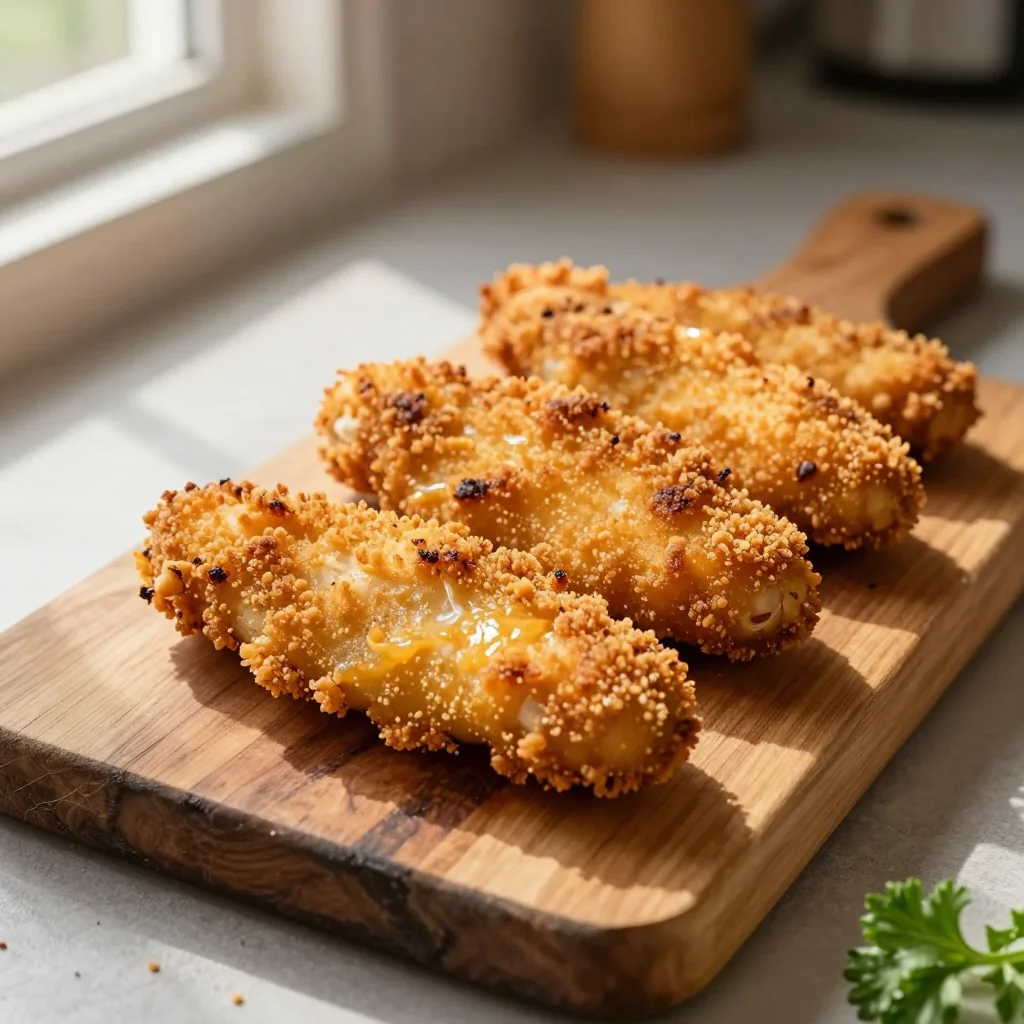
Crispy, golden‑brown chicken tenders with a light, airy panko coating—perfect for family dinners or game‑day snacks.
When I was twelve, my mother would pull a tray of chicken tenders from the oven on Saturday evenings, the kitchen filling with the comforting scent of toasted breadcrumbs and melted butter. I remember sitting at the kitchen table, elbows propped on the counter, eyes fixed on the golden edges that promised a perfect crunch. Those moments sparked a lifelong love for simple, well‑executed comfort food.
This particular recipe draws inspiration from classic Japanese katsu, where panko provides an airy, melt‑in‑your‑mouth texture that ordinary breadcrumbs simply can’t match. By baking instead of deep‑frying, we keep the dish lighter while preserving that irresistible crunch, making it suitable for everyday meals and special occasions alike.
In the next few sections, I’ll walk you through every detail—from selecting the best chicken breast tenders to achieving a flawless crust using a quick egg wash and a seasoned panko mixture. You’ll also discover why each spice matters, how to adjust the recipe for larger gatherings, and tips that guarantee a perfectly baked result every time.
So roll up your sleeves, preheat that oven, and let’s create a batch of chicken tenders that will have everyone reaching for seconds.
🌟 Why This Recipe Will Win Your Heart
From the first bite to the last crumb, this dish balances flavor, texture, and nutrition in a way that feels indulgent yet surprisingly wholesome.
- ✨ Irresistible Crunch: The panko crumbs, when lightly brushed with olive oil, toast to a delicate, airy crunch that stays crisp even after a brief rest.
- ✨ Healthier Than Fried: Baking eliminates the need for large amounts of oil, cutting calories while preserving the juicy interior of the chicken.
- ✨ Simple Ingredient List: Only pantry staples are required, making this recipe accessible for beginners and seasoned cooks alike.
- ✨ Versatile Pairings: Serve with a tangy honey‑mustard dip, a creamy ranch, or a fresh garden salad—the possibilities are endless.
- ✨ Kid‑Friendly Appeal: The familiar shape and mild seasoning make it a hit with younger diners without compromising adult taste.
- ✨ Easy Scaling: The built‑in portion adjuster lets you expand or shrink the recipe without recalculating each measurement manually.
🥗 The Ingredients
📝 Complete Ingredient List
For the Chicken Coating:
For the Egg Wash:
For Garnish (Optional):
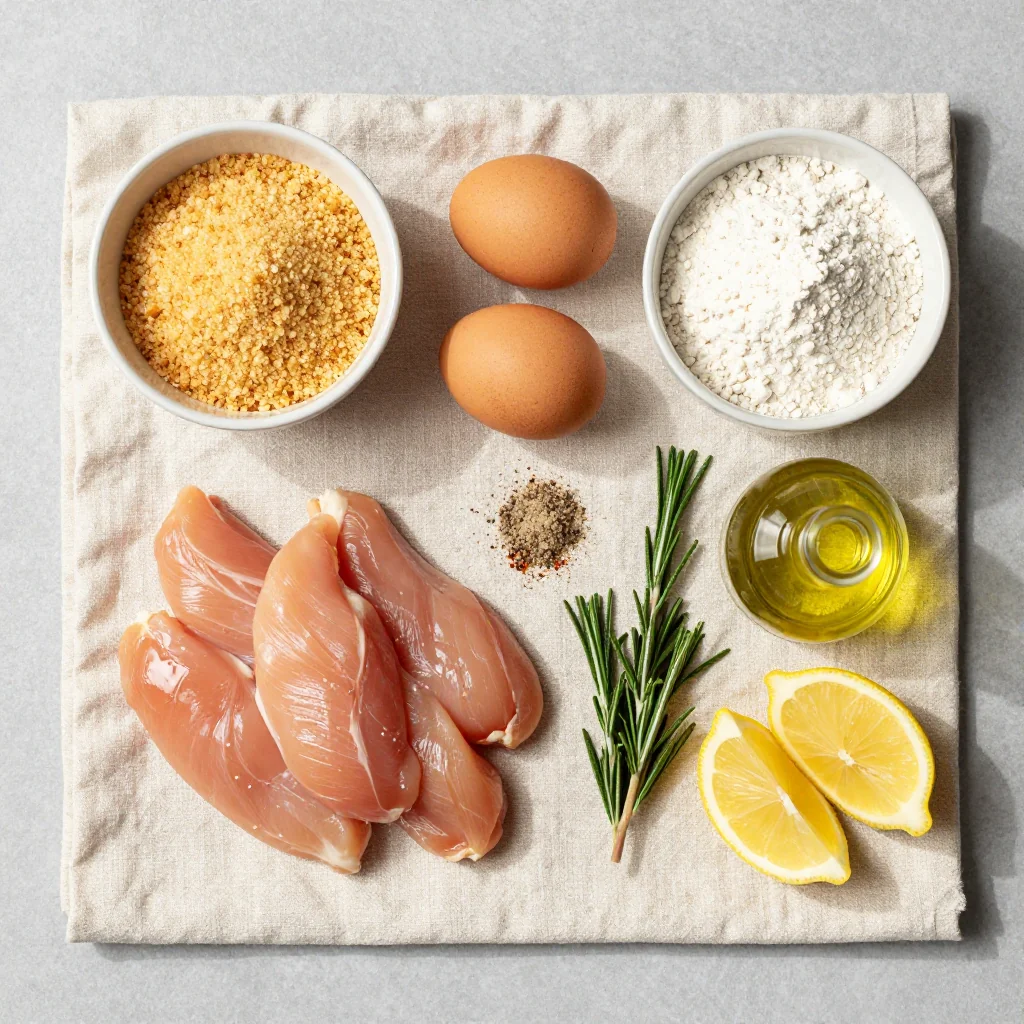
🔍 Focus on Key Ingredients
Chicken Breast Tenders
Chicken breast tenders are naturally tender and cook quickly, making them ideal for a quick dinner. Choose pieces that are uniform in size to ensure even cooking. If you can’t find pre‑cut tenders, simply slice a boneless breast into 1‑inch strips, being careful not to cut too thin, which can dry out during baking.
Panko Breadcrumbs
Panko is a Japanese breadcrumb made from crustless white bread. Its larger, airy flakes create a light, crunchy texture that stays crisp longer than traditional breadcrumbs. For an extra burst of flavor, toast the panko lightly in a dry skillet before mixing with the cheese and spices.
Parmesan Cheese
Freshly grated Parmesan adds umami depth and a subtle salty bite that balances the mild chicken. It also helps the coating adhere to the surface, giving the crust a richer color and a slightly nutty aroma.
🔄 Quick Substitutions
| If you don’t have… | Use instead… |
|---|---|
| Panko breadcrumbs | Fine cornflakes crushed |
| Parmesan cheese | Grated Pecorino Romano |
| Olive oil | melted butter or avocado oil |
👨🍳 Step‑by‑Step Instructions
Follow these detailed steps to achieve perfectly baked, golden‑brown chicken tenders with a satisfying crunch.
📋 Phase 1: Preparation & Mise en Place
Gather your tools, preheat the oven, and set up a three‑station assembly line.
Preheat the Oven
Set your oven to 220°C (425°F) and place a wire rack on a rimmed baking sheet. The rack allows hot air to circulate, ensuring the tenders stay crisp on all sides.
Prepare the Egg Wash
In a shallow bowl, whisk together the two eggs and 30 ml of milk until fully combined. This mixture will help the panko adhere and add a subtle richness.
Season the Panko
In a separate wide bowl, combine the panko, grated Parmesan, garlic powder, smoked paprika, salt, and pepper. Toss gently to distribute the spices evenly.
🔥 Phase 2: Coating & Baking
Create a uniform crust on each piece of chicken and bake to perfection.
Coat the Chicken
Dip each chicken strip first into the egg wash, letting any excess drip off, then press it into the seasoned panko mixture. Ensure an even coating on all sides. Place the coated tenders on the prepared wire rack.
Drizzle with Olive Oil
Lightly drizzle 30 ml of olive oil over the coated tenders. The oil helps the panko turn a beautiful golden hue without deep‑frying.
Bake the Tenders
Slide the tray into the preheated oven and bake for 20‑25 minutes, turning once halfway through. The tenders are done when the coating is deep golden and the internal temperature reaches 74°C (165°F).
✨ Phase 3: Finishing & Serving
Final checks, garnish, and plating.
Check for Doneness
Insert a meat thermometer into the thickest part of a tender; it should read at least 74°C (165°F). If you don’t have a thermometer, cut into the center—juices should run clear.
Garnish
Scatter freshly chopped parsley over the hot tenders for a pop of color and a fresh herbal note.
Serve
Arrange the chicken tenders on a platter with your favorite dipping sauces—honey‑mustard, spicy sriracha mayo, or classic ranch. Pair with a crisp green salad or sweet potato fries for a complete meal.
💡 Expert Tips & Tricks
🛒 Choosing the Right Ingredients
When shopping for chicken, look for meat that is uniformly pink with a firm texture. Avoid any pieces that appear gray or have a slimy feel. For the panko, Japanese brands such as Kikkoman or Nankin are ideal because they are coarser and less dense than generic breadcrumbs, delivering that airy crunch you crave.
🔪 Preparation Techniques
Pat the chicken dry with paper towels before dipping. Excess moisture can cause the coating to slide off during baking. Arrange the coating stations in a line—wet, dry, and back to wet—so you can work efficiently without cross‑contamination.
🌡️ Mastering the Cooking Process
Preheating the oven is non‑negotiable; a hot oven creates steam that helps the panko set quickly, locking in moisture. If you notice uneven browning, rotate the pan halfway through the bake. Using a convection setting can also promote even heat distribution.
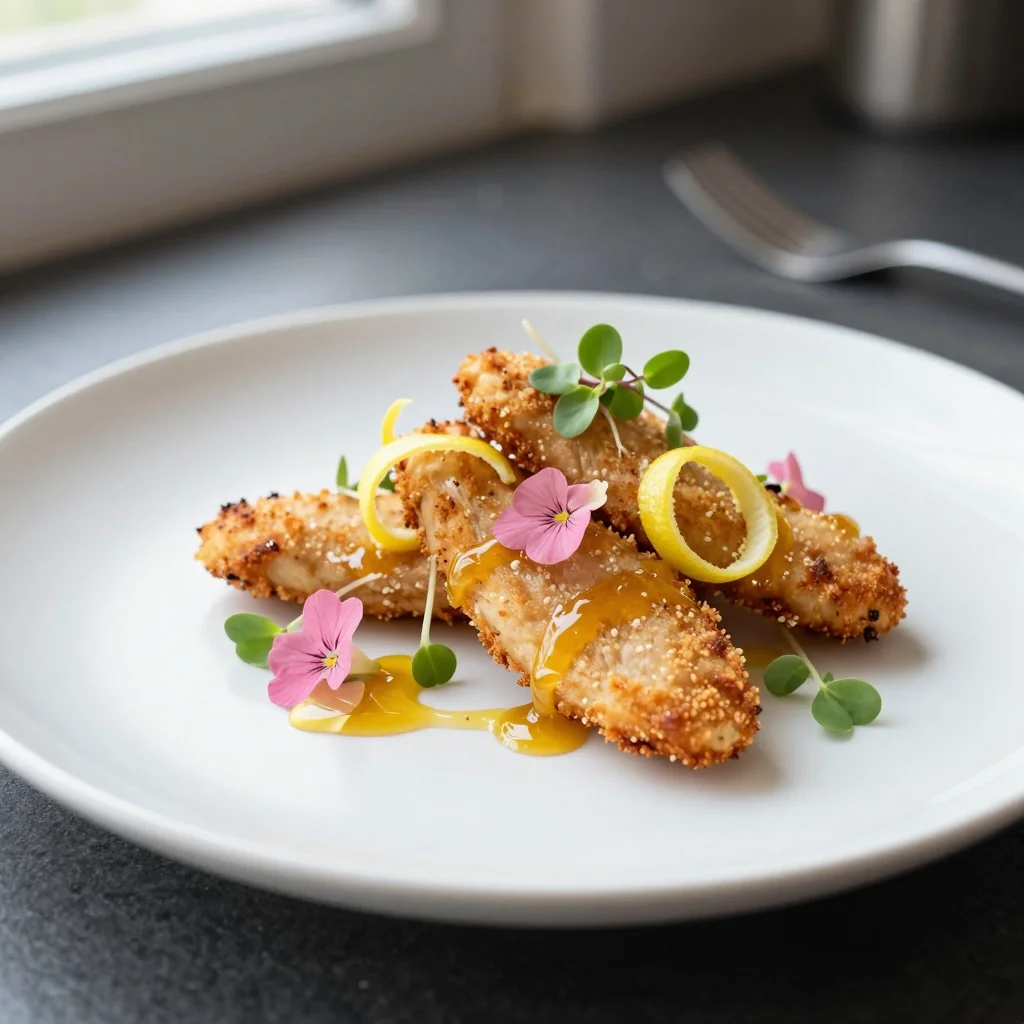
🍽️ Presentation & Service
Serve the tenders on a wooden board for rustic charm, or on a sleek white platter for a modern look. Add a small ramekin of sauce beside each portion, and sprinkle a few extra parsley leaves for visual appeal.
🏆 Pro Tips
Elevate your chicken tenders from great to restaurant‑level with these insider secrets.
- 🎯 Brine the Chicken: Submerge the tenders in a light brine (1 Tbsp salt dissolved in 2 cups water) for 15 minutes before coating. The brine seasons the meat internally and helps retain moisture during baking.
- 🎯 Double‑Coat for Extra Crunch: After the first panko coating, dip the tenders back into the egg wash and coat a second time. This creates a thicker, crunchier crust without adding extra fat.
- 🎯 Use a Thermometer: Consistent internal temperature ensures safety and prevents over‑cooking. A digital instant‑read probe is ideal for quick checks.
- 🎯 Add a Touch of Sweetness: Mix a teaspoon of honey or maple syrup into the egg wash. The caramelization adds a subtle sweet note that balances the smoky paprika.
- 🎯 Finish with a Butter Glaze: Melt 15 g of butter, stir in a pinch of smoked paprika and drizzle over the baked tenders just before serving for a glossy, flavor‑intense finish.
- 🎯 Rest Before Serving: Let the tenders rest for 3‑5 minutes after removing from the oven. This allows the juices to redistribute and the crust to firm up.
"Great cooking is about mastering the fundamentals and then daring to add your own twist." — Thomas Keller
🔄 Variations & Adaptations
The core technique of coating and baking is a canvas for countless flavor experiments and dietary adjustments.
🥬 Vegetarian / Vegan Version
Swap the chicken for thick‑cut cauliflower florets or firm tofu strips. For tofu, press it for 20 minutes to remove excess water, then follow the same coating process. Use a plant‑based milk (such as oat or soy) in the egg wash and replace the eggs with a mixture of 1 Tbsp flaxseed meal + 3 Tbsp water (let sit 5 minutes).
- Cauliflower florets (500 g) – provides a hearty bite and absorbs the flavors.
- Flaxseed “egg” – binds the coating without animal products.
🌶️ Flavor Variations
Adjust the spice blend to match the cuisine you’re craving. Below are three popular twists.
Spicy Version:
Add 1 tsp cayenne pepper and 1 tsp chipotle powder to the panko mix. Serve with a cooling cucumber‑yogurt dip.
Mediterranean Version:
Incorporate 1 tsp dried oregano, 1 tsp lemon zest, and replace Parmesan with crumbled feta after baking. Pair with a side of tzatziki.
Asian Version:
Mix 1 tsp five‑spice powder, 1 tsp toasted sesame seeds, and drizzle a soy‑ginger glaze over the finished tenders.
⚠️ Dietary Adaptations
Gluten‑Free:
Use gluten‑free panko or finely ground rice crackers in place of traditional panko. Ensure the flour used for dusting (if any) is also gluten‑free.
Lactose‑Free:
Replace Parmesan with a lactose‑free hard cheese or nutritional yeast for a cheesy flavor without dairy.
Low‑Calorie:
Reduce the olive oil drizzle to a light spray, and serve with a side of steamed vegetables instead of starchy fries.
👶 Family / Kid‑Friendly Version
For picky eaters, keep the seasoning simple—just salt and a pinch of pepper. Serve with a sweet honey‑mustard dip and a side of carrot sticks. Cutting the tenders into bite‑size pieces makes them easier for small hands.
📦 Storage & Reheating
🧊 Conservation
Refrigerator:
- Duration: 3 days
- Container: Airtight glass or BPA‑free plastic container
- Tip: Place a paper towel at the bottom to absorb excess moisture and keep the crust crisp.
Freezer:
- Duration: 2 months
- Method: Cool completely, then flash‑freeze on a tray before transferring to a zip‑top bag.
- Defrosting: Transfer to the refrigerator overnight or use the microwave’s defrost setting.
💡 For best texture, reheat from frozen using the oven method rather than the microwave.
♨️ Reheating
🔥 Oven (Recommended):
- Preheat to 190°C (375°F).
- Place tenders on a wire rack over a baking sheet.
- Cover loosely with foil and heat for 8 minutes.
- Remove foil and continue for 4‑5 minutes until the crust regains its crunch.
⚡ Microwave (Quick):
- Cover with a microwave‑safe lid.
- Heat on medium power for 1 minute.
- Check and heat additional 30‑second intervals as needed.
- Finish with a quick 30‑second blast on high to revive some crispness.
🍳 Skillet:
Heat a non‑stick skillet over medium heat, add a drizzle of oil, and pan‑fry the tenders for 2‑3 minutes per side until heated through and the crust is re‑crisped.
🍷 Perfect Pairings
🥗 Side Dishes
- Mixed Green Salad: A light vinaigrette with lemon and olive oil balances the richness of the chicken.
- Sweet Potato Fries: Their natural sweetness complements the smoky paprika in the crust.
- Roasted Brussels Sprouts: The caramelized edges add depth and a touch of bitterness that cuts through the cheese.
🍷 Wine & Beverage Pairings
- Chardonnay (unoaked): Its bright acidity matches the crisp crust without overpowering the chicken.
- Pinot Noir: Light red fruit notes pair nicely with the smoky paprika.
- Non‑Alcoholic: Sparkling water with a slice of lime or a chilled hibiscus iced tea.
🍰 To Complete the Meal
Start with a simple tomato bruschetta, follow the chicken tenders with a citrus‑y panna cotta, and finish with a drizzle of caramel sauce over vanilla ice cream for a sweet contrast.
❓ Frequently Asked Questions
Q: Can I use chicken thighs instead of breast tenders?
Yes, boneless, skinless chicken thigh strips work well and add extra juiciness. Because thighs are slightly fattier, you may want to reduce the olive oil drizzle by half to avoid excess greasiness.
Q: How do I prevent the panko from falling off during baking?
Make sure each piece is fully coated in the egg wash before dredging in panko. Press the crumbs gently onto the surface to create a bond. Using a wire rack also helps the coating set without steaming.
Q: Is it okay to skip the Parmesan cheese?
You can omit the cheese, but you’ll lose some of the umami depth and the golden color. A vegan alternative is nutritional yeast, which adds a cheesy flavor without dairy.
Q: My tenders turned out soggy—what went wrong?
Common causes include overcrowding the baking sheet, insufficient preheating, or using a low‑fat coating. Ensure the oven is fully preheated, use a wire rack, and avoid stacking the tenders.
Q: Can I freeze the coated, uncooked tenders?
Absolutely. After coating, place the raw tenders on a parchment‑lined tray, freeze until solid, then transfer to a zip‑top bag. Bake directly from frozen, adding an extra 5‑7 minutes to the cooking time.
Q: How far in advance can I prepare the egg wash?
The egg wash can be whisked up to 2 hours ahead and stored in the refrigerator. Give it a quick stir before using to recombine any settled milk.
🎉 To Your Oven!
This oven‑baked chicken tender recipe delivers the satisfying crunch of fried favorites while keeping the preparation simple and the nutrition sensible. By mastering the balance of a light egg wash, seasoned panko, and a hot, well‑ventilated oven, you’ll create a dish that feels indulgent yet is approachable for any home cook. Whether you’re feeding a family, entertaining friends, or meal‑prepping for the week, the adaptable portion control and storage tips make this recipe a reliable staple in your culinary arsenal.
Give it a try, share your photos, and let us know how you customized the flavors. Your feedback helps us refine the guide and inspires others to experiment. Don’t forget to leave a rating and comment below—your insights are the secret ingredient that makes this community thrive.
Have you tried this recipe?
Leave a comment and rating below! Share your photos on Instagram with #CrispyPankoTenders for a chance to be featured.
Chicken Tenders Oven Baked with Panko Crust
Crispy baked chicken tenders with a light, airy panko crust—perfect for any occasion.
📝 Ingredients
Coating
Egg Wash
Garnish (optional)
👨🍳 Instructions
- 1 Preheat oven to 220°C (425°F) and place a wire rack on a baking sheet.
- 2 Whisk eggs and milk together in a shallow bowl.
- 3 Mix panko, Parmesan, garlic powder, smoked paprika, salt, and pepper in another bowl.
- 4 Dip each chicken strip into the egg wash, then press into the seasoned panko, ensuring an even coating.
- 5 Arrange coated strips on the rack and drizzle with olive oil.
- 6 Bake for 20‑25 minutes, turning once, until golden and internal temperature reaches 74°C (165°F).
- 7 Let rest 3‑5 minutes, then sprinkle with fresh parsley if desired.
- 8 Serve with your favorite dipping sauce and sides.
- 9 Store leftovers in an airtight container; reheat in the oven for best texture.
- 10 Enjoy your crispy, oven‑baked chicken tenders!
🥗 Nutritional Information (per serving)
*Values are estimates based on standard ingredient data.
📚 You Might Also Like
Crispy Baked Fish Sticks
Honey Garlic Chicken Wings
Parmesan Crusted Zucchini Fries


💬 Comments & Reviews
Leave a Comment
Comments will appear here once readers share their thoughts.