It started on a rain‑slick Saturday night, when I was scrambling to salvage a half‑baked batch of cookies that had gone rogue in the oven. The kitchen smelled like burnt sugar and disappointment, and I stared at the charred mess, thinking, “If only I had a way to turn this disaster into something edible.” I was right. A quick search on the internet led me to a recipe that promised to resurrect the worst of my culinary mishaps into a gloriously sweet, crunchy snack mix that would make even my skeptical roommate swoon.
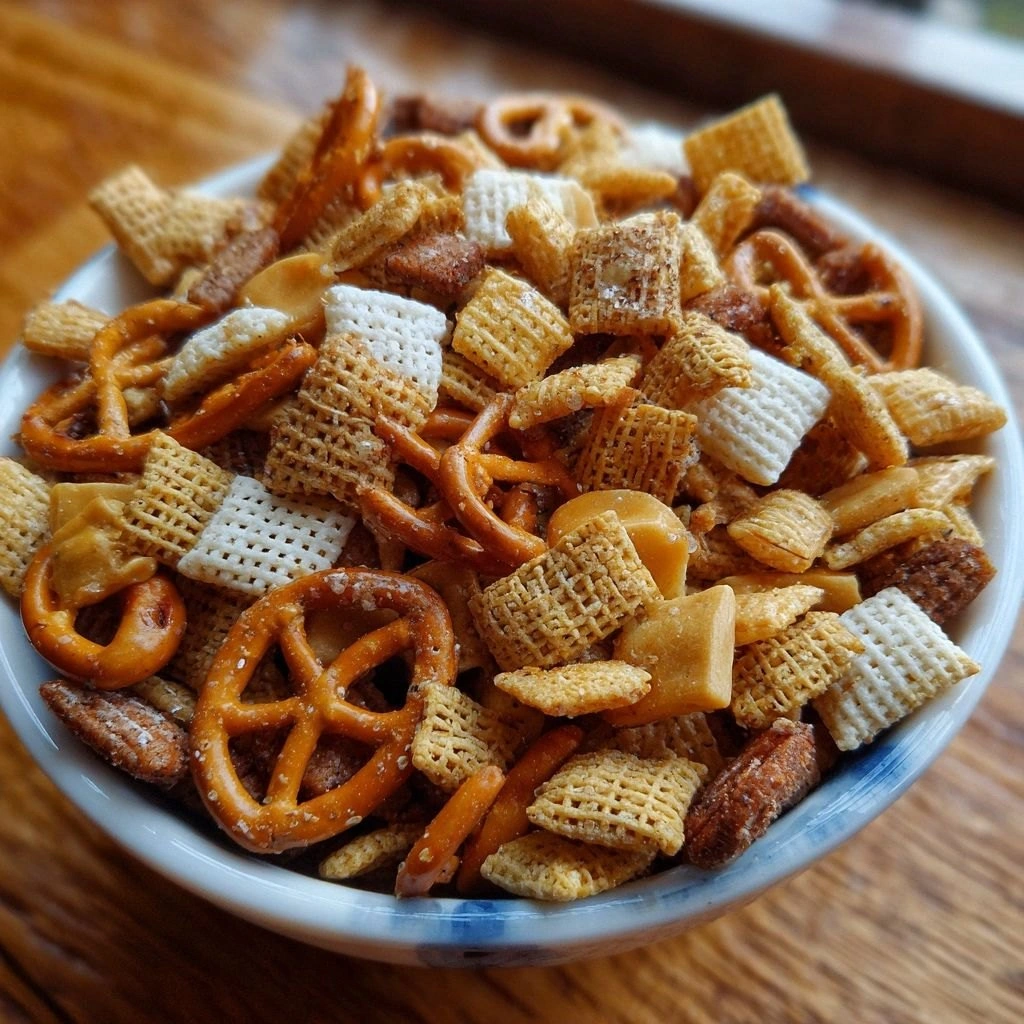
I was skeptical, but the moment the aroma hit my nose—a blend of buttery popcorn, caramelized sugar, and chocolate—my doubts evaporated. The crunch was unmistakable, the sweet coating glistening like a sugary coat on a freshly baked cookie, and the texture was a satisfying blend of airy popcorn, salty pretzels, and soft marshmallows. The first bite was a burst of caramelized sweetness balanced by a subtle salt kick, and the mixture released a faint hint of toasted nuts that made my mouth water. I felt that familiar, guilty excitement that only comes from discovering a recipe that turns kitchen catastrophes into edible triumphs.
This version of the White Trash Sweet Snack Mix is not just another mix‑and‑bake recipe. It’s a meticulously balanced symphony of flavors, textures, and colors that elevate the humble snack to a showstopper. The secret lies in the precise ratio of sweet to salty, the careful timing of each ingredient’s addition, and the subtle twist of adding a splash of honey for that extra glossy sheen. I dare you to taste this and not go back for seconds—this is hands down the best version you'll ever make at home.
If you’ve ever found yourself staring at a bag of stale chips or a forgotten pot of popcorn, this recipe is your new go-to. Picture yourself pulling this out of the oven, the whole kitchen smelling incredible, and a mound of crunchy, sweet goodness waiting to be devoured. Let me walk you through every single step—by the end, you’ll wonder how you ever made it any other way.
What Makes This Version Stand Out
- Flavor Depth: The blend of caramelized sugar, honey, and chocolate creates a layered sweetness that isn’t cloying but rich and complex, making every bite a discovery.
- Crisp Texture: Popcorn, pretzels, and cornflakes are toasted to perfection, while marshmallows soften just enough to fuse the mix without becoming soggy.
- Easy Assembly: All ingredients are pre‑measured and ready to toss, meaning you can whip up a batch in minutes—no complicated sauces or separate pans.
- Versatile Appeal: This mix works for game nights, movie marathons, or a quick snack on the go; it’s a crowd‑pleaser that can be served hot or cold.
- Make‑Ahead Friendly: Once cooled, the mix can be stored in an airtight container for up to a week, making it perfect for busy schedules.
- Budget Conscious: By using pantry staples and a few inexpensive add‑ons, you get a high‑quality snack without breaking the bank.
Alright, let’s break down exactly what goes into this masterpiece…
Inside the Ingredient List
The Flavor Base
The foundation of this mix is the sweet, buttery coating that binds everything together. Butter melts into the popcorn and pretzels, creating a glossy, caramelized layer when combined with brown sugar and honey. The honey adds a subtle floral note that balances the richness of the butter, while the brown sugar contributes deep molasses undertones that make the mix feel indulgent without being overpowering. If you skip the honey, the mix will still taste good, but you’ll lose that glossy sheen and the subtle sweetness that makes each bite memorable.
The Texture Crew
Popcorn is the star of the show, providing airy, light bites that contrast with the denser pretzels and cornflakes. Pretzels bring a satisfying crunch and a hint of saltiness that cuts through the sweetness, while cornflakes add a crisp, almost buttery texture that holds up well under the sugary glaze. Marshmallows soften and fuse the mix together, creating a chewy center that’s a delightful surprise in each bite. If you’re allergic to nuts, simply omit them, but keep in mind that the nuts add a savory crunch that balances the sweetness.
The Unexpected Star
Chocolate chips are the secret weapon that turns a simple snack into a dessert. They melt slightly when heated, creating pockets of chocolate that ooze into the crunchy base, delivering a burst of rich flavor. The chips also help keep the mix from becoming too dry; as they melt, they release a small amount of fat that coats the other ingredients. If you prefer a dairy-free version, use dairy‑free chocolate chips or dark chocolate chunks for a slightly bitter contrast.
The Final Flourish
Sea salt is the finishing touch that elevates the entire mix. It brings out the caramel notes and balances the sweetness, making each bite a harmonious experience. A pinch of sea salt is all you need; too much will make the mix overly salty and ruin the delicate balance. If you’re watching sodium, you can reduce the amount or use a low‑sodium salt alternative.
Everything's prepped? Good. Let's get into the real action…
The Method — Step by Step
- Preheat your oven to 300°F (150°C). Line a large baking sheet with parchment paper or a silicone mat to prevent sticking. This low temperature allows the butter and sugar to melt evenly without burning.
- In a large mixing bowl, combine the popcorn, crushed pretzels, cornflakes, and nuts. Toss them together so each piece is evenly coated with the dry ingredients.
- In a small saucepan over low heat, melt the butter. Once melted, stir in the brown sugar and honey until fully dissolved, creating a glossy syrup. Keep the heat low to avoid caramelizing the sugar too quickly.
- Pour the syrup over the dry mixture, using a spatula to fold the ingredients gently. Ensure every piece is coated; the syrup should cling to each item like a sweet, buttery glaze.
- Add the chocolate chips, marshmallows, and sea salt. Stir until the chocolate starts to melt slightly and the marshmallows soften. This is the moment of truth—watch the color change and smell the sweet aroma.
- Spread the mixture evenly onto the prepared baking sheet. Press lightly to compact the mix, ensuring a uniform layer that will bake evenly.
- Bake for 20 minutes, then remove the sheet from the oven. Let the mix cool for 5 minutes before stirring to redistribute the melted chocolate and marshmallows. This helps the chocolate set into pockets.
- Return the sheet to the oven for an additional 10 minutes, or until the edges of the mix start to turn golden brown. The aroma will intensify, and the mix will develop a caramelized crust.
- Remove from the oven and let cool completely on the sheet. Once cooled, break the mix into bite‑sized clusters. Store in an airtight container at room temperature for up to 7 days.
That's it — you did it. But hold on, I've got a few more tricks that'll take this to another level…
Insider Tricks for Flawless Results
The Temperature Rule Nobody Follows
Many people bake at a high temperature, causing the sugar to burn before the mix has a chance to set. Baking at 300°F (150°C) ensures a slow, even melt that allows the butter and sugar to coat each bite without scorching. I once tried 350°F and ended up with a bitter, burnt taste—don’t make that mistake.
Why Your Nose Knows Best
As the mix bakes, you’ll notice the scent shift from buttery to caramelized. That scent is your cue that the sugar has reached the right stage. If you’re unsure, give the mix a quick sniff; a sweet, caramel aroma means it’s ready.
The 5‑Minute Rest That Changes Everything
After the first 20‑minute bake, let the mix sit on the sheet for 5 minutes before stirring. This pause lets the melted chocolate set into pockets, creating that gooey, chocolatey center that’s the hallmark of this snack mix.
Use a Silicone Mat for Easy Cleanup
A silicone baking mat prevents the mix from sticking, making cleanup a breeze. If you’re using parchment, you might find bits of the mix cling to the paper, which can be frustrating.
Keep It Cool
Once the mix has cooled, break it into clusters and store in an airtight container. If you let it sit at room temperature for too long, the sugar will recrystallize, making the mix gritty.
Creative Twists and Variations
This recipe is a playground. Here are some of my favorite ways to switch things up:
Spicy Sweet Surprise
Add a pinch of cayenne pepper and a drizzle of maple syrup before baking. The heat balances the sweetness, creating a flavor profile that’s both sweet and spicy.
Nutty Chocolate Explosion
Swap the mixed nuts for a blend of chopped almonds and hazelnuts, and use dark chocolate chips. The nutty crunch pairs perfectly with the bittersweet chocolate.
Fruit‑Infused Delight
Stir in dried cranberries or raisins for a chewy, fruity burst. The fruit’s natural sweetness complements the caramelized sugar.
Holiday Holiday Mix
For a festive twist, add a handful of mini peppermint candies and a sprinkle of cinnamon. The mint and spice bring a holiday vibe to any gathering.
Vegan Version
Replace butter with coconut oil, use plant‑based chocolate chips, and ensure the marshmallows are vegan. The result is a fully vegan snack that still delivers on crunch and sweetness.
Guilt‑Free Snack
Use a sugar substitute like erythritol, swap regular popcorn for air‑popped, and choose a low‑fat chocolate. This version keeps the flavor while cutting calories.
Storing and Bringing It Back to Life
Fridge Storage
Store the cooled mix in an airtight container in the refrigerator for up to 3 days. The cool temperature keeps the chocolate from melting and preserves the crunch.
Freezer Friendly
For longer storage, freeze the mix in a sealed bag or container for up to 3 months. Thaw at room temperature for 30 minutes before serving.
Best Reheating Method
To revive a frozen or stale batch, spread the mix on a baking sheet and heat in a preheated oven at 250°F (120°C) for 10 minutes. This gently warms the mix without melting the chocolate, restoring crispness.