Picture this: I’m standing in my tiny kitchen, the smoke alarm buzzing like an angry choir, because I’d tried to flambé a jar of store‑bought marinara and ended up with a charcoal‑kissed disaster. My friends were eye‑rolling, the pizza night was doomed, and I swore off sauces forever. Then, in a moment of desperate inspiration (and a half‑eaten roasted red pepper from the grocery deli), I tossed that pepper into a pan with garlic, olive oil, and a splash of wine. The aroma that rose was nothing short of a siren song, and I knew I had stumbled onto something magical. That night, I made a sauce so smooth it could have been silk, so bright it could have lit up a winter’s night, and it turned my kitchen into a five‑star restaurant for a solid hour.
What does that sauce smell like? Imagine walking through a Mediterranean market at sunset: the smoky perfume of charred peppers, the sweet whisper of caramelized onions, a flirtatious hint of garlic that makes your nose do a little happy dance. You can hear the gentle hiss as the oil meets the pan, feel the warm, buttery glaze coating the back of a wooden spoon, and when you finally taste it, it’s a perfect balance of sweet, smoky, and just‑the‑right‑kick of heat. It clings to pasta like velvet, rides on grilled chicken like a silky cape, and even makes a humble slice of toasted baguette feel like a gourmet treat.
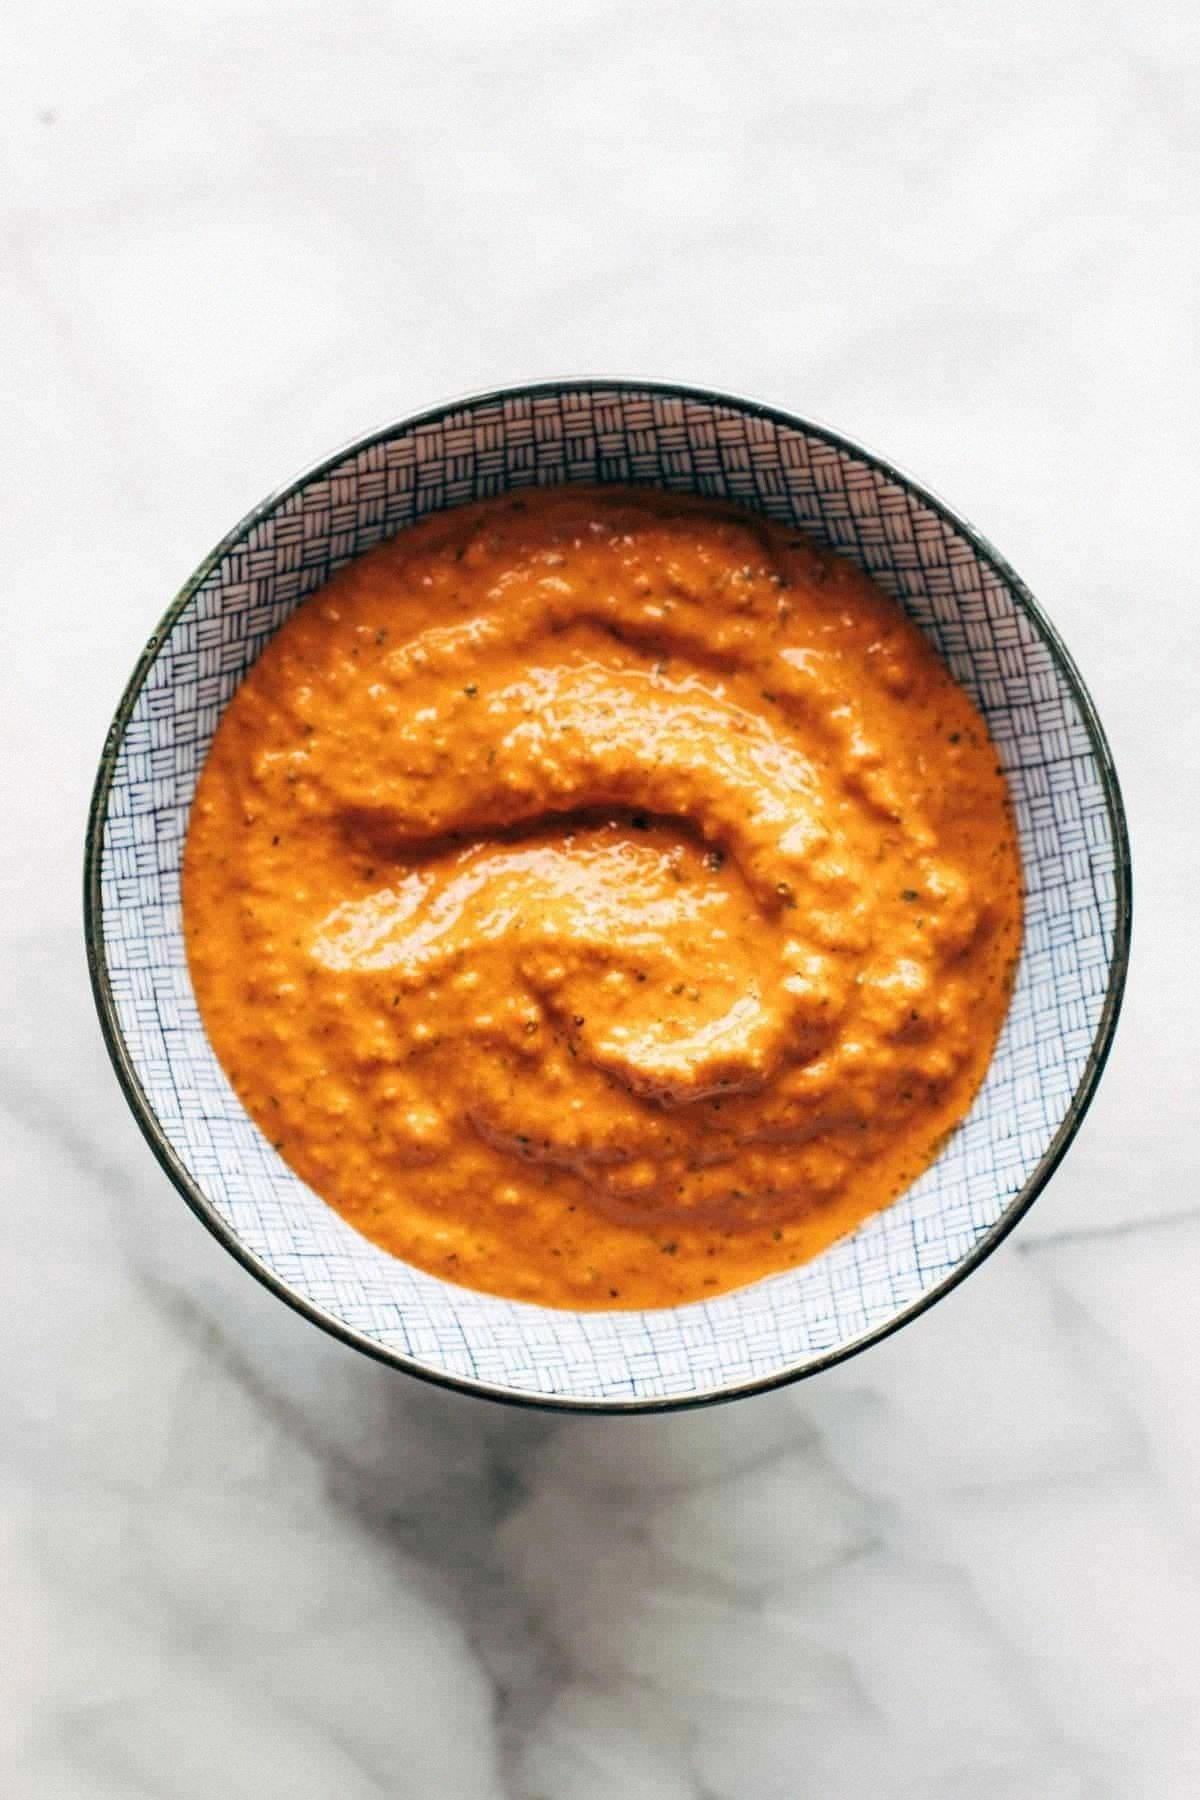
Most recipes for roasted red pepper sauce either skimp on the roasting process, drown the flavor in cream, or over‑salt everything until it tastes like a salty sea. This version, however, respects each ingredient, amplifies the natural sweetness of the peppers, and introduces a secret weapon that most home cooks never think to use: a splash of sherry vinegar that brightens the whole thing without overwhelming it. The result? A sauce that is hands down the best version you’ll ever make at home, and I’m willing to bet you’ll be daring anyone to taste it and not beg for seconds.
And here’s the kicker: I’m going to reveal a technique that most chefs keep under their aprons—roasting the peppers on a high‑heat broiler until the skin blisters and then slipping the charred skins off with a kitchen towel. It’s a tiny step that makes a massive difference, adding depth that you just can’t get from a jar. Okay, ready for the game‑changer? Let me walk you through every single step — by the end, you’ll wonder how you ever made it any other way.
What Makes This Version Stand Out
- Depth of Flavor: The peppers are charred to perfection, giving the sauce a smoky backbone that’s balanced by a subtle acidity from sherry vinegar.
- Creamy Texture: A splash of heavy cream at the end creates a silk‑smooth mouthfeel without turning the sauce cloyingly rich.
- Simplicity: Only nine ingredients, all pantry‑friendly, yet each one plays a starring role.
- Versatility: Works as a pasta sauce, a dip, a glaze for grilled meats, or even a vibrant base for soups.
- Ingredient Quality: Using fire‑roasted peppers (or the broiler trick) elevates the taste beyond any canned version.
- Cooking Method: A quick sauté followed by a gentle simmer locks in the flavors while preserving the bright color.
- Make‑Ahead Potential: It stores beautifully in the fridge for a week and freezes for three months, getting better after a night’s rest.
- Crowd Reaction: Even the most skeptical eaters admit it’s “like a hug for your taste buds.”
Inside the Ingredient List
The Flavor Base
Red Bell Peppers (4 large, fire‑roasted): These are the heart of the sauce. The char brings a smoky, almost caramelized note, while the flesh stays sweet and bright. Skipping the roasting step? You’ll end up with a bland, raw pepper taste that screams “canned.” If fresh peppers aren’t in season, look for jarred fire‑roasted ones—just rinse them well.
The Aromatic Crew
Garlic (3 cloves, minced): Garlic adds that unmistakable punch that makes the sauce sing. Too much and it overpowers the peppers; too little and you lose the depth. If you’re sensitive, try roasting the garlic alongside the peppers for a mellower flavor.
Shallot (1 small, finely diced): Shallots are milder than onions, providing a gentle sweetness that rounds out the sauce. You can substitute with half an onion if you’re out, but expect a stronger bite.
The Unexpected Star
Sherry Vinegar (1 tbsp): This is the secret weapon. Its bright acidity lifts the smoky richness, preventing the sauce from feeling heavy. If you don’t have sherry vinegar, a splash of apple cider vinegar works, though the flavor profile shifts slightly toward fruitiness.
The Final Flourish
Heavy Cream (¼ cup): The cream is added at the very end, just enough to coat each strand of pasta with a velvety sheen without drowning the pepper’s character. For a lighter version, swap with coconut milk, but you’ll get a subtle coconut undertone.
Olive Oil (2 tbsp): A good extra‑virgin olive oil brings fruitiness and helps sauté the aromatics. Using a cheap oil will make the sauce taste flat.
Sea Salt (½ tsp) & Freshly Cracked Black Pepper (¼ tsp): Simple seasoning that amplifies the other flavors. Taste as you go; the sauce should be bright, not salty.
Fresh Basil (a handful, torn): Added at the end for a fragrant pop. If you don’t have basil, flat‑leaf parsley works, but the flavor will be more herbaceous than sweet.
Everything's prepped? Good. Let’s get into the real action…
The Method — Step by Step
Preheat your oven’s broiler to high. Slice the red peppers in half, remove the seeds, and place them skin‑side up on a baking sheet lined with foil. Roast for 8‑10 minutes, or until the skins are blistered and blackened. Let them cool for a few minutes, then wrap them in a clean kitchen towel; the steam will loosen the skins, making them easy to peel. Pro tip: The charred bits are flavor gold—don’t discard them.
While the peppers are cooling, heat the olive oil in a heavy‑bottomed skillet over medium heat. Add the diced shallot and sauté for 2‑3 minutes until translucent, then toss in the minced garlic. You’ll hear a gentle sizzle—That sizzle when it hits the pan? Absolute perfection. Stir constantly to avoid burning; garlic loves attention but hates the dark.
Kitchen Hack: If you want a milder garlic flavor, add the garlic a minute later, after the shallots have softened.Remove the pepper skins, then roughly chop the roasted flesh. Transfer the peppers, along with any juices that collected on the baking sheet, into the skillet. Stir everything together, letting the flavors meld for about 2 minutes. The mixture should begin to smell smoky and sweet—if it doesn’t, increase the heat just a touch.
Now, pour in the sherry vinegar, letting it deglaze the pan. You’ll hear a lively hiss as the liquid meets the hot surface, lifting caramelized bits from the bottom. This is the moment of truth: the sauce should sizzle, steam, and fill the kitchen with a tangy perfume that makes you want to inhale deeply.
Reduce the heat to low and let the mixture simmer for 10‑12 minutes. Stir occasionally; the sauce should thicken slightly and the flavors should marry. Watch Out: If the sauce starts to stick, add a splash of water or broth—this prevents scorching and keeps the texture silky.
Watch Out: Over‑reducing will make the sauce too thick and intensify the saltiness; keep an eye on the consistency.Transfer the hot mixture to a high‑speed blender. Blend on low for 30 seconds, then gradually increase to high for another minute until the sauce is completely smooth. If you prefer a chunkier texture, pulse instead of full blend. Pure magic: The blending creates an emulsion that feels like velvet on the tongue.
Kitchen Hack: Blend while the sauce is still warm; heat helps the emulsion stay stable longer.Return the blended sauce to the skillet, stir in the heavy cream, and let it warm through for 2‑3 minutes. The sauce should take on a glossy sheen and coat the back of a spoon effortlessly. Taste and adjust seasoning with sea salt and black pepper—remember, the sauce should be bright, not salty.
Turn off the heat, fold in the torn basil leaves, and let the residual heat wilt them gently. This final flourish adds a fresh, aromatic finish that lifts the entire dish.
Serve immediately over al dente pasta, grilled chicken, or as a dip with crusty bread. If you’re not serving right away, let the sauce cool to room temperature before storing.
That’s it — you did it. But hold on, I’ve got a few more tricks that'll take this to another level…
Insider Tricks for Flawless Results
The Temperature Rule Nobody Follows
Never blend a cold sauce. The heat keeps the oil and water phases from separating, giving you that coveted silkiness. I once tried blending a cooled batch and ended up with a grainy mess that looked more like a paint palette than a sauce. Keep the sauce at a gentle simmer, and the blender will do its magic without fighting the temperature.
Why Your Nose Knows Best
Don’t rely solely on a timer—use your nose. When the shallots turn translucent and the garlic releases a buttery scent, you know the aromatics are ready. If you miss this cue and let them brown too long, you'll get a bitter undertone that no amount of vinegar can fix.
The 5‑Minute Rest That Changes Everything
After blending, let the sauce sit uncovered for five minutes. This short rest allows the flavors to meld and the pepper’s smoky notes to settle. I dared a friend to skip this rest, and his pasta ended up tasting “flat.” Trust the rest; it’s a tiny pause with a massive payoff.
Blend in Batches for Consistency
If your blender is small, blend in two batches instead of overloading. Over‑crowding can cause uneven blending, leaving pockets of pepper skin that bite. A smooth, uniform sauce is the hallmark of a pro.
Storage Savior: The Water Splash
When reheating from the fridge or freezer, add a splash of water or broth before warming. This revives the sauce’s velvety texture, preventing it from drying out. The water steams the sauce back to life, like a spa day for your palate.
Creative Twists and Variations
This recipe is a playground. Here are some of my favorite ways to switch things up:
Smoky Chipotle Kick
Swap one of the red peppers for a chipotle‑in‑‑adobo pepper. The smoky heat deepens the flavor profile, making it perfect for tacos or grilled shrimp. Keep the cream low to let the heat shine.
Creamy Coconut Dream
Replace the heavy cream with full‑fat coconut milk and add a pinch of toasted cumin. This creates a tropical twist that pairs beautifully with Thai noodles or roasted cauliflower.
Herbaceous Green
Blend in a handful of fresh spinach or kale along with the basil for a nutrient‑boosted, emerald‑green sauce. The greens mellow the pepper’s sweetness and add a subtle earthiness.
Roasted Garlic Fusion
Roast a whole head of garlic alongside the peppers, then mash the soft cloves into the sauce. The caramelized garlic adds a buttery depth, turning the sauce into a luxurious dip for artisan crackers.
Spicy Harissa Infusion
Stir in a tablespoon of North African harissa paste after blending. The complex spice blend adds warmth and a hint of cumin, perfect for serving over couscous or grilled lamb.
Cheesy Finish
Finish the sauce with a quarter cup of grated Pecorino Romano for a salty, nutty edge. This version works wonderfully as a topping for baked potatoes or as a base for a gourmet pizza.
Storing and Bringing It Back to Life
Fridge Storage
Transfer the cooled sauce to a clean glass jar, seal tightly, and store in the refrigerator for up to 7 days. The flavors will continue to develop, becoming more harmonious with each day.
Freezer Friendly
Portion the sauce into airtight freezer bags, flatten them for easy stacking, and freeze for up to 3 months. Thaw overnight in the fridge, then reheat gently on the stovetop.
Best Reheating Method
Warm the sauce over low heat, adding a tablespoon of water or broth per cup of sauce. Stir continuously until it reaches a silky consistency. Avoid high heat, which can cause the cream to separate and the sauce to become grainy.