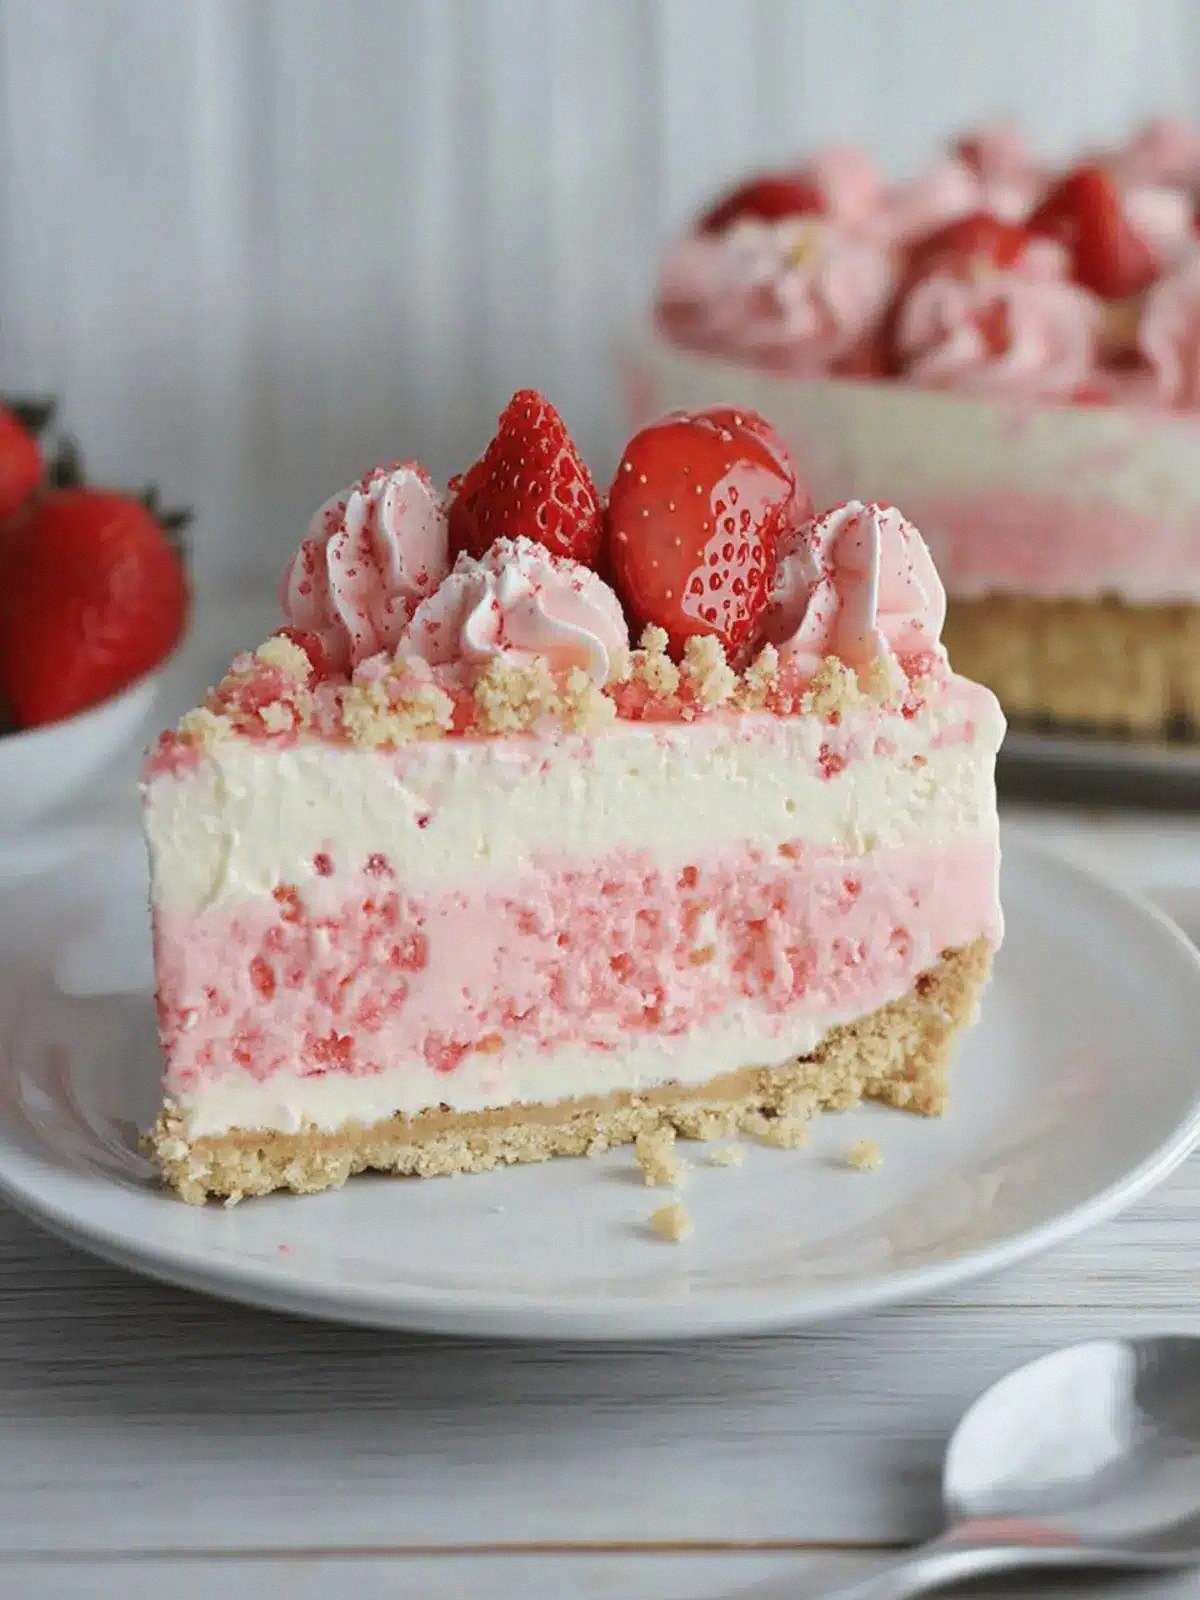
Picture this: I was halfway through a week of burnt brownies, the kitchen smelling like charred sugar, and my friends were demanding dessert. I stared at the pantry, my eyes landing on a box of vanilla cream cookies and a jar of strawberry gelatin. Suddenly, a spark of genius lit up: what if I could turn those humble cookies into a silky, no‑bake cheesecake that would make everyone question their baking skills? The idea was simple, but the execution demanded precision. I was determined to create something that would be the talk of every gathering.
From the moment the butter melted, the air filled with a buttery aroma that danced with a faint hint of vanilla. The sound of the cookies crunching in the bowl was like a crunchy snowflake falling onto a warm blanket. The sight of the glossy strawberry gelatin glimmering in the light made my mouth water. I could almost taste the sweet, tangy burst that would follow each bite. The texture, I promised myself, would be a paradox of creamy smoothness and crunchy delight.
Unlike the typical cheesecake that relies on a heavy, baked crust, this version leans on a crunchy cookie base that snaps like fresh spring snow. The creamy filling is light, airy, and doesn't need the oven to set. The strawberry gelatin gives a burst of fruitiness that cuts through the richness. The result is a dessert that feels like a summer breeze on a hot day, yet satisfies the comfort cravings of a winter night. I dare you to taste this and not go back for seconds.
The secret lies in the ratio of gelatin to cream cheese, the precise timing of when the butter is melted, and a daring twist: using strawberry wafers for an extra layer of crunch. I’ll walk you through every single step, from crushing the cookies to letting the gelatin set in the fridge. By the end, you’ll wonder how you ever made it any other way. The flavor profile is bold, the texture is impeccable, and the finish is so clean that it feels almost indulgent. So grab your kitchen tools, and let’s dive into the ultimate no‑bake strawberry crunch cheesecake.
What Makes This Version Stand Out
- Crunch: The cookie base offers a satisfying snap that contrasts with the silky filling. Each bite delivers a playful texture that keeps the palate engaged. It’s like a secret layer of surprise hidden under a blanket of cream.
- Fruit Burst: The strawberry gelatin infuses real fruit flavor that brightens the dessert. It cuts through the richness of cream cheese and creates a balanced taste. The color is vibrant, making the cheesecake look as good as it tastes.
- No‑Bake Simplicity: You skip the oven entirely, saving time and energy. The method is straightforward, yet the result feels like a gourmet creation. Even novice cooks can master this with minimal fuss.
- Make‑Ahead Friendly: This cheesecake can be prepared a day in advance and stored in the fridge. The gelatin keeps it firm, and the cookie base stays crisp. It’s perfect for parties where you need to prep ahead.
- Light Yet Decadent: The filling is airy and airy, thanks to whipped cream and careful gelatin use. Yet it still feels indulgent, delivering the richness of a traditional cheesecake. It’s a win‑win for calorie‑conscious dessert lovers.
- Visual Appeal: The contrast between the dark cookie crust and the pale, glossy filling is Instagram‑ready. A drizzle of strawberry sauce or a dusting of powdered sugar adds a finishing touch. The presentation elevates the entire experience.
- Customization Potential: Swap vanilla cream cookies for chocolate or oatmeal cookies to create new flavor profiles. Add a splash of liqueur or citrus zest for an adult twist. The base is versatile enough to accommodate countless variations.
Alright, let's break down exactly what goes into this masterpiece...
Inside the Ingredient List
The Flavor Base
Unsalted butter is the silent hero that binds the cookie crumbs together and provides a silky mouthfeel. When melted with boiling water, it creates a liquid that coats each crumb, ensuring the crust holds its shape. The 1 tablespoon of gelatin is the secret to a firm yet tender foundation; it sets quickly without a baking step. Granulated sugar, at half a cup, balances the buttery richness and adds a subtle sweetness that lets the strawberry shine.
The Texture Crew
Twenty‑six vanilla cream cookies are the backbone of the crust, offering a mellow vanilla backdrop that complements the fruit. Sixteen ounces of cream cheese, softened to room temperature, give the filling its classic velvety texture. Whipping cream, measured at one cup, is folded in to aerate the mixture, creating a light cloud that melts in your mouth. Powdered sugar, a quarter cup, is used to sweeten the final filling without adding bulk.
The Unexpected Star
Three ounces of strawberry gelatin is the star that injects real fruit flavor into every bite. Its translucent sheen and bright color make the cheesecake visually stunning. The gelatin also contributes to the filling’s structural integrity, allowing the cheesecake to hold its shape without a bake. Strawberry wafers, ten pieces, add a delightful crunch on top, creating a multi‑sensory experience.
The Final Flourish
For an extra burst of flavor, a drizzle of strawberry sauce can be added just before serving. A dusting of powdered sugar or a sprinkle of crushed cookie crumbs on top adds a decorative touch. These small additions elevate the cheesecake from simple to unforgettable. With the ingredients prepped, the real action begins.
Everything's prepped? Good. Let's get into the real action...
The Method — Step by Step
-
Begin by placing the vanilla cream cookies in a food processor and pulsing until they form fine crumbs. If you prefer a more rustic base, crush them in a zip‑lock bag with a rolling pin until the crumbs are uniform. This step is crucial because the texture of the crust depends entirely on how evenly the crumbs are ground. A coarse crumb will lead to a lumpy filling, so take your time.
-
In a small saucepan, melt the half cup of unsalted butter over low heat. Once the butter is fully liquid, pour in the one cup of boiling water, stirring constantly. The mixture should look glossy and slightly opaque; this indicates that the butter has fully incorporated with the water. Let it cool for a minute before adding the gelatin.
-
Bloom the tablespoon of gelatin in a tablespoon of cold water for 5 minutes, letting it absorb the moisture. Then, whisk it into the butter-water mixture until completely dissolved. The gelatin will act as the binder that sets the crust without baking. If you skip this step, the crust will collapse when you press it into the pan.
-
Fold the cookie crumbs into the butter-gelatin mixture until the crumbs are evenly coated. The crumb mixture should feel moist but not soggy. Press the mixture firmly into the bottom of a 9‑inch springform pan, ensuring an even layer. This will be the foundation of your cheesecake, so take care to smooth the surface with a spatula or the back of a spoon.
-
In a large mixing bowl, beat the softened cream cheese until smooth and creamy. Gradually add the half cup of granulated sugar, mixing until the sugar dissolves and the mixture is light. The goal is to achieve a silky base that will hold the fruit and cream.
-
Whip the cup of whipping cream to soft peaks in a separate bowl. Gently fold the whipped cream into the cream cheese mixture, creating a light, airy filling. At this point, add the strawberry gelatin that has been dissolved in a tablespoon of warm water. This gelatin not only flavors the filling but also gives it a beautiful translucent sheen.
-
Spread the filling over the chilled crust, smoothing the top with a spatula. Arrange the ten strawberry wafers on top, pressing them gently into the filling so they are slightly embedded. This not only adds crunch but also creates a visual contrast that makes the cheesecake pop.
-
Cover the pan with plastic wrap and refrigerate for at least 4 hours, preferably overnight, until the cheesecake is set. The gelatin will firm up, giving the cheesecake a firm yet tender bite. When ready to serve, release the cheesecake from the springform pan and slice with a clean, warm knife for crisp edges.
That's it — you did it. But hold on, I've got a few more tricks that'll take this to another level. From subtle temperature tweaks to finishing touches that elevate the presentation, the following insider tips will ensure every bite is flawless.
Insider Tricks for Flawless Results
The Temperature Rule Nobody Follows
Keep all dairy ingredients at room temperature before mixing. Cold cream cheese and whipped cream will create lumps and hinder the smoothness of the filling. A quick microwave pulse can bring them to the right temperature without overheating. This simple step saves you from a ruined texture.
Why Your Nose Knows Best
Smell the filling before pouring it onto the crust. A faint buttery scent indicates the butter has fully integrated; a strong gelatin aroma means the gelatin is fully dissolved. Trust your nose to catch any off‑odors that could hint at an improper ratio or over‑cooking.
The 5‑Minute Rest That Changes Everything
After pressing the crust into the pan, let it sit in the fridge for 5 minutes before adding the filling. This short rest allows the crumbs to set and prevents them from absorbing excess moisture from the filling, preserving the crunchy texture.
Keep It Cool, Keep It Fresh
Store the cheesecake in the refrigerator at a consistent 35‑40°F. Avoid temperature fluctuations that could cause the gelatin to soften and the filling to separate. A sealed container or a tightly wrapped cover helps maintain moisture balance.
The Secret to a Silky Filling
Fold the whipped cream into the cream cheese gently, using a spatula in a sweeping motion. Over‑mixing can cause the air to escape, resulting in a dense filling. A light touch preserves the airy quality that makes this cheesecake so indulgent.
The Quick Chill Trick
After assembling the cheesecake, place it in a shallow tray with a few ice cubes around the edges. This technique chills the outer layer faster, setting the gelatin quickly without over‑cooling the interior. It’s a small step that makes a big difference.
Creative Twists and Variations
This recipe is a playground. Here are some of my favorite ways to switch things up:
Chocolate Crunch Delight
Swap the vanilla cream cookies for dark chocolate sandwich cookies and replace the strawberry gelatin with chocolate gelatin. The result is a rich, chocolate‑laced cheesecake that still retains the crunchy base. Perfect for chocolate lovers or a decadent holiday treat.
Minty Fresh Twist
Add a tablespoon of peppermint extract to the filling and use mint‑flavored wafers on top. The cool mint balances the sweetness and gives the cheesecake a refreshing finish, ideal for late‑summer afternoons.
Lemon Zest Surprise
Incorporate the zest of one lemon into the cream cheese mixture and use lemon gelatin. The bright citrus cuts through the richness, creating a zesty, tangy flavor profile that’s surprisingly refreshing.
Berry Medley Fusion
Blend a mix of fresh blueberries and raspberries into the filling, and top with a drizzle of mixed berry coulis. This adds natural fruit flavor and a pop of color that makes the cheesecake visually stunning.
Nutty Crunch Variation
Crush a handful of toasted almonds into the cookie crust and sprinkle almond slivers on top. The nutty crunch adds depth and a subtle earthy note that pairs wonderfully with the creamy filling.
Adult‑Only Version
Stir in a splash of Grand Marnier or Chambord into the filling for a sophisticated twist. The liqueur adds a subtle warmth and complexity that transforms the cheesecake into a dessert for grown‑ups.
Storing and Bringing It Back to Life
Fridge Storage
Keep the cheesecake refrigerated for up to five days. Store it in an airtight container or wrap it tightly in plastic wrap to prevent it from absorbing fridge odors. The gelatin will maintain its firmness, ensuring each slice remains silky.
Freezer Friendly
For longer storage, freeze the cheesecake in a freezer‑safe container for up to two months. Thaw it overnight in the refrigerator before serving. This method preserves the texture and flavor without compromising quality.
Best Reheating Method
When you’re ready to serve a frozen cheesecake, avoid the microwave. Instead, let it thaw in the fridge and finish with a quick 10‑minute warm water bath to bring it to room temperature. Add a splash of water before reheating to create steam that restores the filling’s smoothness.