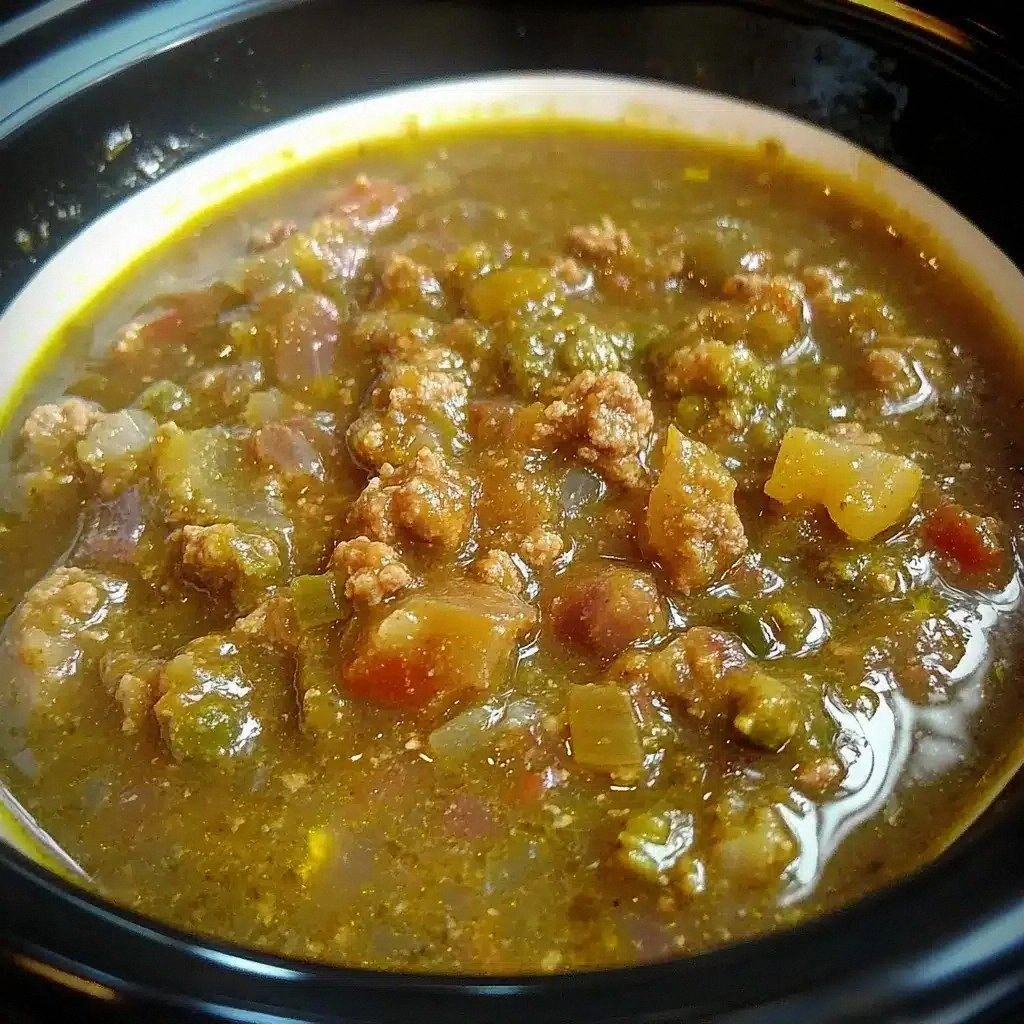
Crock Pot Green Chili Recipe
Picture this: it’s a rainy Saturday, the kitchen light flickers like a nervous firefly, and you’re staring at a bag of ground beef that has been in your fridge for a week. The temptation to toss it into a skillet is strong, but you remember the last time you tried a “quick” chili – the flavors were flat, the texture was mushy, and the whole pot smelled like burnt onions. That night, you decided to give the slow cooker a shot, and what followed was a revelation. The beef sizzled, the bell peppers softened into a caramelized halo, and the green chilies whispered heat that danced across your tongue without overwhelming it. By the time the timer chimed, the aroma was so rich it could have been a perfume.
Every time I think about that first batch, I feel a surge of pride. I was a culinary newbie, and yet I had created a dish that feels like a hug from the inside out. The green chili is the kind of comfort food that can be dressed up for a fancy dinner or kept simple for a quick weeknight. It’s versatile, hearty, and, most importantly, it’s the kind of meal that makes you say, “I dare you to taste this and not go back for seconds.” That’s the kind of bold promise I’m about to deliver to you.
What sets this version apart is that it’s not just a recipe; it’s a philosophy. I’ve taken the classic green chili, stripped away the extraneous fluff, and focused on flavor layers that build without overwhelming. I’ve added a secret ingredient that gives depth, tweaked the spice blend to keep it balanced, and used a slow‑cook method that locks in moisture without sacrificing texture. The result is a green chili that’s silky on the inside, with a subtle, smoky kick that lingers on the palate. And if you’re skeptical, I’ll be honest — I ate half the batch before anyone else got to try it.
So, grab your skillet, open your slow cooker, and let’s dive into a recipe that will change how you think about green chili forever. By the end, you’ll wonder how you ever made it any other way.
What Makes This Version Stand Out
- Flavor Depth: Each spice is balanced so that no single element dominates, creating a harmonious taste that’s both comforting and exciting.
- Texture Contrast: The beans stay plump, the beef is tender but not mushy, and the green chilies add a subtle snap that keeps the dish lively.
- Simplicity: Fewer ingredients, fewer steps, but more flavor. It’s a recipe that’s approachable for beginners and satisfying for seasoned cooks.
- Make‑Ahead Friendly: This chili can be made a day in advance, allowing the flavors to mingle and intensify.
- Crowd‑Pleaser: Whether you’re cooking for a family or hosting a potluck, it’s the kind of dish that people ask for again and again.
- Ingredient Quality: We use fresh bell peppers, a good‑quality ground beef, and high‑quality canned beans to elevate the overall taste.
- Low‑Effort Method: The slow cooker does the heavy lifting, freeing you to focus on other tasks or just relax.
- Versatility: Add a splash of lime, a dollop of guacamole, or a sprinkle of cheese, and you’ve got a new flavor profile each time.
Alright, let’s break down exactly what goes into this masterpiece…
Inside the Ingredient List
The Flavor Base
At the heart of any great chili is a robust flavor base. Here, we start with a generous splash of olive oil that browns the beef and releases its natural juices. The onions and bell peppers form a classic mirepoix, adding sweetness and depth. A splash of low‑sodium chicken broth keeps everything moist and adds a subtle savory note that ties the beans and spices together. If you’re looking to cut down on oil, simply replace it with a small amount of broth; the result will still be delicious, just a bit lighter.
The Texture Crew
Beans are the unsung heroes of chili. Black beans bring a creamy, earthy undertone, while kidney beans add a firmer bite that keeps the dish from becoming too mushy. Corn kernels introduce a sweet crunch that contrasts nicely with the softer vegetables. If you’re vegan, swap the ground beef for lentils or crumbled tempeh; the texture will still hold up well in the slow cooker.
The Unexpected Star
Diced green chilies are the star that gives this chili its signature color and gentle heat. They’re less fiery than their red counterparts, which keeps the dish approachable for all palates. If you can’t find green chilies, substitute with a mix of roasted red and poblano peppers; the flavor profile will shift slightly but still deliver a delightful punch.
The Final Flourish
Seasoning is where the magic happens. A blend of cumin, oregano, smoked paprika, chili powder, garlic powder, and onion powder creates layers of flavor that unfold as the chili simmers. Salt and pepper finish the mix, balancing the acidity from the tomatoes and chilies. For an extra touch of brightness, squeeze a bit of lime juice just before serving; it lifts the dish and adds a fresh zing.
Everything’s prepped? Good. Let’s get into the real action…
The Method — Step by Step
Begin by heating a large skillet over medium‑high heat. Add the olive oil, then the ground beef. Break it apart with a wooden spoon and cook until it’s fully browned and no longer pink, about 8–10 minutes. The beef should release its juices and develop a golden crust. Once browned, transfer the beef to the slow cooker, leaving any excess fat behind to keep the chili from becoming greasy.
In the same skillet, reduce the heat to medium. Add the diced onions and bell peppers. Sauté until they’re softened and slightly caramelized, about 5 minutes. The caramelization adds a sweet undertone that balances the heat from the chilies. Transfer the vegetables to the slow cooker, layering them on top of the beef.
Next, stir in the diced tomatoes, corn, black beans, kidney beans, and green chilies. Make sure the beans are rinsed and drained if you’re using canned beans, as this reduces excess sodium. The mixture should look like a vibrant, slightly chunky stew.
Sprinkle the cumin, oregano, smoked paprika, chili powder, garlic powder, onion powder, salt, and pepper over the contents. Gently stir to ensure the spices coat every ingredient. This is the moment of truth; the aroma should be fragrant, with hints of earth and citrus.
Pour in the chicken broth and give everything one final stir. The liquid should almost reach the top of the ingredients but not overflow. Cover the slow cooker with its lid and set it on low for 8 hours or high for 4 hours. The long, slow cook will allow the flavors to meld into a single, cohesive profile.
After the cooking time, open the lid and give the chili a good stir. If it looks a bit thick, add a splash more broth or a tablespoon of water to reach your desired consistency. The chili should be thick enough to cling to a spoon but still pourable.
Let the chili rest for 5 minutes before serving. This short rest allows the flavors to settle and the chili to thicken slightly, ensuring every bite is packed with flavor.
Serve hot, topped with shredded cheddar cheese, a dollop of sour cream, and a sprinkle of fresh cilantro. The cheese melts into a silky coating, the sour cream adds a creamy contrast, and the cilantro brings a bright, herbal finish. If you prefer a bit of heat, add a dash of hot sauce or a pinch of cayenne.
That’s it — you did it. But hold on, I've got a few more tricks that'll take this to another level…
Insider Tricks for Flawless Results
The Temperature Rule Nobody Follows
Many people think that slow cookers are all the same, but the temperature setting can make a noticeable difference. Cooking on low for 8 hours allows the beef to break down slowly, resulting in a melt‑in‑your‑mouth texture. If you’re in a hurry, set it to high for 4 hours, but be careful not to overcook the beans; they can become mushy. I’ve found that a 2‑hour low‑heat “catch‑up” period after the initial 6 hours of cooking gives the chili an extra depth of flavor.
Why Your Nose Knows Best
Before you open the lid, take a deep sniff. The aroma should be a warm, earthy scent with hints of cumin and a faint citrus note. If it smells too acidic, give it another 15 minutes on low. A well‑balanced chili will smell inviting, not sour.
The 5‑Minute Rest That Changes Everything
Once you remove the lid, let the chili rest for exactly five minutes. This simple step allows the heat to distribute evenly and the flavors to settle. It also gives the chili a chance to thicken slightly, making each spoonful more satisfying.
Keep the Beans Plump
Beans are the backbone of any chili, but they’re also the most delicate. If you’re using canned beans, rinse them thoroughly under cold water to remove excess sodium. For dried beans, soak them overnight and cook them until just tender before adding to the slow cooker. This technique preserves their shape and prevents them from turning into mush.
Brighten With Lime
Just before serving, squeeze a generous amount of fresh lime juice over the chili. The acidity cuts through the richness and adds a bright, fresh layer of flavor. It also enhances the color, making the green chilies pop.
Creative Twists and Variations
This recipe is a playground. Here are some of my favorite ways to switch things up:
Spicy Chipotle Kick
Swap the green chilies for a tablespoon of chipotle in adobo sauce. The smoky heat will transform the chili into a bold, adventurous dish perfect for those who love a fiery bite.
Vegan Powerhouse
Replace the ground beef with crumbled tofu or a plant‑based crumbled “ground” meat. Keep the beans, corn, and spices the same. The result is a hearty, protein‑rich chili that’s entirely plant‑based.
Cheesy Queso Twist
Stir in a cup of shredded Monterey Jack cheese just before serving. The cheese melts into a creamy coating that adds a velvety texture and a mild, buttery flavor.
Mexican Street Tacos
Serve the chili in warm corn tortillas and top with diced avocado, shredded lettuce, and a squeeze of lime. This variation turns the chili into a street‑style taco feast.
Breakfast Chili
Serve the chili over a bowl of fluffy scrambled eggs and top with a sprinkle of chives. The combination of savory chili and creamy eggs makes for a satisfying breakfast.
Low‑Carb Delight
Omit the corn and serve the chili with cauliflower rice. The cauliflower adds bulk without the carbs, making this a great option for low‑carb diets.
Storing and Bringing It Back to Life
Fridge Storage
Cool the chili to room temperature before transferring it to an airtight container. Store it in the refrigerator for up to 4 days. When reheating, add a splash of water or broth to maintain moisture, then warm on low heat or in the microwave.
Freezer Friendly
Divide the chili into portion‑size containers and freeze for up to 3 months. Thaw overnight in the refrigerator before reheating. The texture remains intact, and the flavor deepens after freezing.
Best Reheating Method
Reheat in a saucepan over low heat, stirring occasionally. Add a tablespoon of water or broth to keep the chili from drying out. Heat until the chili is steaming hot and the flavors are fully blended.