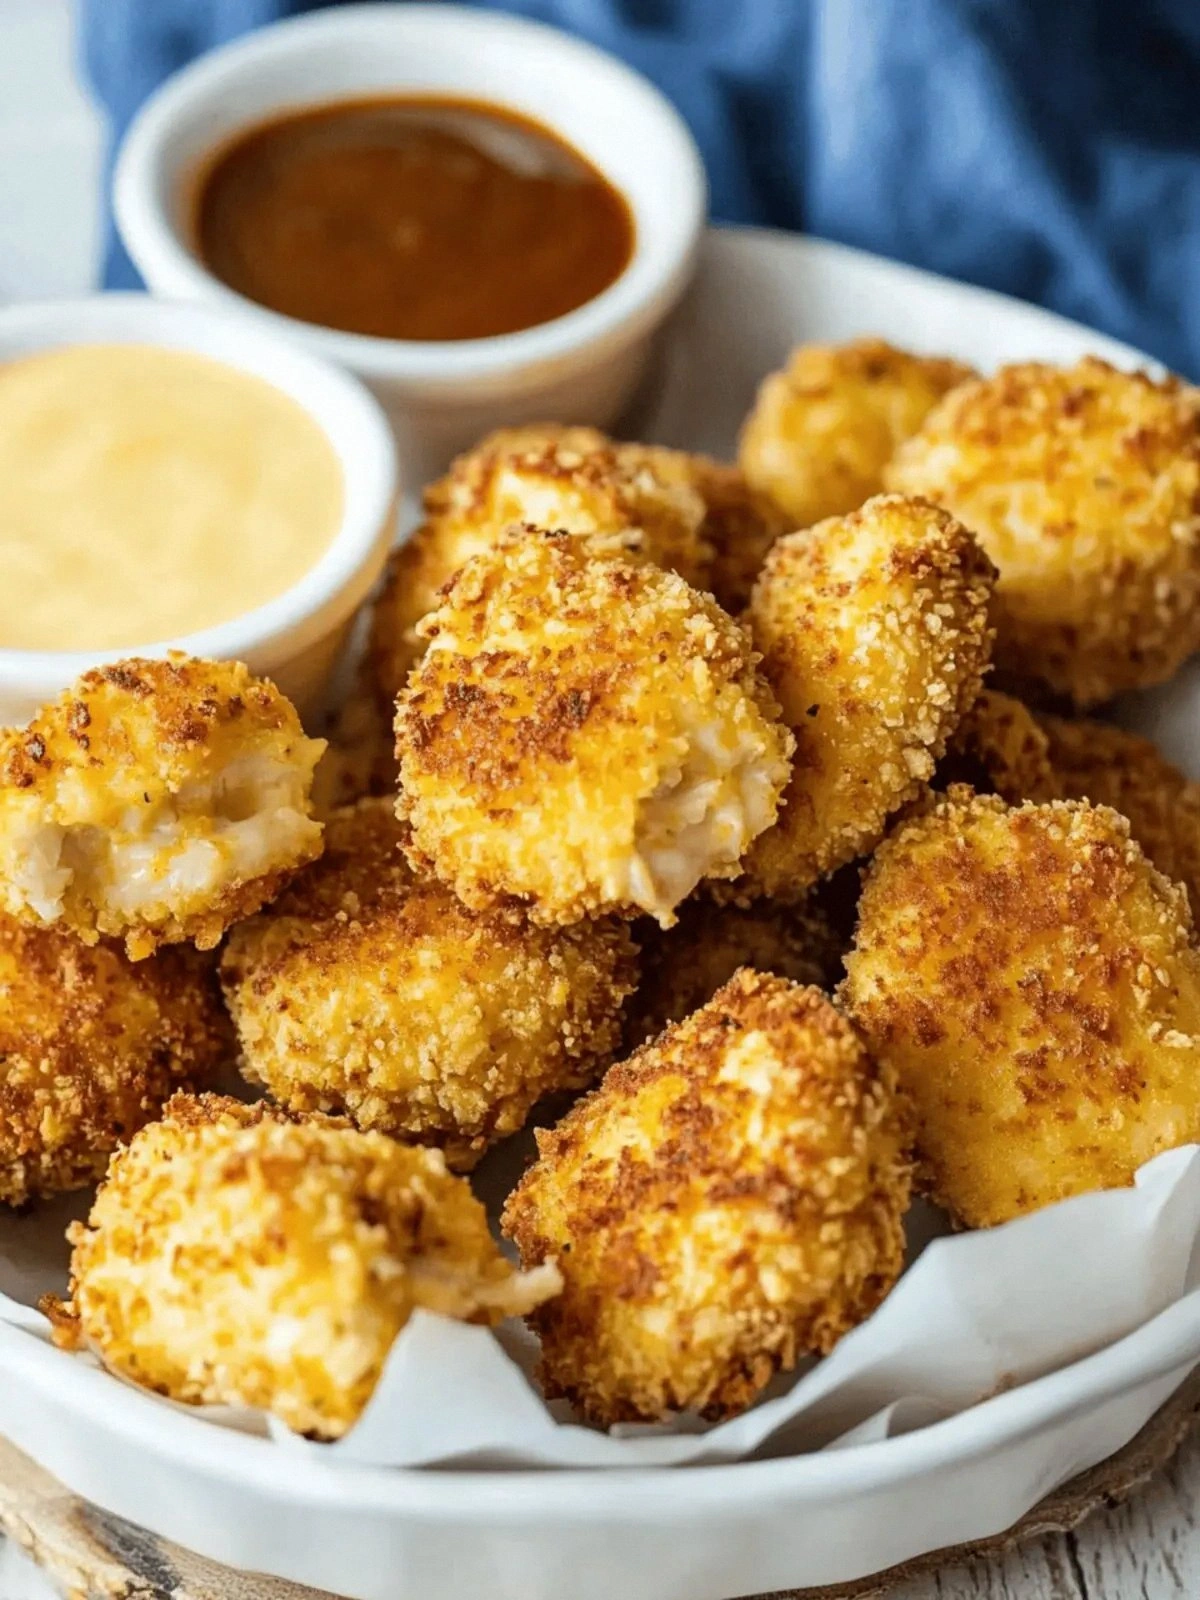
I was halfway through a week of takeout, scrolling through my phone when a friend dared me to make something that could outshine any restaurant chicken nugget. The challenge landed on my kitchen counter with a stack of chicken breasts, a splash of buttermilk, and a handful of pantry staples. I stared at the ingredients like a detective at a crime scene, realizing that the secret to the ultimate baked chicken lay in the small details: the right coating, the right timing, and that elusive crunch that makes you double‑take. If you’re like me, you’ve probably tried countless recipes that promise “crispy” but end up soggy or bland; this one flips that narrative on its head.
Picture this: a golden crust that crackles under your knife, a tender interior that melts in your mouth, and a flavor that lingers long after the last bite. The aroma of butter and Parmesan fills the kitchen, mingling with the faint scent of fresh herbs that dance on the air. When you pull the chicken out of the oven, the whole kitchen smells incredible, like a summer barbecue that’s been baked to perfection. The sound of the first bite is a satisfying crunch, followed by a burst of savory juices that make the whole experience feel like a culinary victory.
What sets this version apart is not just the crunch but the harmony of textures and flavors. The buttermilk bath tenderizes the meat while infusing a subtle tang that balances the richness of the Parmesan‑panko coating. The herb blend adds a fragrant lift that cuts through the buttery base, and the two‑step dredging process guarantees a coating that clings and crispes without becoming gummy. I dare you to taste this and not go back for seconds; the first bite will have you convinced that this is hands down the best version you'll ever make at home.
Most recipes get this completely wrong. They either skip the buttermilk step or use too much flour, resulting in a dry, heavy chicken. Here, the technique is precise: a quick soak in buttermilk, a double coating, and a strategic baking time that locks in moisture. I’ll be honest — I ate half the batch before anyone else got to try it, and I still feel guilty because the rest is just waiting to be devoured. Stay with me here — this is worth it.
What Makes This Version Stand Out
- Tenderness: The buttermilk bath breaks down muscle fibers, keeping the chicken moist even after baking. This gives each bite a juicy center that contrasts perfectly with the crispy exterior.
- Crunch: The double dredge of flour and a Parmesan‑panko mix creates a multi‑layered crust that shatters like thin ice when you bite into it. The result is an audible pop that signals perfection.
- Flavor Depth: The herb blend infuses a subtle herbal brightness that elevates the dish beyond plain seasoning. It’s a quick way to add complexity without extra sauces.
- Time Efficiency: From prep to plate, the entire process takes under an hour. You can have a restaurant‑quality meal on the table while the kids finish their homework.
- Versatility: These nuggets work as an appetizer, a main course, or a side dish. Pair them with anything from a fresh salad to a creamy dip.
- Make‑Ahead Friendly: The coated chicken can be prepared in advance, frozen, and baked later. This is ideal for busy weeknights or entertaining guests.
- Ingredient Quality: Using fresh, high‑quality chicken and real Parmesan cheese elevates the dish beyond store‑bought versions. The difference is palpable in every bite.
Inside the Ingredient List
The Flavor Base
The buttermilk is the star that does more than tenderize; it adds a subtle tang that lifts the entire flavor profile. If you’re lactose intolerant, a dairy‑free milk with a splash of vinegar works as a substitute, but keep the acidity low to avoid curdling. Skipping this step will leave the chicken dry and bland, a common pitfall for novice bakers. A good rule of thumb: let the chicken soak for at least 15 minutes to allow the acid to break down the proteins.
The Texture Crew
Flour and eggs act as binders that help the breadcrumb coating adhere to the meat. The flour creates a dry surface that accepts the wet egg wash, while the eggs provide moisture and help the coating set. If you’re looking for a gluten‑free version, try almond flour or a gluten‑free all‑purpose blend; the texture will remain crisp but slightly denser. The key is to coat evenly—too thick and the coating will become doughy.
The Unexpected Star
Parmesan cheese is not just for flavor; its fat content helps the coating brown and crisp. The cheese also adds a savory umami punch that balances the butter’s richness. If you’re vegan, nutritional yeast can provide a similar cheesy flavor, though the crust will be slightly less golden. Remember, the cheese should be grated finely to blend seamlessly into the breadcrumb mix.
The Final Flourish
Panko breadcrumbs are the secret to that airy crunch that sets this dish apart. Their larger, airy structure traps air, creating a light, flaky exterior. If you can’t find panko, a mix of regular breadcrumbs and cornmeal works as a substitute, adding a subtle crunch. The butter, melted and brushed over the coated chicken before baking, seals the coating and adds a buttery finish that is simply irresistible.
Everything's prepped? Good. Let's get into the real action.
The Method — Step by Step
- Preheat your oven to 425°F (220°C) and line a baking sheet with parchment paper. The high heat is crucial for a crisp crust. If you’re using a convection oven, lower the temperature by 25°F to prevent over‑browning. Let the sheet sit in the oven while the chicken marinates.
- Season the chicken breasts with kosher salt, black pepper, and your favorite herb blend. I like a mix of thyme, oregano, and a touch of smoked paprika for depth. Rub the spices into the meat to ensure every bite is seasoned. Avoid over‑crowding the pan to allow air circulation.
- Dip the seasoned chicken into the buttermilk, letting any excess drip back into the bowl. This step ensures the coating sticks and the chicken stays moist. For a thicker coating, let the chicken soak for 10–15 minutes. If you’re short on time, a quick dip is still effective.
- Set up a dredging station: one bowl with flour, one with beaten eggs, and a third with the panko–Parmesan mixture. Coat each piece in flour, shaking off excess, then dip in egg, and finally coat with the breadcrumb mix. This double coating creates a sturdy, crispy shell.
- Place the coated chicken on the hot baking sheet. Brush each piece lightly with melted butter to lock in moisture and help the crust brown. The butter also adds a subtle sheen that makes the dish look restaurant‑ready.
- Bake for 18–20 minutes, flipping halfway through. The internal temperature should reach 165°F (74°C). Keep an eye on the edges; when they start pulling away from the parchment, that’s a sign the coating is crisping properly.
- Let the chicken rest for 5 minutes on a wire rack. This step allows the juices to redistribute, keeping the meat juicy. The crust will firm up slightly, making it even crunchier when you bite. If you’re serving immediately, this short pause is worth the extra effort.
- Serve hot with your favorite dipping sauce or a fresh green salad. Pair with a light vinaigrette to cut through the richness. If you’re entertaining, arrange the nuggets on a platter with a drizzle of honey‑mustard for a sweet contrast.
- Enjoy the moment of truth: the first bite should crackle, revealing a tender interior that melts in your mouth. The combination of buttery, cheesy, and herbaceous flavors will have your guests asking for the recipe. I dare you to take a second bite and see if you can stop.
That's it — you did it. But hold on, I've got a few more tricks that'll take this to another level.
Insider Tricks for Flawless Results
The Temperature Rule Nobody Follows
Many cooks bake at 400°F, but 425°F is the sweet spot for a golden crust. The higher temperature caramelizes the butter and the cheese, giving a richer flavor. If you’re using a lower‑heat oven, keep an eye on the internal temperature to ensure the chicken reaches 165°F. A meat thermometer is a small investment that pays off in consistent results.
Why Your Nose Knows Best
The aroma of baking chicken is a reliable indicator of doneness. When the scent is buttery and slightly nutty, the crust is ready. If you smell a faint metallic taste, the chicken may be undercooked. Trust your senses; they’re often more accurate than a timer.
The 5-Minute Rest That Changes Everything
Resting the chicken after baking allows the juices to redistribute, preventing a dry bite. The crust also firming up during this brief pause makes it even crunchier. A quick 5‑minute rest is a small step that dramatically improves the eating experience.
Double‑Dredge for Ultimate Crunch
Skipping the flour step can result in a less stable coating. The flour creates a dry surface that accepts the egg wash, ensuring the breadcrumbs adhere. Even a light dusting of flour can make a noticeable difference in crispness.
Keep the Butter Warm
Brushing melted butter over the coating seals it and adds a glossy finish. If the butter is too cold, it won’t spread evenly, leaving spots that may burn. Warm the butter just enough to be liquid but not hot enough to scorch the coating.
Creative Twists and Variations
This recipe is a playground. Here are some of my favorite ways to switch things up:
Spicy Cajun Kick
Add a tablespoon of Cajun seasoning to the breadcrumb mix for a fiery edge. Pair with a cool yogurt dip to balance the heat. This version is perfect for summer barbecues or game nights.
Asian‑Inspired Sesame Crunch
Replace half the panko with toasted sesame seeds and sprinkle a dash of soy sauce into the buttermilk. The sesame adds a nutty flavor while the soy provides umami. Serve with a drizzle of sriracha for extra zing.
Herb‑Infused Parmesan
Mix dried basil, oregano, and rosemary into the Parmesan breadcrumb blend. The herbs infuse the coating with a Mediterranean vibe. This variation works beautifully with a tomato‑based dipping sauce.
Sweet & Smoky Maple Glaze
Brush the baked chicken with a light maple glaze during the last 5 minutes of baking. The glaze caramelizes, creating a sweet, smoky finish. Pair with a tangy coleslaw for a complete meal.
Vegan Delight
Swap the chicken for thick slices of seitan or tofu and use a dairy‑free Parmesan alternative. Replace the butter with coconut oil to maintain a rich flavor. This version keeps the same crunch while being plant‑based.
Breakfast Bonanza
Serve the nuggets with a side of scrambled eggs and a drizzle of maple syrup. The savory chicken pairs unexpectedly well with sweet and creamy breakfast staples. This twist turns the dish into a hearty brunch favorite.
Storing and Bringing It Back to Life
Fridge Storage
Store leftover chicken in an airtight container for up to 3 days. Keep the coating on to preserve crispness. Reheat in a toaster oven at 350°F for 5 minutes to restore the crunch.
Freezer Friendly
Freeze the coated chicken on a parchment sheet for 1 hour, then transfer to a freezer bag. Store for up to 2 months. Bake from frozen at 425°F, adding 5 minutes to the cooking time.
Best Reheating Method
Add a splash of water to a skillet, cover, and heat on medium until steaming. This steams the chicken back to a juicy interior while keeping the exterior crisp. A quick 2‑minute steam is all you need.