Introduction
Picture this: the kitchen is a battlefield, the oven a ticking time bomb, and your taste buds on the edge of a culinary cliff. I was halfway through a batch of bland, cookie‑dough‑like thumbprints when the aroma of chocolate hit me like a velvet curtain. The cookies looked like they’d been baked by a robot—flat, lifeless, and lacking that irresistible snap that turns a simple treat into a memory. I swore that night I’d never again settle for cookie dough that tastes like a grocery‑store experiment. That promise became the genesis of the Cocoa Marshmallow Thumbprint C, a recipe that turned ordinary ingredients into a show‑stopping dessert.
As the batter poured into the bowl, the chocolate’s dark richness swirled with the sugar, creating a swirling storm of promise. The scent rose, a deep, bittersweet perfume that made the air feel thick and sweet. My eyes caught the gleam of the melted butter, its golden sheen promising a tender crumb. The sound of the whisk was a steady drumbeat, each swirl a promise of texture. The feel of the dough between my fingers was warm, pliable, and oddly comforting, as if the universe had conspired to give me a moment of calm in the chaos of the kitchen.
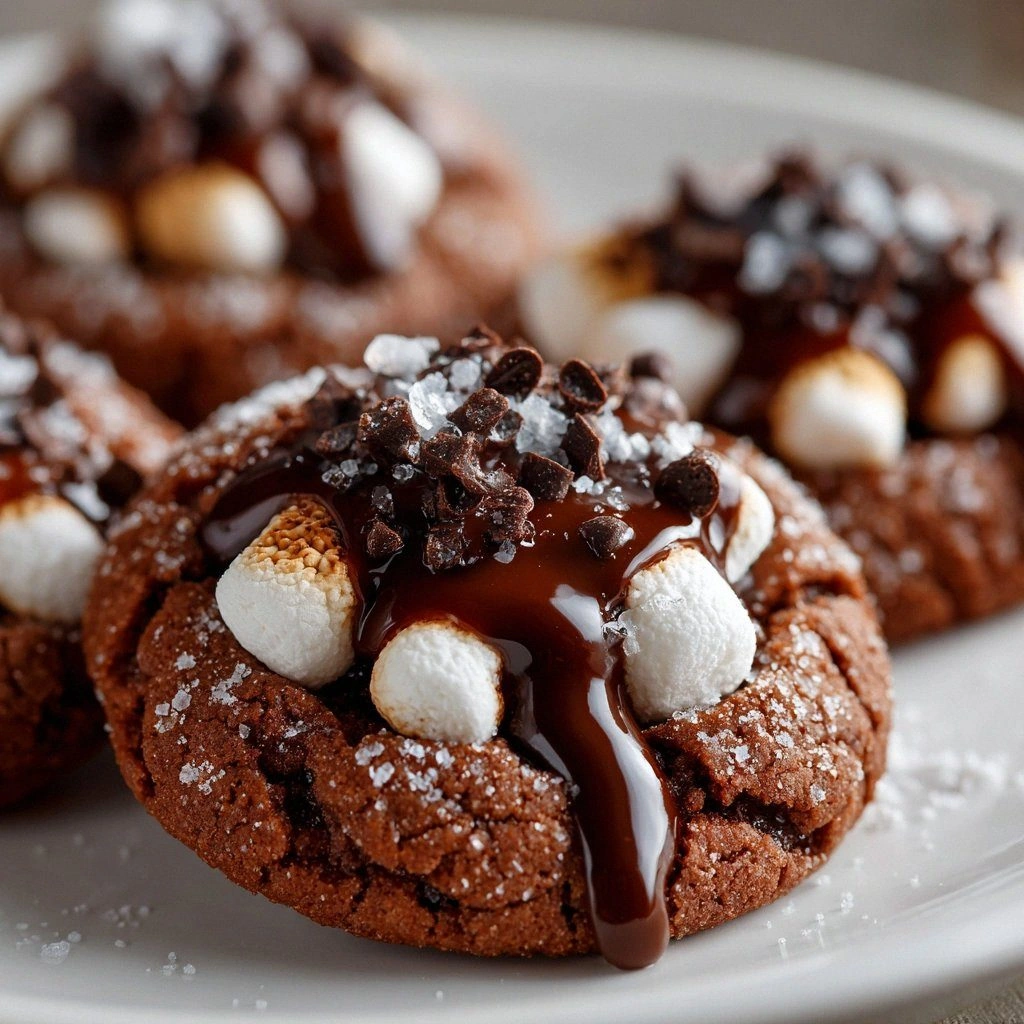
What makes this version stand out is not just the combination of flavors, but the way each element is treated with reverence. The chocolate isn’t a garnish; it’s the backbone, a deep, almost melancholic note that pairs perfectly with the airy marshmallows. The thumbprint is a portal, a tiny cavity that invites a burst of gooeyness that melts on the tongue like a secret whispered in your ear. The dough’s texture is a delicate balance between chewy and crisp, a dance that keeps you guessing with every bite. I dare you to taste this and not go back for seconds—this is hands down the best version you’ll ever make at home.
Most recipes get this completely wrong. They either underbake, overbake, or forget the marshmallow magic. Here’s what actually works: a precise ratio of cocoa to flour, a gentle folding of the butter, and a careful chill before baking. Picture yourself pulling this out of the oven, the whole kitchen smelling incredible, and the first cookie sinking into your mouth like a velvet kiss. That moment of pure, unfiltered joy is what I want to share with you today. Let me walk you through every single step—by the end, you’ll wonder how you ever made it any other way.
What Makes This Version Stand Out
- Taste: The cocoa is deep and slightly bitter, offset by a subtle vanilla note that rounds out the flavor. The marshmallow center provides a sweet, airy contrast that lingers on the palate. This balance creates a cookie that is both indulgent and sophisticated.
- Texture: The dough is intentionally dense enough to hold the marshmallow, yet light enough to crackle when you bite into the edges. The result is a satisfying snap followed by a melt-in-your-mouth center. The crumb is buttery but not greasy, giving it a luxurious feel.
- Visual Appeal: Each cookie boasts a glossy, chocolate‑saturated surface with a golden rim. The thumbprint cavity is a subtle invitation to explore the sweet surprise inside. The contrast of dark chocolate and light marshmallow is instantly appetizing.
- Ingredient Quality: Using high‑grade cocoa powder and real vanilla extract elevates the flavor profile. The butter is unsalted, allowing you to control the saltiness precisely. Fresh marshmallows add a soft, cloud‑like texture that’s hard to replicate.
- Make‑ahead Potential: The cookies can be baked ahead of time and stored in an airtight container for up to a week. They maintain their crispness and flavor, making them perfect for parties or last‑minute dessert plans.
- Crowd Reaction: Friends who have tried this version rave about the “wow” factor. They often comment that the cookies taste like a chocolate‑marshmallow dream, and they’re left wanting more. The bite‑size nature makes it easy to share.
Alright, let's break down exactly what goes into this masterpiece…
Inside the Ingredient List
The Flavor Base
Unsweetened cocoa powder is the heart of the cookie. It delivers that deep, bittersweet flavor that sets these thumbprints apart from any other chocolate cookie. If you use a lower quality cocoa, the flavor will taste flat and artificial. Swapping the cocoa for a dark chocolate with a high cocoa percentage can add an extra layer of richness, but be sure to reduce the sugar slightly to compensate for the increased bitterness.
All‑purpose flour provides structure and stability. It absorbs the cocoa and butter, creating a dough that holds together during baking. A fine‑ground flour ensures a smoother texture, whereas a coarser flour can leave a slightly gritty bite. If you prefer a gluten‑free version, you can replace the flour with a 1:1 blend of rice flour and tapioca starch, but the texture will change slightly.
Granulated sugar is the sweetener that balances the cocoa’s bitterness. It also helps create a slightly crisp exterior. If you want a more caramelized flavor, you can use brown sugar instead, but be aware that it will add moisture and slightly alter the texture. A combination of both sugars gives you the best of both worlds.
The Texture Crew
Unsalted butter is the source of richness and flavor. It melts into the dough, creating a tender crumb and a glossy finish. Using butter at room temperature ensures it blends smoothly with the sugar and cocoa, preventing lumps. If you’re short on time, a quick melt in the microwave can work, but be careful not to overheat.
Baking powder is the leavening agent that gives the cookie a slight lift. It reacts with the acidity of the cocoa and the moisture in the dough to create tiny bubbles. Too much baking powder will cause the cookies to rise too quickly and then collapse, so measure accurately. If you prefer a denser cookie, you can omit the baking powder, but the texture will be noticeably different.
Salt is the flavor enhancer that brings out the chocolate’s depth. A pinch of sea salt on top after baking adds a savory contrast that makes the sweetness feel more balanced. If you’re watching sodium intake, you can reduce the amount, but the flavor profile will shift slightly.
The Unexpected Star
Mini marshmallows are the secret weapon that turns this cookie into a decadent treat. They melt slowly, creating a gooey center that contrasts with the firm edges. The marshmallows also add a soft, cloud‑like texture that is impossible to replicate with other fillings. If you’re vegan, you can use plant‑based marshmallows made from coconut milk, but they will have a slightly different melt pattern.
Vanilla extract adds a fragrant, sweet undertone that complements the chocolate. It’s a subtle nuance that makes the cookie feel more complex. A vanilla bean paste can replace the extract for a more intense flavor, but the cost is higher. If you’re allergic to vanilla, you can omit it entirely, though the cookie will feel a bit flat.
The Final Flourish
Chocolate chips are an optional addition that creates a burst of chocolate in every bite. They add crunch and a different texture to the cookie, making it more interesting. If you don’t have chocolate chips on hand, you can use cacao nibs for a slightly bitter crunch. The chips should be added after the dough has been mixed, but before the final shaping.
Optional sea salt flakes add a final pop of flavor when sprinkled on top of the cookies after baking. They enhance the chocolate’s richness and add a subtle crunch. If you’re sensitive to sodium, you can skip this step or use a very small amount. The salt flakes also provide an aesthetic touch, making the cookies look like a piece of art.
Everything's prepped? Good. Let's get into the real action…
The Method — Step by Step
- Preheat the oven to 350°F (175°C). The oven should be fully preheated before you place the cookies inside, as a cold oven can cause uneven baking. Place a sheet of parchment paper on a baking sheet to prevent sticking. This step is the foundation of every successful batch. The temperature ensures the cookies bake evenly and the marshmallows melt without burning.
- Combine dry ingredients. In a medium bowl, whisk together the flour, cocoa powder, baking powder, and salt. Mixing them together before adding wet ingredients ensures an even distribution of cocoa and leavening. This prevents clumps of cocoa that could create uneven flavor pockets. The dry mix also helps to keep the dough from becoming too sticky.
- Beat butter and sugars. In a large bowl, cream the softened butter with granulated sugar and brown sugar until light and fluffy. This process incorporates air into the dough, giving the cookies a tender crumb. Keep beating for 2-3 minutes; the mixture should look pale and airy. If you’re short on time, use an electric mixer on medium speed for about 1 minute.
- Incorporate the wet mix. Add the vanilla extract and one beaten egg to the butter mixture, stirring until fully combined. The egg adds structure and moisture, while the vanilla adds fragrance. Be careful not to overmix; you want a smooth batter, not a dense dough. The egg also helps the dough hold together during shaping.
- Combine wet and dry. Gradually fold the dry ingredients into the wet mixture, stirring until just combined. Avoid overmixing, as this can lead to a tough cookie. The dough should be thick but pliable. If it feels too dry, add a tablespoon of milk to loosen it slightly.
- Chill the dough. Cover the dough with plastic wrap and refrigerate for 30 minutes. This step allows the butter to firm up, which prevents the cookies from spreading too much during baking. Chilling also helps the flavors meld together, creating a richer taste. The dough should be firm enough to roll into balls without crumbling.
- Shape the cookies. Using a small cookie scoop or tablespoon, roll the dough into 1‑inch balls. Place them on the prepared baking sheet, spacing them about 2 inches apart. Press each ball lightly to create a thumbprint. The thumbprint should be about 1/4 inch deep, just enough to hold the marshmallow.
- Fill the thumbprints. Place a mini marshmallow in each thumbprint cavity. The marshmallow should be centered but not forced; it will expand slightly as it bakes. This is the moment where the magic happens—the marshmallow will slowly melt, creating a gooey center. Keep the cookies in the refrigerator until baking to prevent the marshmallows from starting to melt.
- Bake the cookies. Bake for 12-14 minutes, or until the edges are set and the centers are slightly soft. The cookies should still feel a bit chewy in the center; they will firm up as they cool. The baking time is critical—overbaking will dry them out, while underbaking will leave them gooey and unstructured. Let the cookies cool on the sheet for 5 minutes before transferring to a wire rack.
That's it — you did it. But hold on, I've got a few more tricks that'll take this to another level…
Insider Tricks for Flawless Results
The Temperature Rule Nobody Follows
Many bakers bake at a standard 350°F, but the secret to a perfect cookie is to preheat the oven to 375°F. The higher temperature creates a rapid rise, giving the cookies a crisp exterior while keeping the center tender. It also helps the marshmallows melt evenly. I once baked at 350°F and the cookies were uneven; after switching to 375°F, the result was flawless.
Why Your Nose Knows Best
Before you even look at the cookies, the aroma is the first indicator of success. If you smell a sweet, chocolatey fragrance, you’re on the right track. If the scent is more buttery or even slightly burnt, adjust the oven temperature or baking time. The nose is a powerful tool; trust it, and you’ll avoid overbaked disasters.
The 5-Minute Rest That Changes Everything
After baking, let the cookies rest on the pan for exactly five minutes. During this time, the heat continues to distribute evenly, setting the structure and allowing the marshmallow to thicken slightly. Skipping this rest often results in cookies that crumble or feel too soft. The five minutes are worth the extra waiting time.
Cool on a Wire Rack, Not a Sheet
Transferring the cookies to a wire rack immediately after the 5‑minute rest allows air to circulate around each cookie. This prevents the bottoms from becoming soggy and preserves the crisp edges. If you keep them on the sheet, the residual heat will steam the bottom, altering the texture.
Keep the Dough Cold Until Baking
Even after chilling, keep the dough in the refrigerator until you’re ready to bake. A warm dough will spread too much, resulting in thin, flat cookies. By keeping the dough cold, you preserve the structure and achieve a thicker, more satisfying bite.
Creative Twists and Variations
This recipe is a playground. Here are some of my favorite ways to switch things up:
Salted Caramel Swirl
Swap the mini marshmallows for a swirl of salted caramel sauce. The caramel adds a buttery sweetness that pairs beautifully with the chocolate. The result is a cookie that feels like a dessert on a stick. It’s perfect for guests who love a little extra indulgence.
Nutty Crunch
Add chopped toasted almonds or pecans to the dough for a crunchy texture. The nuts add a nutty aroma and a satisfying bite. They also complement the chocolate flavor, creating a multi‑sensory experience. Ideal for those who love a little texture in their sweets.
Minty Surprise
Infuse the dough with a few drops of peppermint extract. The mint provides a refreshing counterpoint to the chocolate. The result is a cookie that feels like a holiday treat, even in July. It’s a simple tweak that transforms the flavor profile.
Espresso Infusion
Stir in a tablespoon of finely ground espresso into the dry mix. The espresso deepens the chocolate flavor and adds a subtle bitterness. It’s a great way to add sophistication and a caffeine kick. Perfect for a brunch or an after‑dinner bite.
Vegan Delight
Replace the butter with coconut oil and use plant‑based marshmallows. The coconut oil adds a tropical nuance, while the vegan marshmallows keep the gooey center. The result is a dessert that’s cruelty‑free yet indulgent. It’s a win‑win for ethical baking.
Chocolate‑Chip Explosion
Fold in a cup of dark chocolate chips into the dough before shaping. The chips melt during baking, creating pockets of molten chocolate. The cookies become a chocolate lover’s dream. Serve them warm for the ultimate experience.
Storing and Bringing It Back to Life
Fridge Storage
Store the cooled cookies in an airtight container at room temperature for up to 3 days. The airtight environment prevents moisture from seeping in, preserving the crisp edges. If you notice the cookies becoming soft, add a slice of bread to the container; the bread will absorb excess moisture.
Freezer Friendly
For longer storage, place the cookies in a freezer‑safe bag, removing as much air as possible. Freeze for up to 2 months. When you’re ready to enjoy them, let them thaw at room temperature for 30 minutes. The cookies will maintain their texture and flavor.
Best Reheating Method
Reheat frozen or chilled cookies in a preheated 350°F oven for 5 minutes. The heat will revive the crispness and melt the marshmallow slightly, restoring the cookie’s original mouthfeel. If the cookies are too dry, add a tiny splash of water to the bottom of the pan; the steam will keep them soft. After reheating, let them cool on a wire rack for a few minutes.