I was in the middle of a frantic Tuesday night when my roommate dared me to make something that would “blow his mind and make him forget his deadline.” I stared at the empty pantry, the clock ticking, and a sudden craving for something that felt both comforting and wildly exciting. The kitchen smelled like stale coffee and desperation, but then I remembered the half‑a‑pound of ground beef I had bought for a quick taco night that never happened. I thought, why not turn that lonely beef into a masterpiece that could stand up to any Mexican‑style feast?
I tossed the beef into a hot pan, let it sizzle until the edges turned a deep caramel brown, and then I added a secret weapon: a splash of lime juice right at the end, which made the meat sing like a mariachi band on a summer night. The aroma that rose was a heady mix of cumin, chili powder, and paprika, each spice dancing together like a perfectly choreographed flash mob. The sizzling sound was the soundtrack of triumph, and the heat from the stove warmed my hands and my heart. I could already picture the final burrito—cheese melting, salsa bright, avocado buttery—just waiting to be devoured.
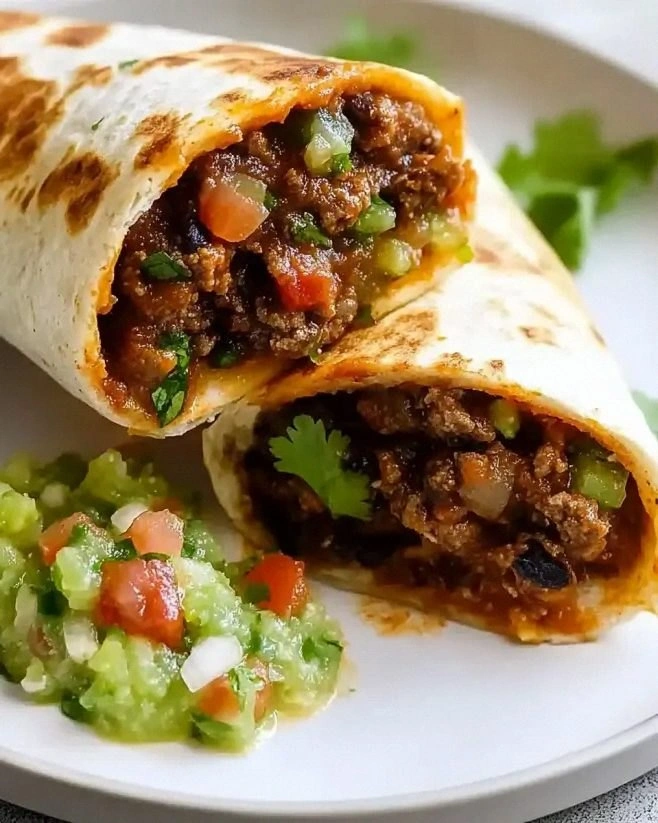
Most burrito recipes either drown the beef in a sea of sauce or leave the tortillas soggy and sad. I’ve tried those, and I’ll be honest — I ate half the batch before anyone else got to try it because the flavors were so addictive. This version, however, balances the beef’s richness with a fresh, zesty homemade salsa that cuts through the heaviness like a razor‑sharp knife through butter. The salsa isn’t just a topping; it’s a game‑changer that adds a burst of acidity, a hint of heat, and a garden‑fresh crunch that makes each bite feel like a fiesta in your mouth.
I’m about to walk you through every single step — by the end, you’ll wonder how you ever made a burrito any other way. Okay, ready for the game‑changer? This isn’t just a recipe; it’s a confidence boost, a flavor bomb, and a reason to dare your friends to a burrito showdown. I dare you to taste this and not go back for seconds. Let’s dive in.
What Makes This Version Stand Out
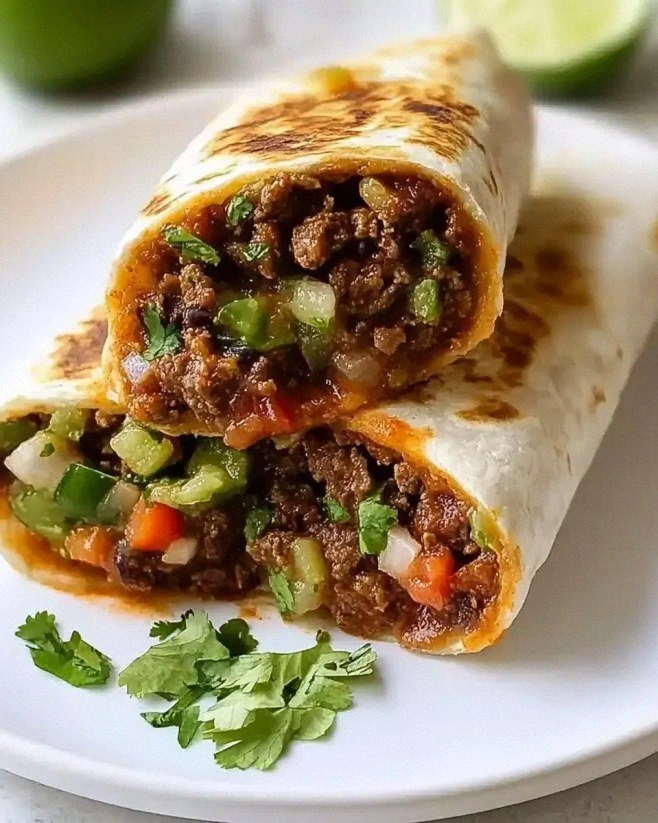
- Flavor Explosion: The combination of seasoned beef, tangy salsa, and creamy avocado creates a layered taste that evolves with each bite, keeping you hooked from the first chew to the last.
- Texture Harmony: You get the satisfying crunch of fresh lettuce, the soft melt of cheddar, and the tender bite of black beans—all wrapped in a tortilla that stays pliable yet sturdy.
- Simplicity Meets Sophistication: Only a handful of pantry staples are needed, yet the result feels like something you’d order at a high‑end Mexican grill.
- Ingredient Quality: Using fresh cilantro, ripe tomatoes, and a good‑quality ground beef elevates the entire dish from “okay” to unforgettable.
- Crowd‑Pleaser: Whether it’s a family dinner or a casual get‑together, these burritos spark conversation and empty plates in record time.
- Make‑Ahead Potential: The salsa can be prepared a day ahead, and the beef keeps well, making assembly a breeze when guests arrive.
- Cooking Method: Browning the beef first locks in juices, while the quick sauté of aromatics adds depth without overcooking.
- Versatility: Swap the cheese, add a splash of hot sauce, or go vegetarian—the base recipe adapts like a chameleon.
Alright, let's break down exactly what goes into this masterpiece...
Inside the Ingredient List
The Flavor Base
The ground beef is the heart of this burrito, providing a juicy, meaty foundation. Using a 1‑pound package ensures each bite has enough protein without overwhelming the other components. If you skip the beef, you lose that satisfying umami punch, and the burrito can feel flat. For a leaner option, try 90% lean ground turkey, but be ready for a slightly milder flavor profile.
Olive oil, just a tablespoon, is the silent hero that prevents sticking and adds a subtle fruitiness to the meat. Choose extra‑virgin olive oil for the best flavor, and don’t skimp—it’s what helps the spices cling to the beef. If you’re out of olive oil, a neutral oil like canola works fine, though you’ll miss that extra depth.
The Texture Crew
A small onion, finely diced, brings a sweet, caramelized backdrop that balances the heat of the chili powder. The onion also adds a slight crunch if you don’t overcook it, which is essential for that bite‑size contrast. If you’re allergic to onions, try finely chopped shallots; they’re milder but still provide that aromatic base.
Garlic cloves—two of them—are the aromatic whisper that ties the spices together. When you hear that sizzle as the garlic hits the pan, you know you’re on the right track. Crushing the garlic before mincing releases more allicin, giving you a bolder flavor.
The Unexpected Star
The homemade salsa is where the magic truly happens. Combining two medium tomatoes, a quarter‑cup of onion, a jalapeño, fresh cilantro, lime juice, and a pinch of salt creates a bright, zesty topping that cuts through the richness of the beef. The jalapeño adds just enough heat to make you sit up, while the lime juice provides a citrus snap that brightens the entire dish.
Canned black beans bring a creamy, earthy element that pairs perfectly with the rice and cheese. Rinse them well to remove excess sodium, and then warm them gently so they meld with the other fillings without turning mushy.
Shredded cheddar cheese adds a sharp, buttery melt that pulls the whole assembly together. Using a full cup ensures every bite has that gooey stretch you crave. If you prefer a milder melt, Monterey Jack works just as well.
The Final Flourish
Large flour tortillas are the canvas for this culinary artwork. Four of them provide a generous size that can hold all the fillings without tearing. Warm them briefly on a dry skillet; this makes them pliable and prevents cracks when you roll.
Lettuce adds a crisp, refreshing crunch that contrasts the warm fillings. A cup of shredded lettuce is enough to give each bite a fresh snap without overwhelming the other textures.
A ripe avocado, sliced or mashed, offers a buttery richness that smooths out the spice and adds a luxurious mouthfeel. If your avocado isn’t perfectly ripe, drizzle a little lime juice over the slices to keep them green and vibrant.
A medium tomato, diced, can be tossed into the burrito for an extra burst of juiciness, especially if you love a slightly wetter bite. Salt it lightly to draw out its juices before adding.
Salt and pepper to taste are the final seasoning touches that bring everything into balance. Remember, you can always add more later, but you can’t take it away once it’s in.
Everything's prepped? Good. Let's get into the real action...
The Method — Step by Step
Heat a large skillet over medium‑high heat and add the tablespoon of olive oil. Once the oil shimmers, drop in the ground beef, breaking it up with a wooden spoon. Let the meat sizzle without stirring for about 30 seconds; you’ll hear a satisfying crack that signals a proper sear. Then, stir and continue cooking until the beef is browned all over, about 6‑8 minutes, and the juices have evaporated. This is the moment of truth—if the beef isn’t browned, you’ll miss the deep, caramelized flavor that makes these burritos unforgettable.
Kitchen Hack: After browning, drain any excess fat, then return the beef to the pan and deglaze with a splash of water or broth to pick up the browned bits stuck to the pan.Add the finely diced small onion and the minced garlic to the browned beef. Cook, stirring constantly, until the onion becomes translucent and the garlic is fragrant—about 2‑3 minutes. You’ll notice the kitchen filling with a sweet, aromatic perfume that signals you’re on the right track. Sprinkle in the chili powder, cumin, and paprika, stirring to coat every morsel. Let the spices toast lightly for another minute; this releases their essential oils and deepens the flavor profile.
Season the mixture with salt and pepper to taste, then turn off the heat and set the beef aside. Cover the pan with a lid to keep the meat warm while you prepare the salsa. This resting period lets the flavors meld, and the meat stays juicy.
While the beef rests, start the salsa. In a medium bowl, combine the two medium tomatoes (seeds removed for less water), the quarter‑cup diced onion, the minced jalapeño (adjust quantity for heat preference), and the quarter‑cup fresh cilantro. Squeeze the juice of one lime over the mixture and sprinkle a pinch of salt. Toss everything together until the ingredients are evenly distributed. The salsa should look vibrant, with a deep red hue from the tomatoes and bright green flecks of cilantro. Let it sit for at least 10 minutes; this allows the flavors to marry and the acidity to mellow.
Watch Out: If you over‑salt the salsa, the lime won’t be able to balance the flavor, so start with a light pinch and adjust after tasting.Warm the flour tortillas. Heat a clean, dry skillet over medium heat and place each tortilla for about 15 seconds per side, just until you see small bubbles forming. The tortillas should be pliable but not crispy; this ensures they won’t tear when you roll them. If you prefer a slightly toasted flavor, let them brown a second longer, but watch closely—burnt tortillas ruin the texture.
Kitchen Hack: Stack the warmed tortillas on a plate and cover with a clean kitchen towel; this keeps them warm and prevents them from drying out while you assemble.Begin assembling the burritos. Lay a tortilla flat, then spoon a generous scoop of the seasoned beef onto the center. Follow with a quarter cup of cooked rice, a quarter cup of black beans, and a handful of shredded lettuce. Add a quarter cup of shredded cheddar cheese, a few slices of avocado, and a spoonful of the fresh salsa. Finish with the diced medium tomato for extra juiciness. The key is to keep the fillings centered, leaving about an inch of space on each side to roll without tearing.
Roll the burrito tightly: fold the left side over the filling, then the right side, and finally roll from the bottom up, tucking in the edges as you go. The roll should be snug, but not so tight that the tortilla bursts. Once rolled, place the burrito seam‑side down on the skillet over medium heat for 2‑3 minutes per side, pressing gently with a spatula. This sears the tortilla, giving it a golden‑brown crust that’s crispy on the outside yet still soft inside. The sizzling sound you hear is a sign of perfection.
Serve the burritos hot, with any remaining salsa on the side for dipping. Garnish with a wedge of lime and a sprinkle of extra cilantro if you like. The first bite should deliver a burst of savory beef, a tangy salsa kick, creamy avocado, and a satisfying crunch from the lettuce—all wrapped in a warm, slightly toasted tortilla. That sizzle when it hits the pan? Absolute perfection. And now the fun part—watch your guests dive in, eyes widening with each bite.
That's it — you did it. But hold on, I've got a few more tricks that'll take this to another level...
Insider Tricks for Flawless Results
The Temperature Rule Nobody Follows
Never cook the beef on high heat from the start; medium‑high is the sweet spot. Starting too hot will scorch the meat, creating a bitter taste, while too low a temperature leaves the beef soggy. By allowing the pan to heat gradually, you give the meat time to develop a caramelized crust that locks in juices. A friend once tried cooking on high flame and ended up with a dry, flavorless filling—let’s just say the burritos were a flop.
Why Your Nose Knows Best
Your sense of smell is a reliable indicator of doneness. When the beef releases that roasted, nutty aroma, you know the Maillard reaction is happening. Likewise, the moment the garlic turns golden and you can smell its sweet perfume, it’s time to add the spices. If you can’t smell the spices, they haven’t toasted enough, and the flavor will be flat.
The 5‑Minute Rest That Changes Everything
After cooking the beef, let it rest for five minutes off the heat. This pause allows the juices to redistribute, preventing them from spilling out when you fold the burrito. The result is a juicier, more cohesive filling. I once skipped this rest and ended up with a soggy tortilla that fell apart mid‑bite.
Salsa So Fresh It Pops
Don’t over‑process the salsa. A chunky texture keeps the bite interesting and prevents the tortillas from becoming soggy. Use a hand‑mixer or a simple bowl and fork to combine the ingredients. The lime juice should be added last to keep the cilantro bright and the tomatoes from turning mushy.
The Cheese Melt Trick
Sprinkle the cheddar cheese while the burrito is still on the skillet, then cover the pan with a lid for 30 seconds. The trapped steam melts the cheese evenly, creating that gooey stretch you love. If you forget the lid, the cheese may stay clumpy and not integrate fully with the other fillings.
Creative Twists and Variations
This recipe is a playground. Here are some of my favorite ways to switch things up:
Southwest Chipotle Blast
Swap the jalapeño for a chipotle pepper in adobo sauce and add a teaspoon of smoked paprika. The result is a smoky, slightly sweet heat that pairs beautifully with the avocado. Perfect for those who love a deeper, wood‑smoked flavor.
Veggie‑Lover’s Dream
Replace the ground beef with roasted cauliflower florets and add sliced bell peppers. The cauliflower absorbs the spices, offering a satisfying bite while keeping the dish lighter. Top with a dollop of Greek yogurt instead of cheese for a tangy twist.
Cheesy Queso Fusion
Mix in a half‑cup of melted queso fresco into the beef just before assembling. The cheese melts into the meat, creating a creamy, indulgent core that makes each bite extra decadent. This version is a hit at game nights.
Breakfast Burrito Remix
Add scrambled eggs and replace the black beans with refried beans. Sprinkle some breakfast sausage crumbles for extra protein. The salsa becomes a fresh morning topping, and the whole dish feels like a brunch fiesta.
Spicy Mango Salsa Upgrade
Dice a ripe mango and toss it into the salsa with the tomatoes and jalapeño. The mango’s natural sweetness balances the heat, creating a tropical burst that brightens the burrito. Ideal for summer gatherings.
Storing and Bringing It Back to Life
Fridge Storage
Place the cooked beef, rice, and beans in airtight containers; keep the salsa in a separate jar. Store the tortillas wrapped in a damp paper towel inside a zip‑top bag. They’ll stay fresh for up to three days. When ready to eat, reheat the beef and beans in a skillet with a splash of water, then assemble fresh.
Freezer Friendly
Cool the beef completely, then portion it into freezer‑safe bags with a little broth to prevent drying. The salsa freezes well; just portion it into ice‑cube trays for easy thawing. Wrap the tortillas in foil before freezing. They can be stored for up to two months. To reheat, thaw overnight in the fridge, then warm on the stove or microwave.
Best Reheating Method
When reheating assembled burritos, place them on a skillet over medium heat, add a teaspoon of water, and cover with a lid for two minutes. The steam revives the tortilla’s softness while the water prevents it from drying out. If you prefer a crispier finish, finish with a quick broil for a minute, watching closely to avoid burning.